


Previous Story
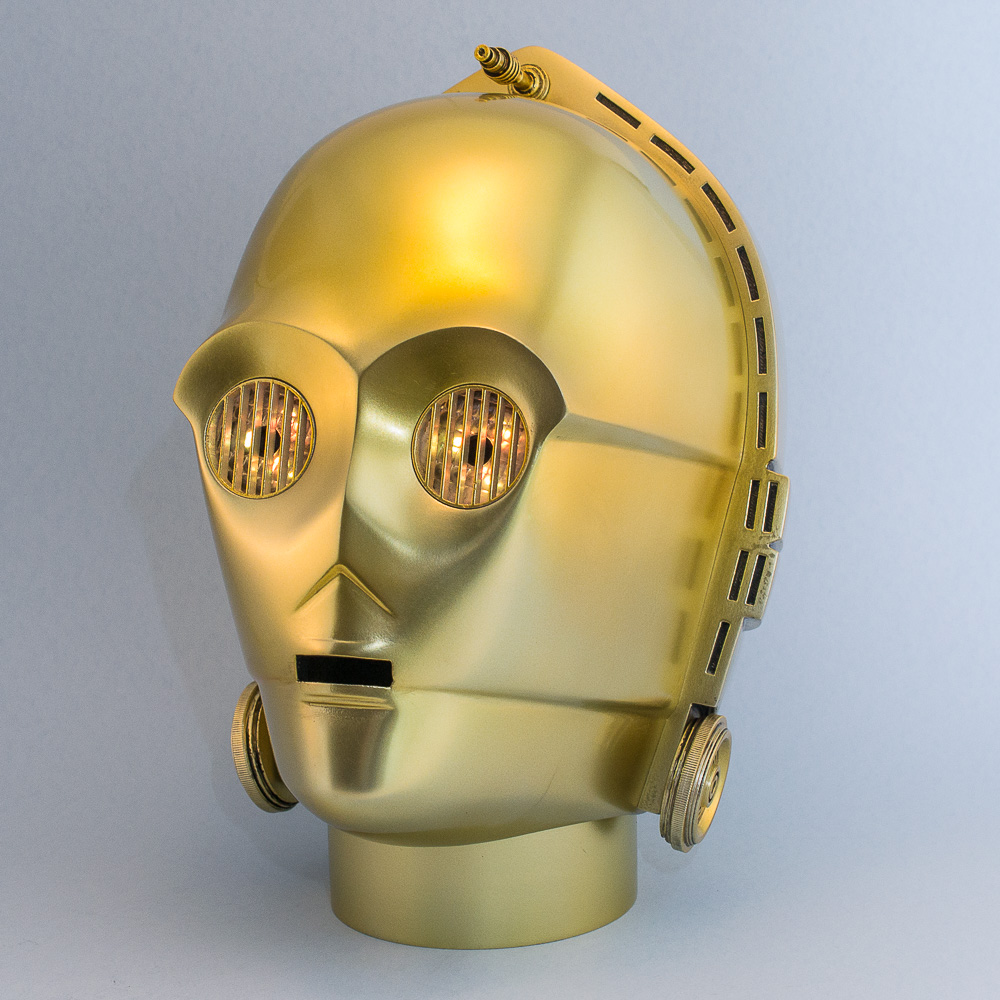
3D Print & Paint C-3PO
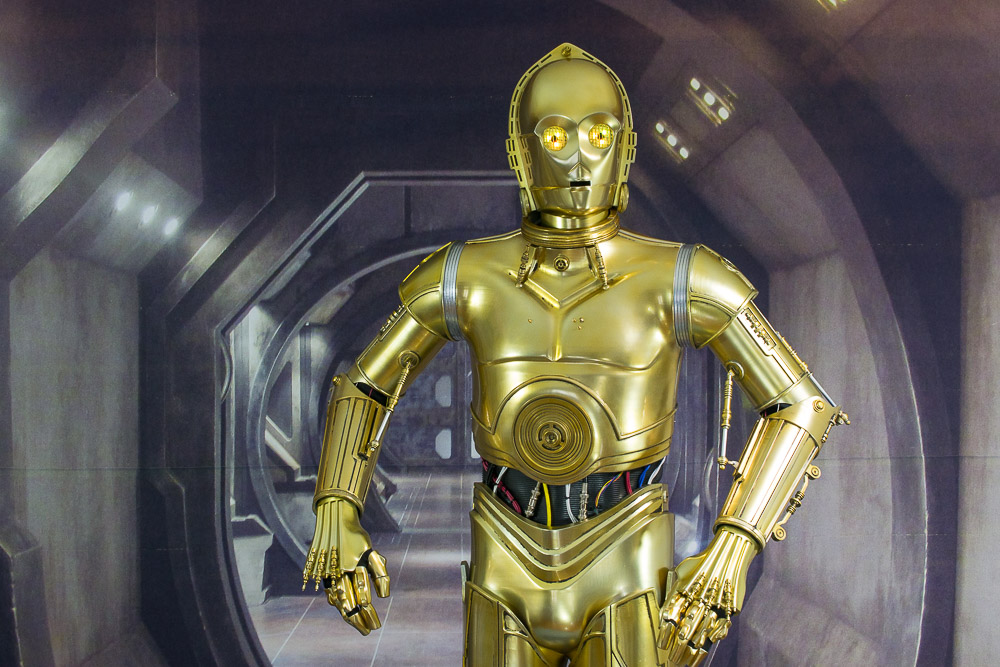
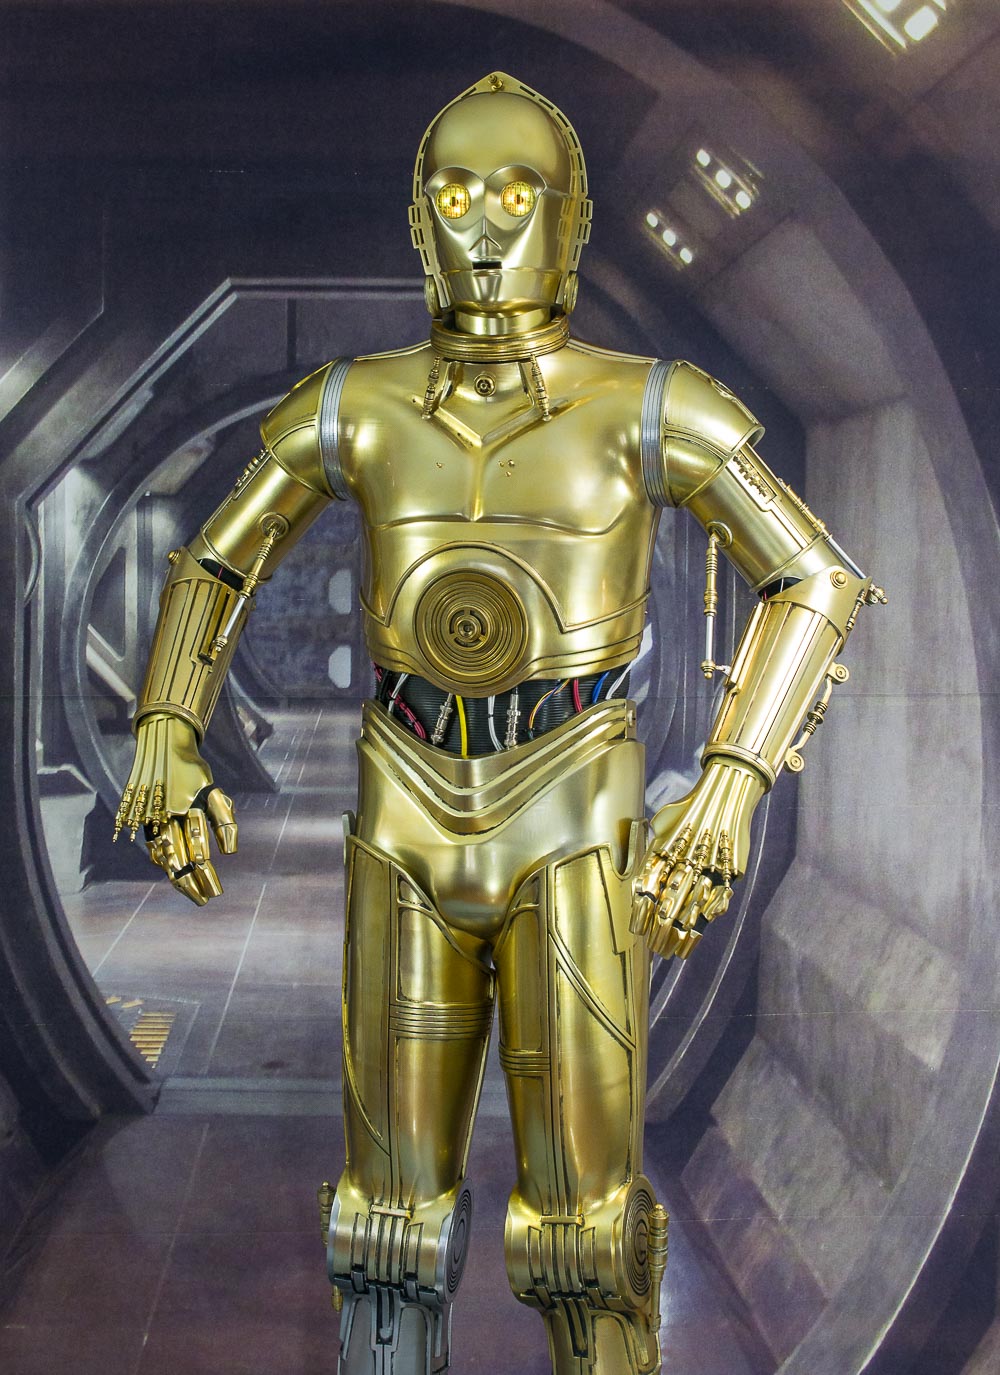
3D Printed C-3PO
Plastic is indeed fantastic. With the advent of the 3D printer, the sky is the limit when making objects from scratch. From toys, to tools, to costumes, the 3D printer can do it all.
When I committed to building an R2 unit, I examined my build options, factoring in cost, weight, and portability. I went with a styrene plastic “kit” from Media Conversions. This kit did not include R2’s greeblies: vents, eye, holo projectors, coin return, boosters, and other decorations. These greeblies were available for purchase online in resin. The cost for all of the components was in the neighborhood of $500. While purchasing these items would have saved me time, saving money was more important. Astromech.net had R2’s greeblies available in 3D print format. Rather than spend $500 on resin parts, I ended up purchasing my first DIY Prusa 3D printer for $280. It had an 8″x8″x7″ build area. Enough to print all of R2’s greeblies. It was small and inexpensive, and it helped me produce the parts that I needed. It did take some time to familiarize myself with the printer and its settings. When I first started building R2, only the greeblies were available for 3D printing. Today, a full-size R2 unit can be 3D printed.
For a very brief time, I thought about starting a wearable C-3PO costume. After some quick research, it appeared that I was not the right body type. In addition, the designer of that costume must have been a sadist, it looks extremely uncomfortable. I have a lot of respect for Anthony Daniels and other C-3PO costumers for squeezing themselves into that extremely tight space, with very limited articulation. However, this wouldn’t stop me from building a protocol droid. I still wanted one, and R2 needed a buddy to keep him company. I decided to build a static C-3PO. I joined the C-3PO builders group on Facebook, the timing was impeccable. Within a few days of joining, Jesse M released a fully printable protocol droid. As you can imagine, the sizes of some of the pieces were rather large. My 3D printer was the little printer that could, however, for a job this size, I wanted something with a larger build area. I upgraded to a Creality CR-10S printer and began my protocol droid building journey. Let’s take a look at the materials used to construct a 3D printed protocol droid. Please feel free to deviate from the tools and materials. There is more than 1 way to build and paint a protocol droid. My build is by no means perfect, and is not without its flaws.
Tools
Creality CR-10S or other 3D printer
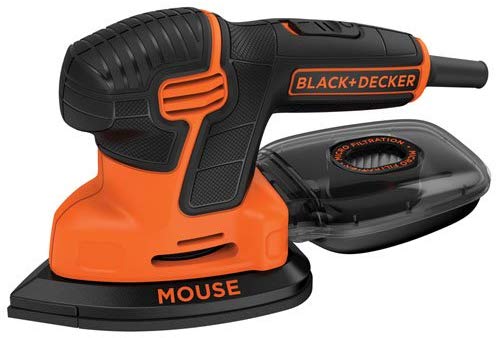
Mouse sander (optional but helpful)
Abrasives from 100 grit to 400 grit
Drill driver
Airbrush (optional)
Materials
PLA+ Filament: 9 rolls (allows for mistakes)
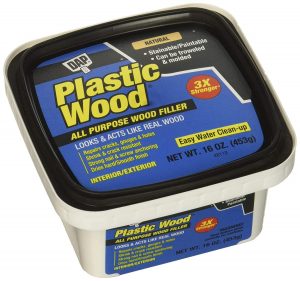
DAP Wood Filler Putty
Rustoleum Filler Primer Spray: 5 cans
Rustoleum Gloss White Spray: 5 cans
SpazStix Mirror Chrome for airbrush: 3 bottles
Tamiya Acrylic Clear Yellow X-24: 3 jars of 23ml
Tamiya Acrylic Clear Red X-27: 1 jar of 23ml
Tamiya Acrylic Thinner X-20A: 1 250ml bottle
SprayMax 2K Gloss Clear: 6 cans
Bondo Fiberglass Resin: 1 can
Bondo Fiberglass Cloth: 2 packages
Bondo Spot Filler & Glaze Putty: 1 tube
Adhesives (CA glue, plastic bonder epoxy)
Hardware
1/4″ aluminum rod
3/8″ tube
M2 & M3 screws, nuts, washers
Utility Floor Mat: 2 yards to be safe
Various wires for belly
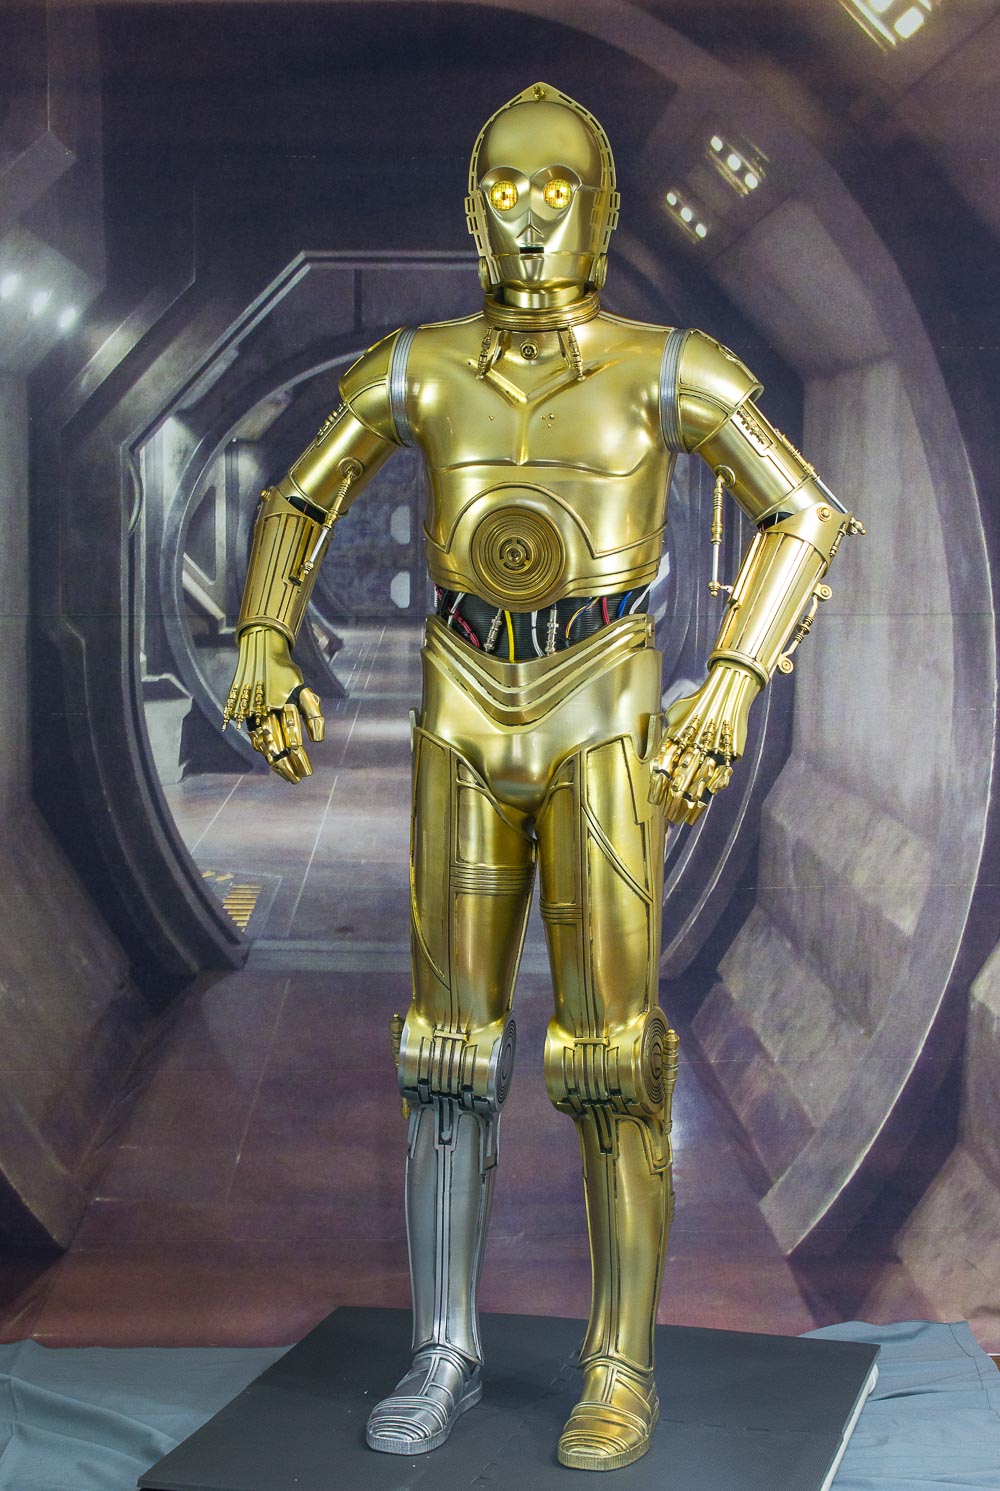
Finished Product:
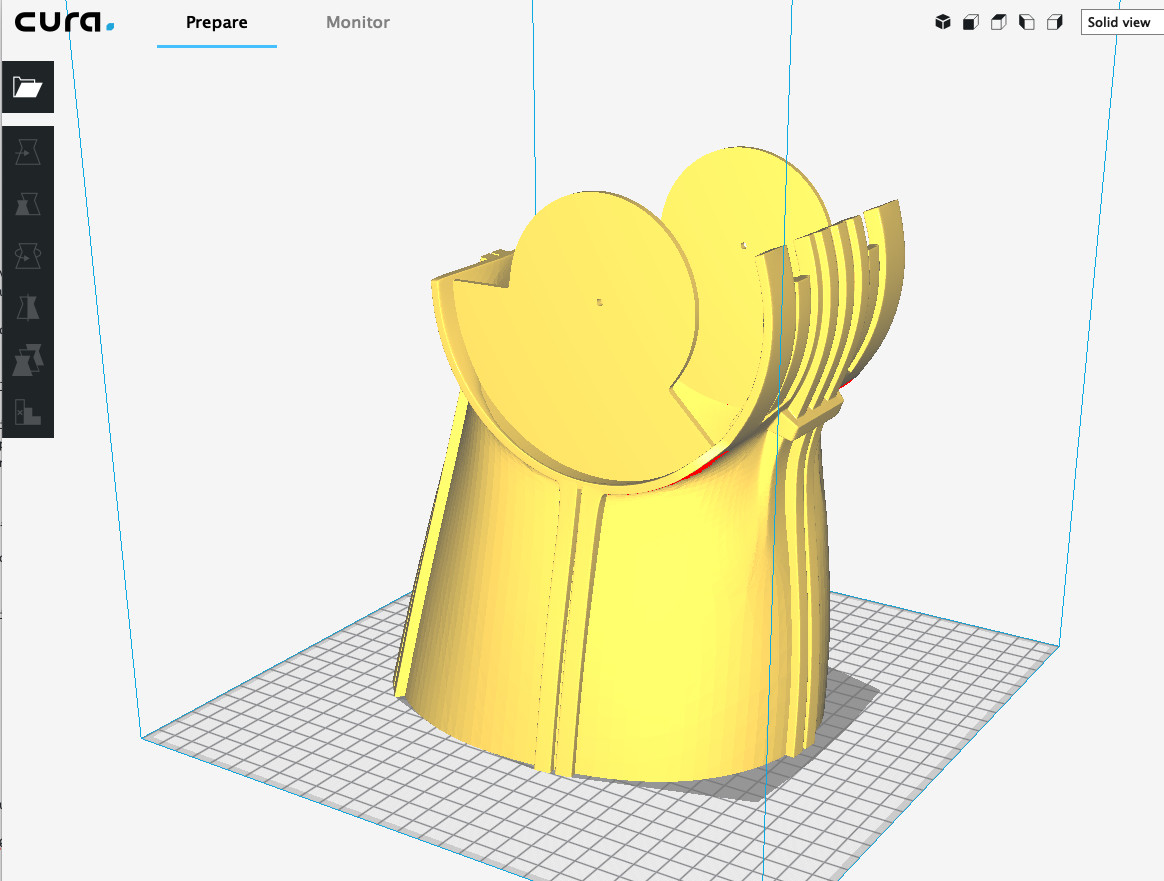
1) Printing
All of C-3PO’s stl files are available on thingiverse.com. Download everything and begin printing! I printed all of the large parts with a .2mm layer height. For the smaller, more detailed parts, I printed at .12mm layer height. I used PLA+ in black for my filament.
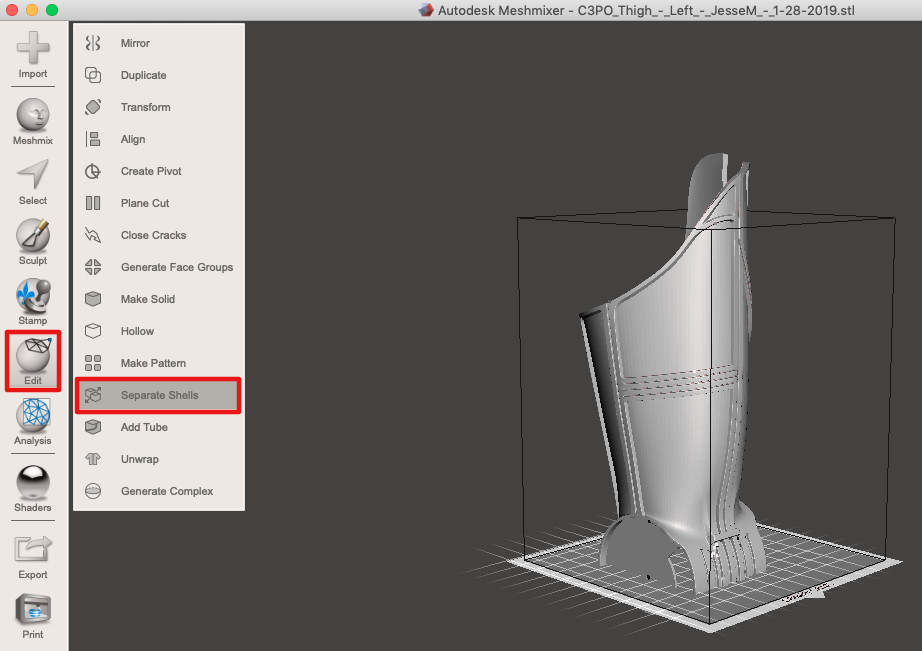
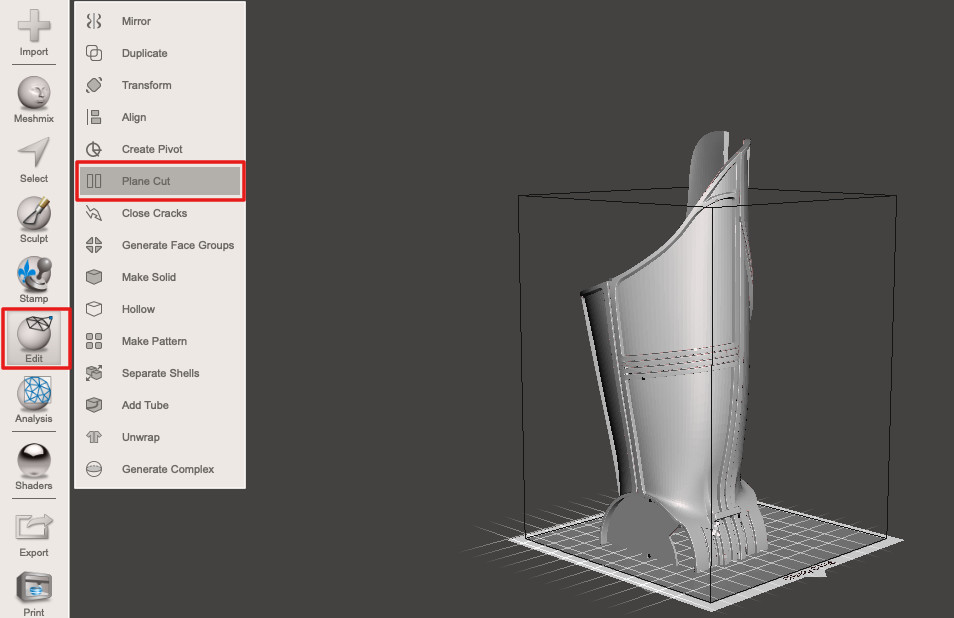
Some of the large parts needed to be split in order to fit on the build plate. I used Meshmixer (free) to split these pieces. For example, to split the thigh, I imported the STL file into Meshmixer and:
- selected Edit -> Plane Cut
- for the Cut Type, I selected Slice (Keep Both) and then clicked accept
- from the Edit menu, selected Separate shells
- I selected one half in the object browser, and then exported the top piece. Then I selected the bottom half in the object browser and exported the bottom piece.
Once the object has been split, you can simply rotate it so that the flat edge sits on the bed.
Action shot from the printer:
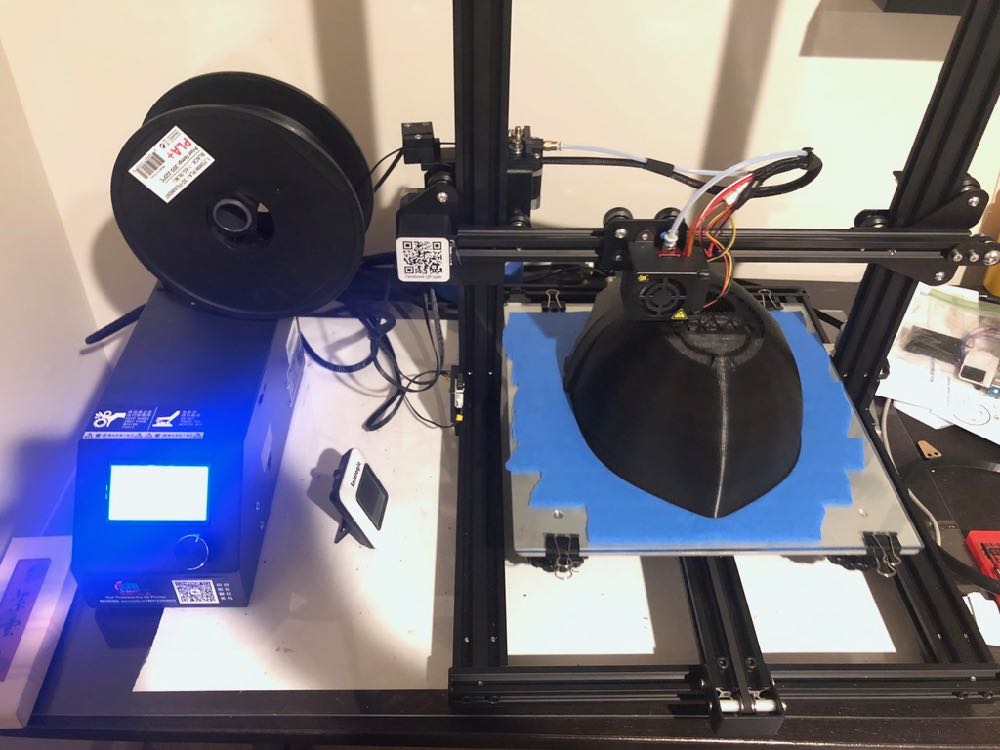
Because many of the parts require HOURS of printing, I suggest having a battery backup in front of your 3D printer. Its heartbreaking to be at 95% complete on your print and the power flickers.
2) Assemble split pieces
Getting good, quality prints will play a big part in this step. Things need to align so that you don’t have uneven joints that will produce gaps and/or bulges. For the initial bond, I used SCIGrip #16. This is an excellent syrup-y plastic bonder that gives you a better working time than CA glue. The fixture time is about 8-10 minutes. CA glue or SCIGrip #3 can also be used for the initial bond. Just know that the fixture time is much quicker. For any gaps that may appear, or weak areas, a coat of plastic bonder epoxy can be used to reinforce the initial bond. I spread some on the back side of the pieces.
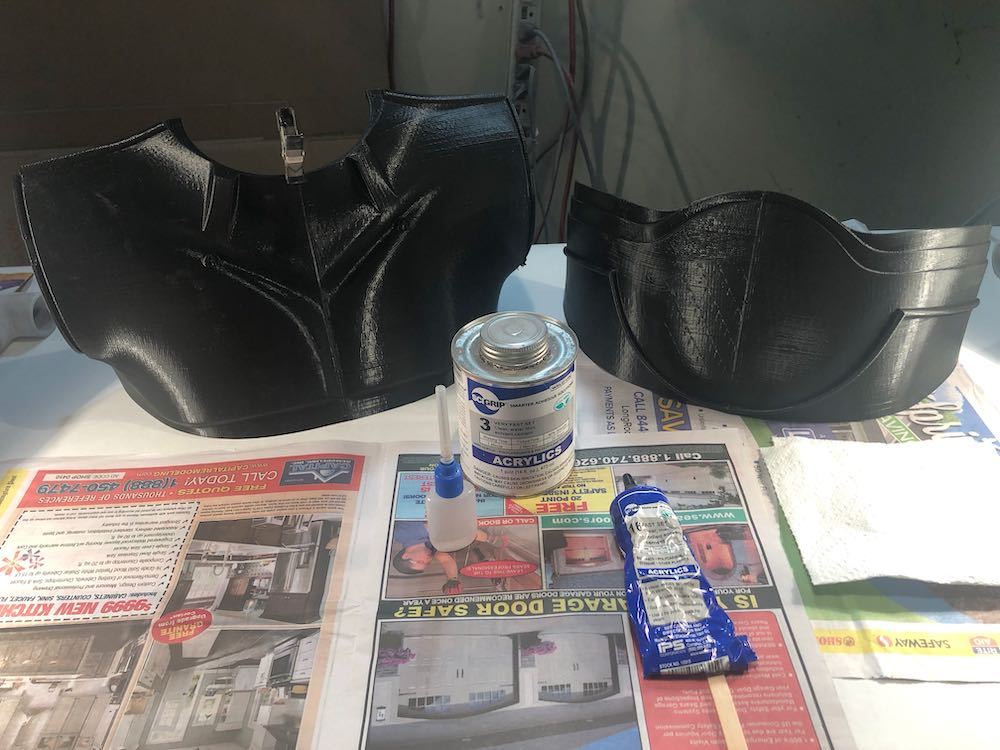
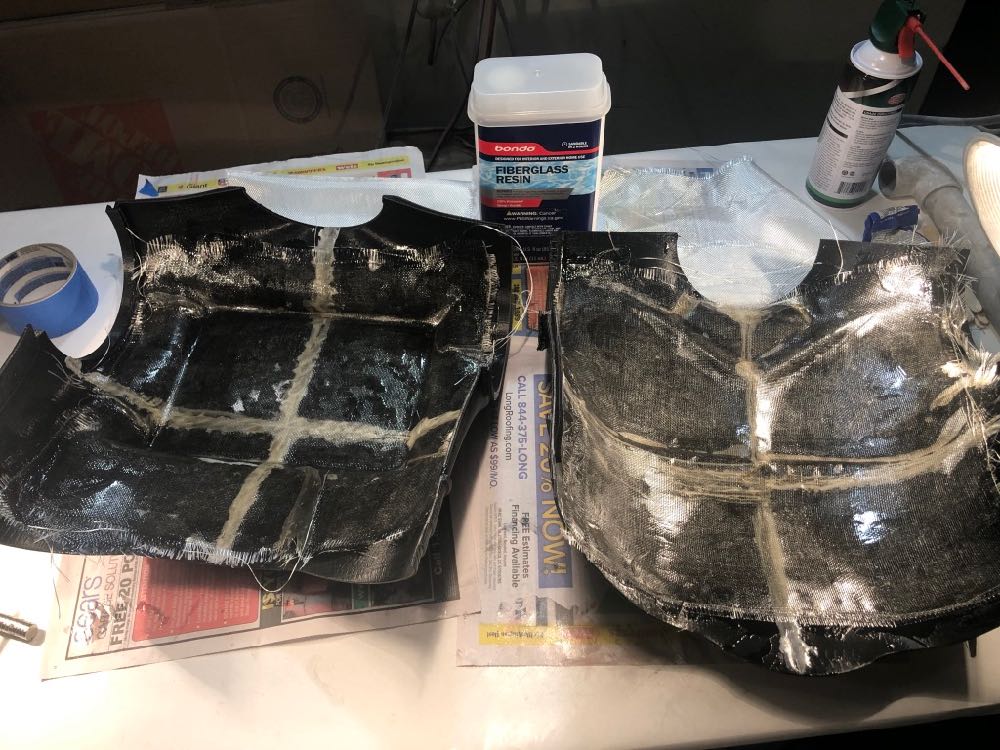
Finally, to really strengthen the object, fiberglass resin was applied with a disposable 2″ chip brush, and then topped with fiberglass cloth, followed by more resin, another layer of cloth, more resin, a 3rd layer of cloth, and a final layer of resin. This stuff emits EXTREMELY harmful vapors. Please do this outside or at least with the garage door open. A respirator (not a pollen mask) is highly recommended.
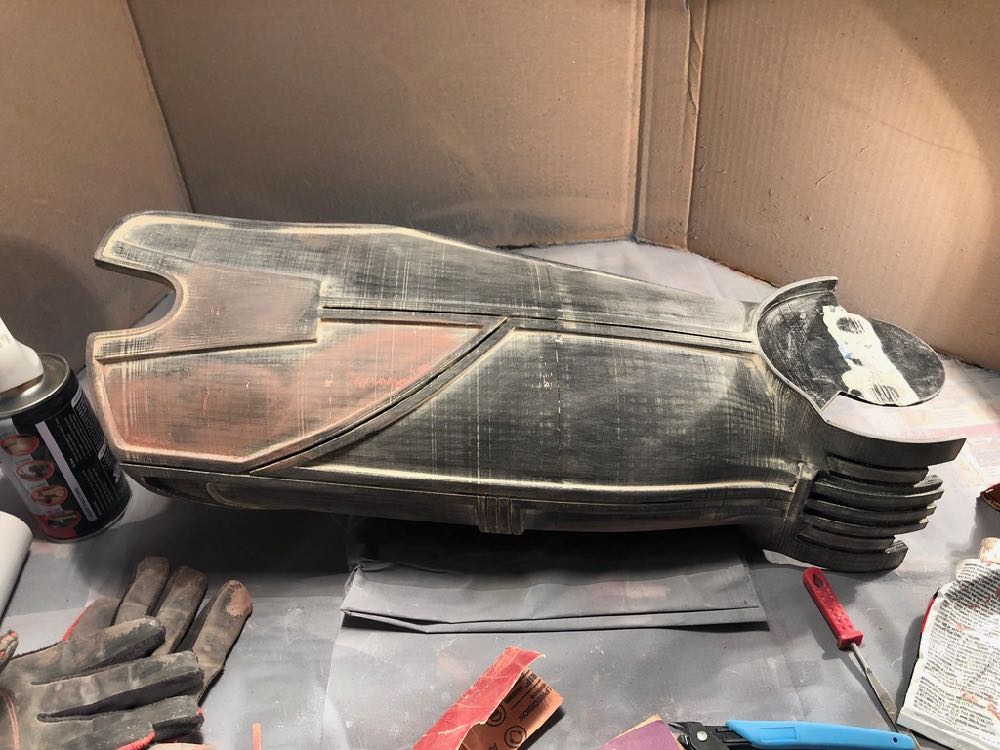
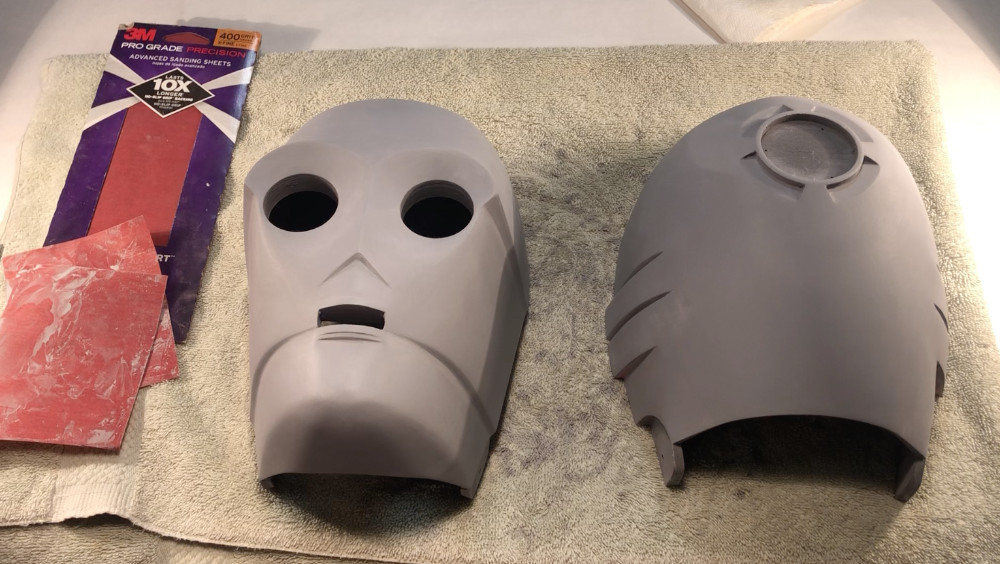
3) Sanding
Knock down all of those 3D print ridges with some 100 or 120 grit sandpaper. For some of the pieces (I’m looking at you thighs), a mouse sander can come in handy. Try to get it as level as you can.
4) Filler
I still had some areas that had some ridges. The pieces that required assembly also had some minor gaps that needed to be filled. To be safe, I slathered on a bunch of DAP wood filler putty and spread it with a wet fingertip. This made the putty a little more fluid. I spread it all out, careful to avoid any areas that I didn’t want to fill. I let this dry overnight. After drying, all of the pieces were then sanded with 220 grit sandpaper. You should see the filler left behind in any of the ridges/gaps. Repeat the wood filler putty process if you still see significant gaps. In a pinch, Bondo Spot Filler & Glaze putty can be used for small areas that require touch-ups. It dries much faster than the wood filler putty (20-30 mins), but should not be used for large gaps. It is only meant to fill deep scratches or pin head holes. After the 220 grit, I smoothed things out with 400 grit.
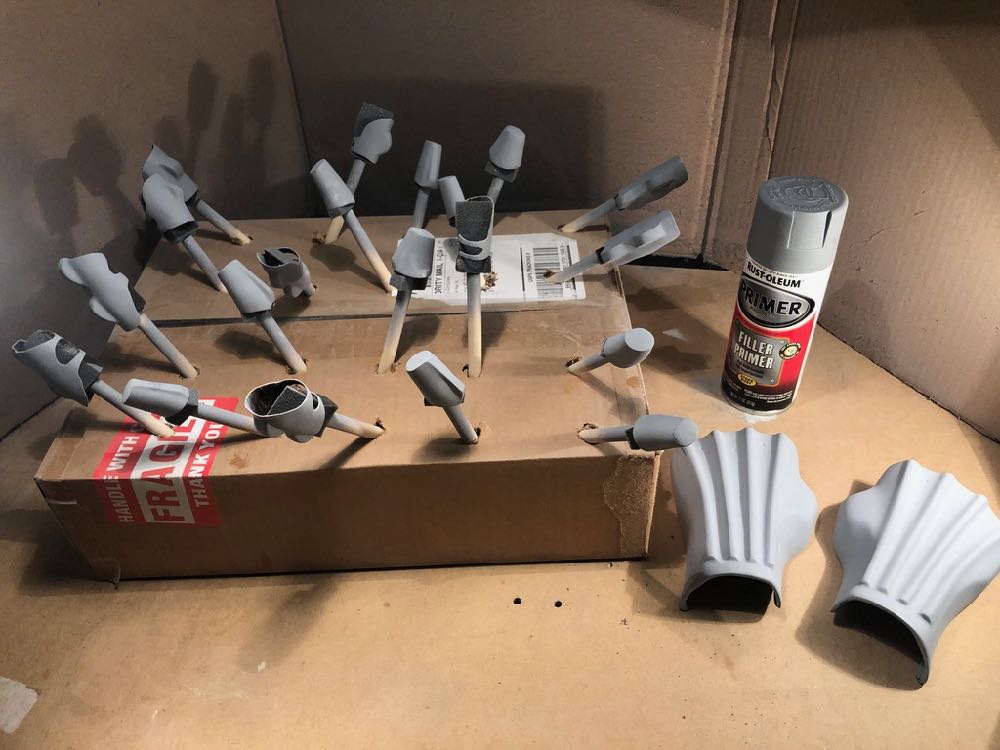
5) Priming for painting
I sprayed all of the pieces with Rustoleum Auto Filler Primer. I sprayed a light first coat coat, wait about 5-10 minutes, hit it with a second coat, wait another 5-10 minutes, and then hit it with a 3rd coat. Do not spray it too heavy or it will take a long time to cure. Nice even coats is the way to go. While this is “filler” primer, do not use it as a crutch to fill major holes (i.e. don’t keep spraying a piece with filler primer to fill a gap). If you still see gaps, go back to some filler (Bondo spot putty or wood filler putty) and sand it with 220-400. Let the filler do the heavy lifting. The auto filler primer dries in 2-4 hours. Take your time and get that surface prep as close to perfect as you can.
Once the filler primer had cured, I wet-sanded all of the pieces with 400 grit sandpaper. This knocked down any grittiness left from the filler primer, but left filler primer where it needed to be. It gave it a relatively smooth surface, with enough texture for the next layer of paint to bite into.
If you still see imperfections after performing the steps above, fill the imperfections, sand with 220 & 400 grit, hit with more filler primer, and wet sand again. This is an important step. The next layers of paint will not hide imperfections. This is the step where you want to take care of any defects.
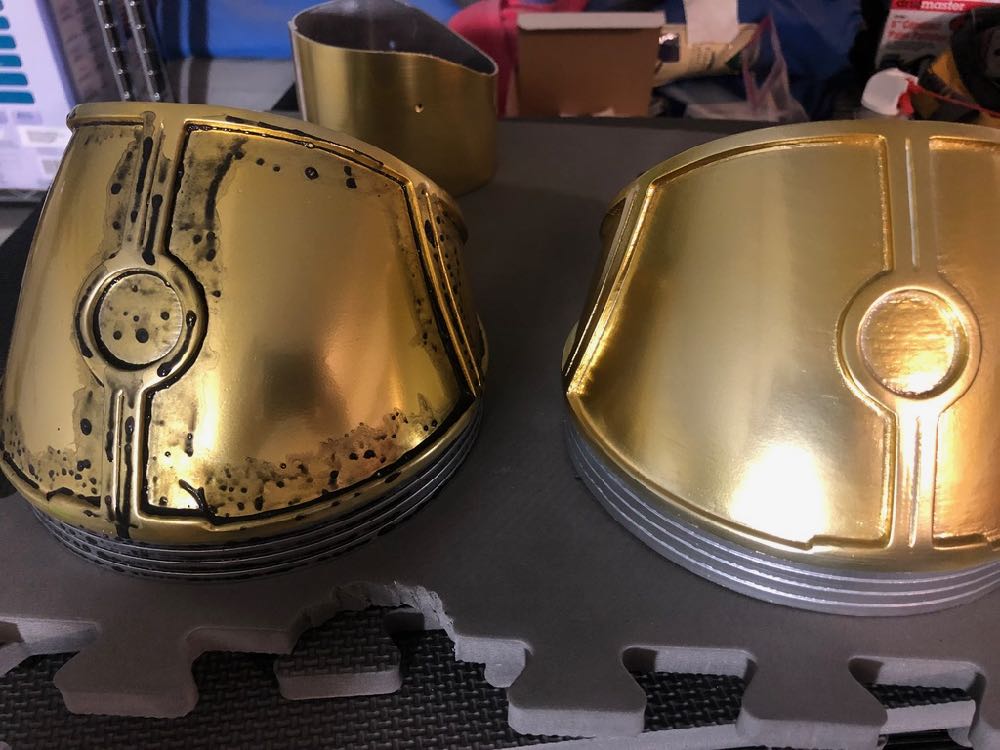
6) Base coat
I’m going to jump ahead for a moment. In order to get a semi-reflective finish, I will be applying SpazStix Mirror Chrome via airbush in a future step. Most chrome airbrush paints recommend a black gloss undercoat. I ran some tests with using a black and white gloss coat, topped with chrome. The black gloss coat did look nice, but it was a little too dark for a C-3PO finish. I chose to go with a white gloss undercoat.
Prior to spraying Rustoleum White Gloss, I used compressed air to remove any debris from the pieces. I also wiped everything down with a tack cloth.
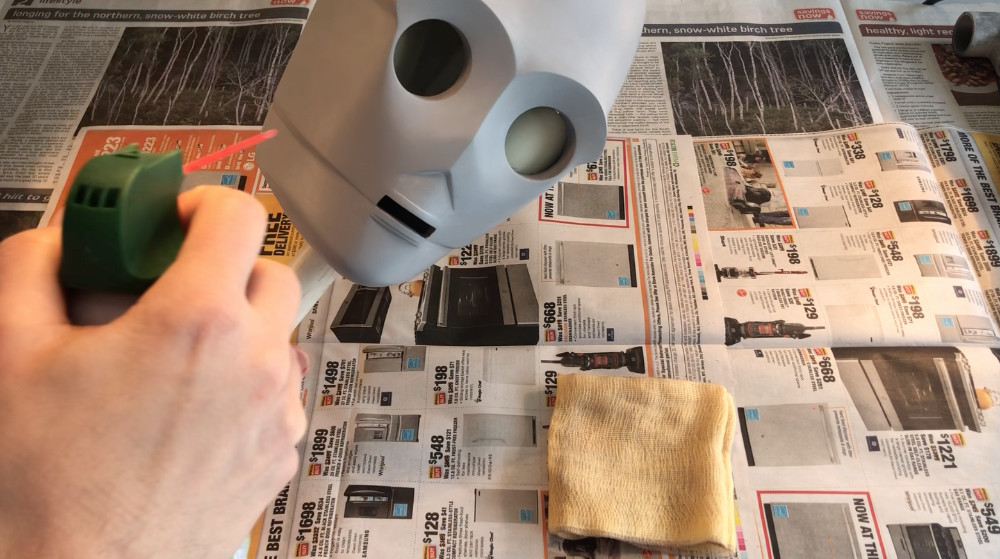
Once the items were lint free, I sprayed a light first coat of gloss white, covering about 60% of the object. I waited 10 minutes, and then hit the object with a second coat, covering about 80% of the object. After waiting another 10 minutes, I hit it with a 3rd wetter coat. If you aren’t comfortable working with spray cans, practice on some scrap plastic first. Ideally, you want the piece to look smooth and wet WITHOUT having any runs and drips.
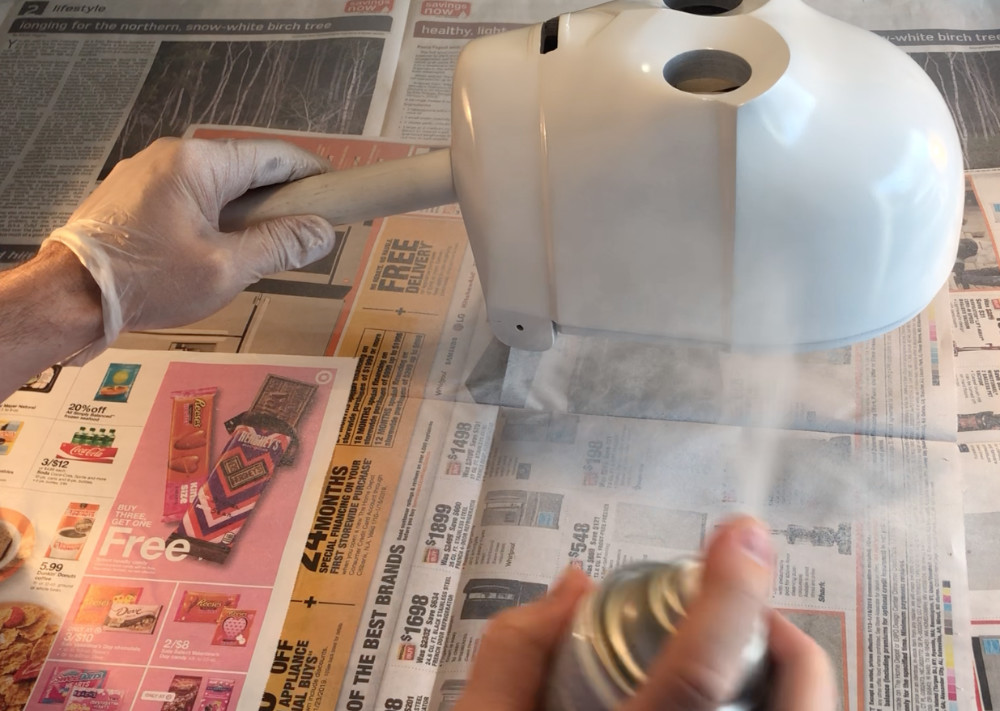
If you DO have some runs/drops/orange peel, do not despair. This will set you back a tad, but you don’t have to start over. Let the object cure for 48 hours, then wet-sand the imperfection with 1000 grit until it is gone. Hit the piece with some more gloss white to get a smooth finish.
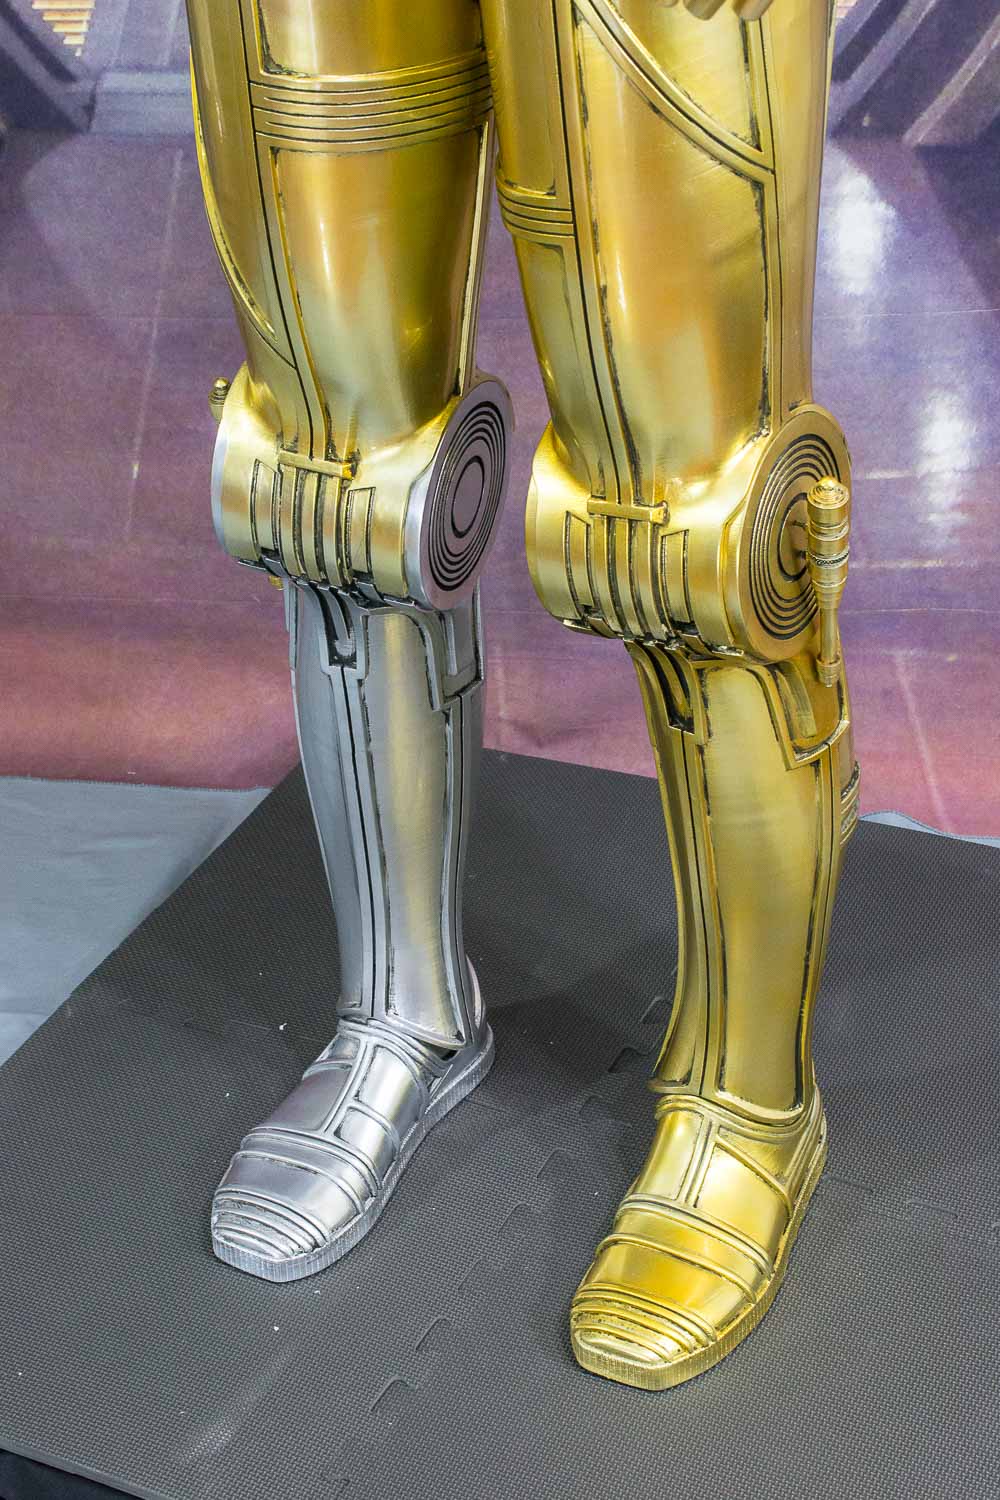
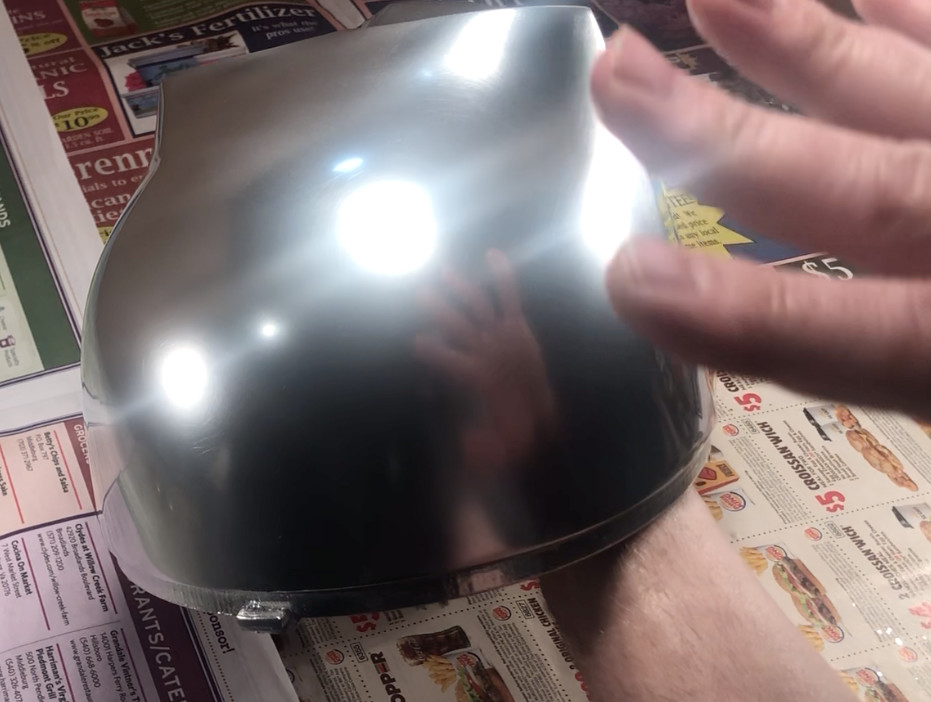
7) Chrome
A well-known chrome paint used by many scale modelers is Alclad II Chrome. It is a great paint. I have also had success with SpazStix Mirror Chrome. It looks as good, if not better, than Alclad. Alclad costs about $10/bottle for 1oz. You can get a 2oz bottle of SpazStix for $11.
I used a tack cloth to remove any debris from the pieces, and then shot everything with Spaz Stix Mirror Chrome at about 17PSI, using my Paasche H airbrush. It took about 3 passes for each piece to get good coverage. I lightly wiped away any excess with a microfiber towel. Rubbing too hard could remove the chrome. It is thin, so use care when wiping.
8) Tint
To keep that nice reflective surface that the SpazStix Mirror Chrome provides, and get a gold tint, I used a mixture of acrylic clear paints. The formula was: 5ml of Tamiya Clear Yellow X-24 + 1ml of Tamiya Clear Red X-27 + 6ml of Tamiya Acrylic Thinner X-20A. I used pipettes to carefully measure all of the ingredients.
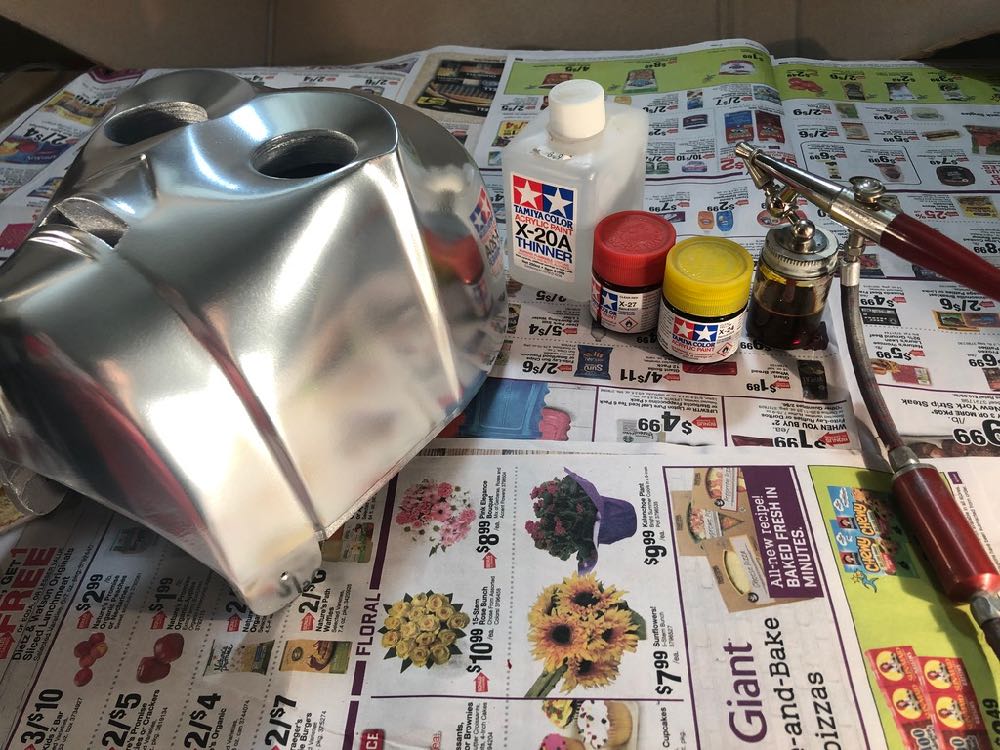
I typically made a double batch of the formula and used the jar attachment on the airbrush, instead of the little cup. I sprayed at about 17-18PSI, and hit the objects with 4-5 passes to build up a nice gold tint.
I did try using yellow alone on some initial paint tests. It looked a little too green in some lights. The dash of red helped bring the tone closer to gold/brass.
I applied Tamiya X-22 Clear Gloss to the right shin/calf, right foot, and shoulder rings. These parts will retain a chrome finish, but require a barrier of clear acrylic to protect the chrome underneath.
9) 2K Clear Coat
I would like to thank Gordon Tarpley for recommending use of a 2K clear coat. At first, I was apprehensive about laying anything on top of the chrome & tint, as it is extremely fragile. The 2K clear coat is a urethane, and did not affect the layers beneath.
One more time with the tack cloth, to remove any debris. I used SprayMax 2K High Gloss for the clear coat. This clear coat is expensive for a spray can. I purchased a 6 pack on Amazon for just over $100. I needed 5-1/2 cans to complete the job. I am VERY pleased with the results. It may sound pricey, but it was worth it. This finish is tough and beautiful. It really brought the shine back to all of the pieces.
The only thing different that I did with the SprayMax, was activating the paint. There is a red button that is used to mix the 2 catalysts. Shake the can for a bit, hit the red button to mix, then shake some more. It was then business as usual: a fairly light initial coat, wait 10 minutes, a 2nd coat, wait 10 minutes, then a 3rd wet coat.
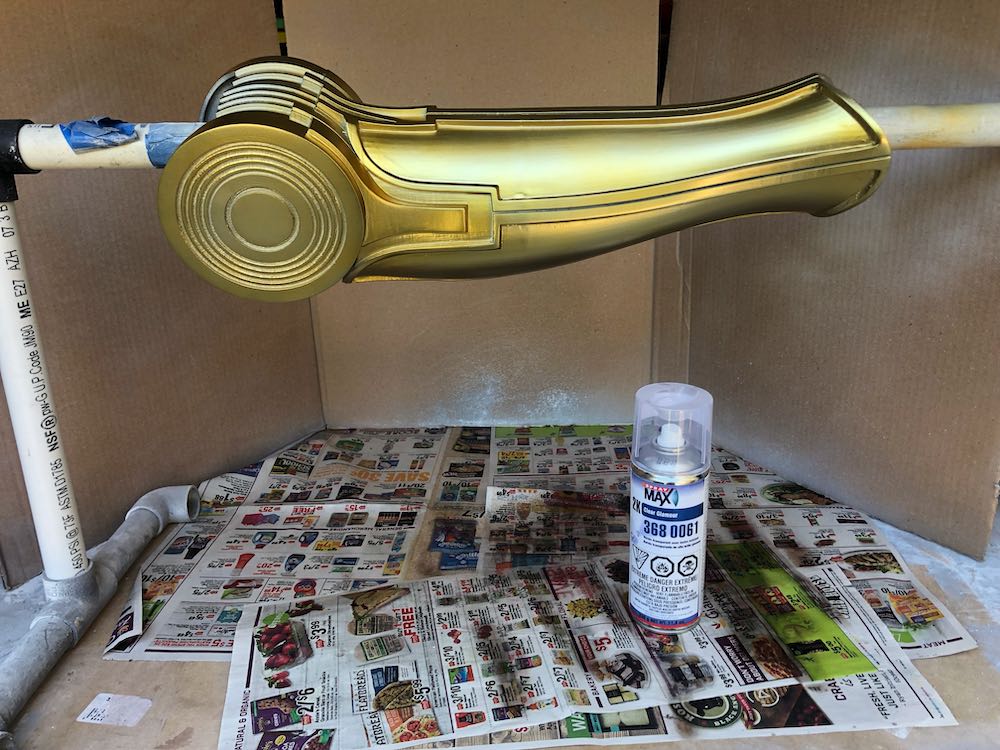
***Please note, do not spray the 2K clear coat directly on Alclad or SpazStix. You must have an acrylic coat in between, such as the Tamiya yellow/red tint, or Tamiya clear, or Alclad clear acrylic. Spraying urethane directly on Alclad or SpazStix will severely damage the finish.
10) Weathering
I didn’t want 3PO looking like he just came off of the showroom floor. I wanted him to look like he’d been through some dangerous spots, and then had a quick wipe-down. That was one of the great things about Star Wars. It was a universe that had a lived-in feel. It was dirty and battle-worn.
I mixed some black acrylic craft paint with a little bit of water and a dash of dish soap to help with surface tension. I slathered it in all of the corners and edges where dirt and grime would acquire. I didn’t really wait for it to dry. I simply took damp paper towels and wiped off excess, leaving paint in the recessed areas. Brown paint can also be used. Because of the smooth surface that the 2K gloss proves, the acrylic can be removed rather easily.
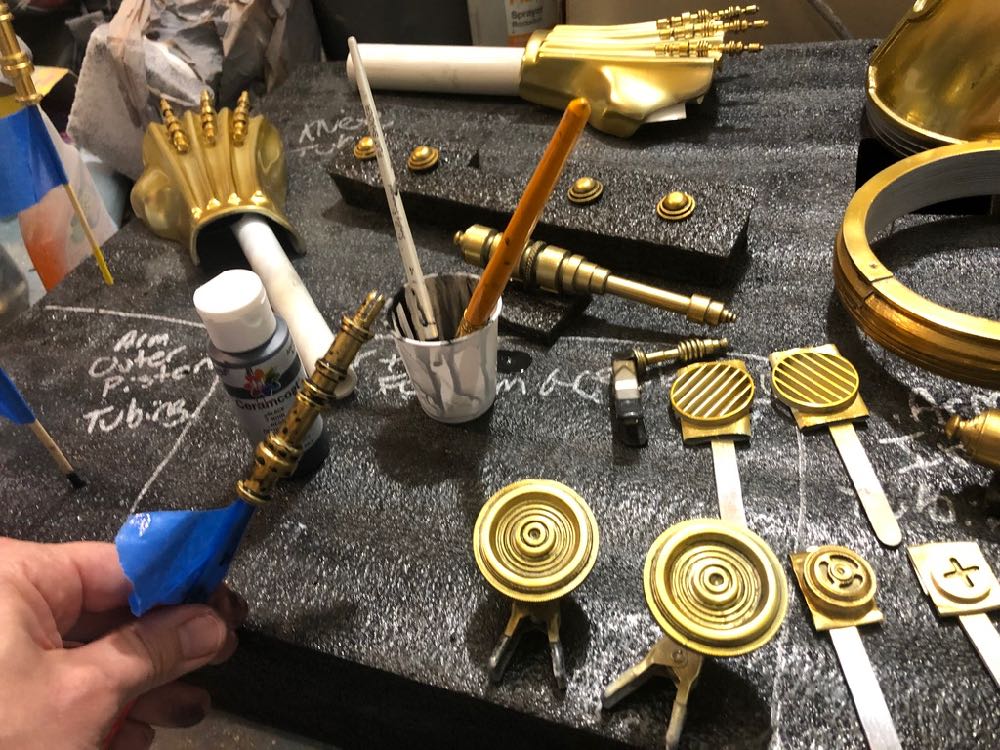
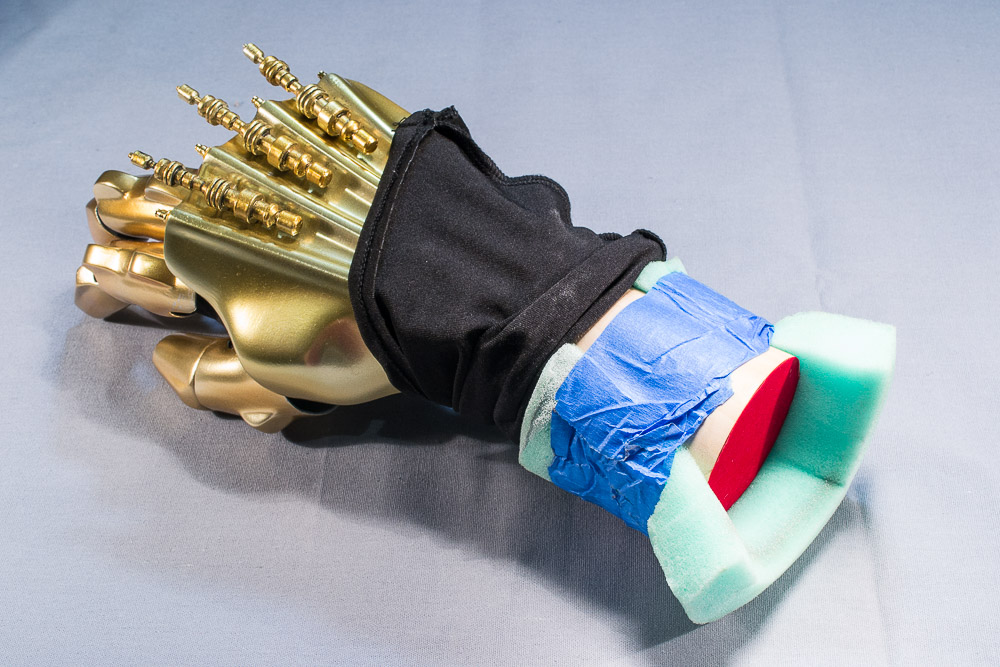
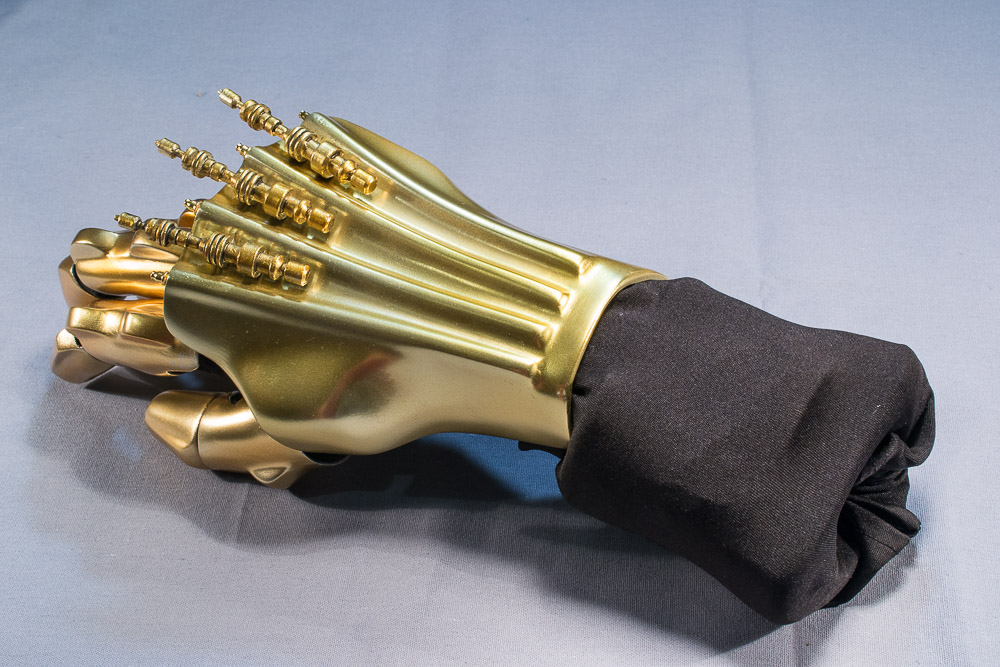
11) Greeblies
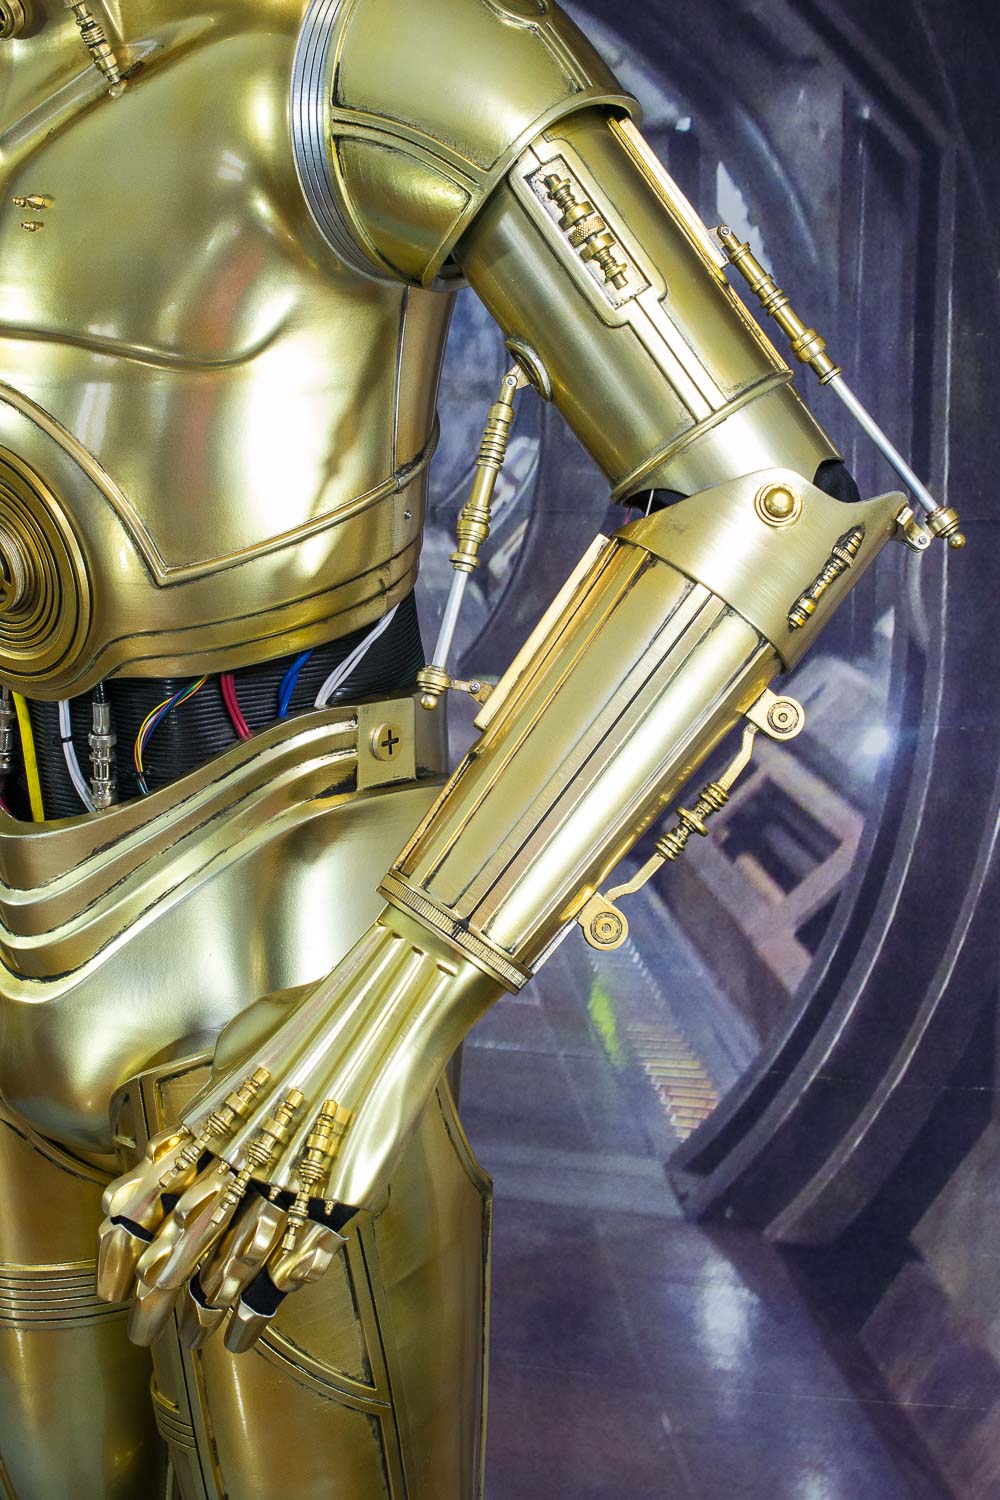
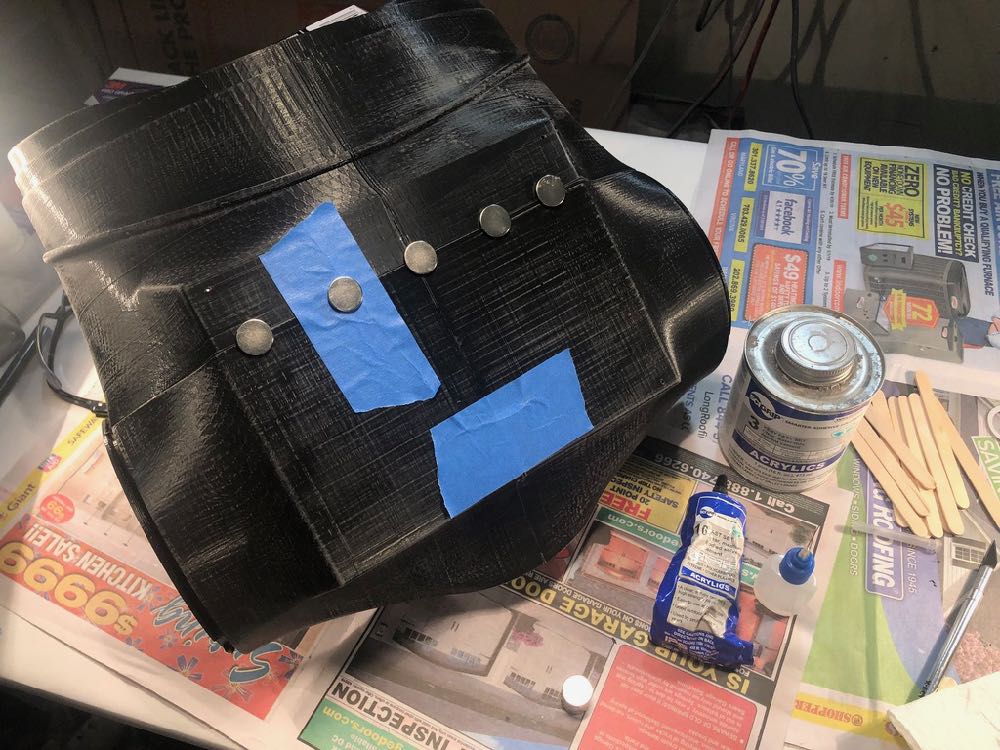
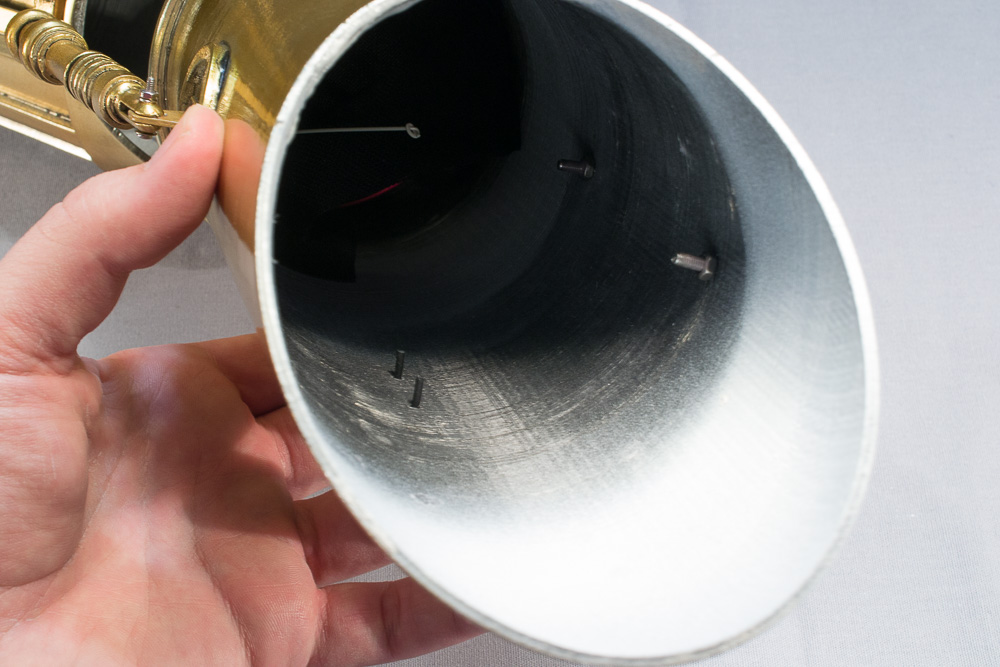
Thanks to Jesse M, all of the pieces are marked with holes to ensure alignment is accurate. For many of the pieces, a small piece of filament can be used to align and secure the pieces. For example, 3PO’s belly button piece has a hole on the back side. I glued (CA) a 1cm piece of 1.75mm filament, spread some e6000 on the rest of the belly button piece, and then aligned it with the chest plate. The filament helped with alignment, and e6000 can secure just about anything. This was used for the arm greeblies (not the moveable pistons), and the back head piece.
I epoxy’d M3 screws into the elbow joint covers. This did require drilling out the underside of the elbow joint cover so that the screw head could fit inside. Any size screw can be used. I had some of these left over from another project.
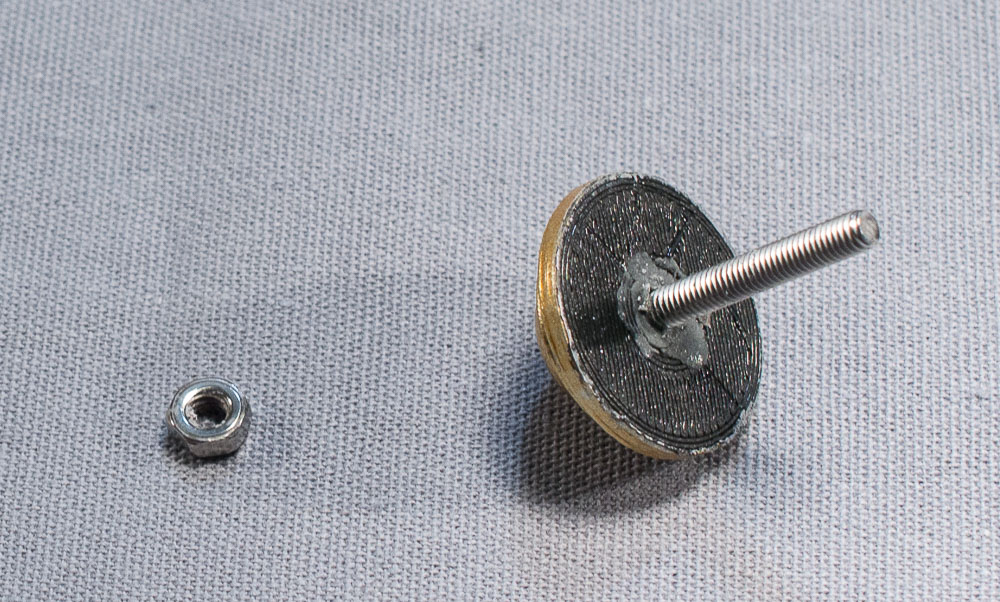
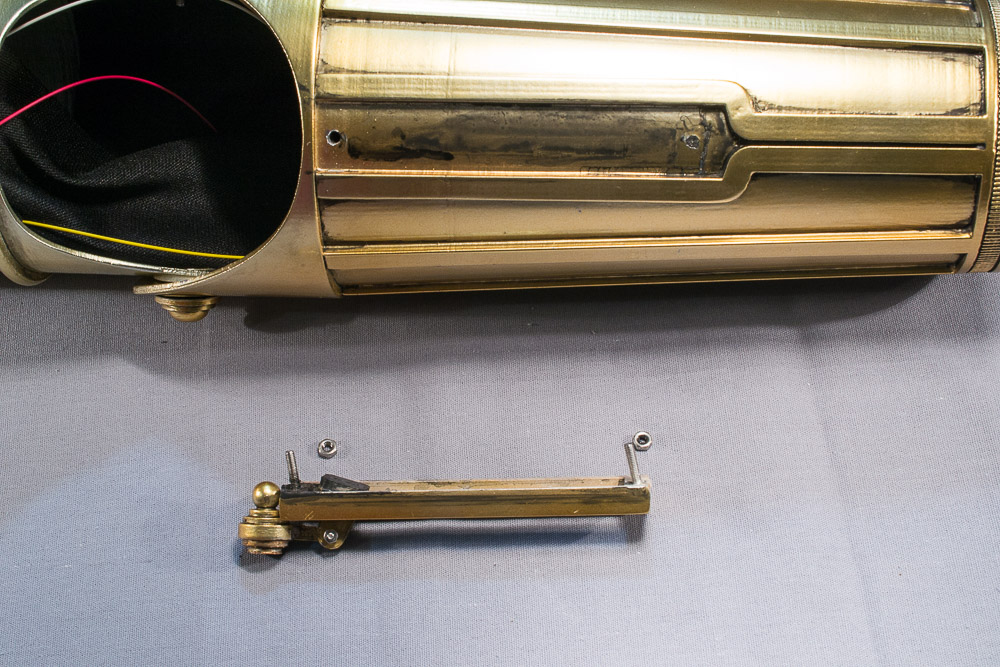
I did the same thing with the “rail sliders” on the forearm and bicep. In the event that the slider breaks or falls out, I want the ability to remove the rail slider tracks to perform repairs. I epoxy’d more M3 screws into the rail sliders, and then secured them with nuts to the biceps and forearms. I had enough clearance while reaching through the top of the forearm to secure both screws with M3 nuts.
I used earring backs and blank studs for 3PO’s chest and hand decorations. I liked having the studs for extra reinforcement. I drilled small holes from the rear, inserted the stud, and then secure the earring back with CA glue onto the stud. I know it isn’t an official part, but I ended up using my 3D printer nozzle that I used for printing C-3PO as the larger chest greeblie. It had some sentimental value after printing 800 hours worth of protocol droid.
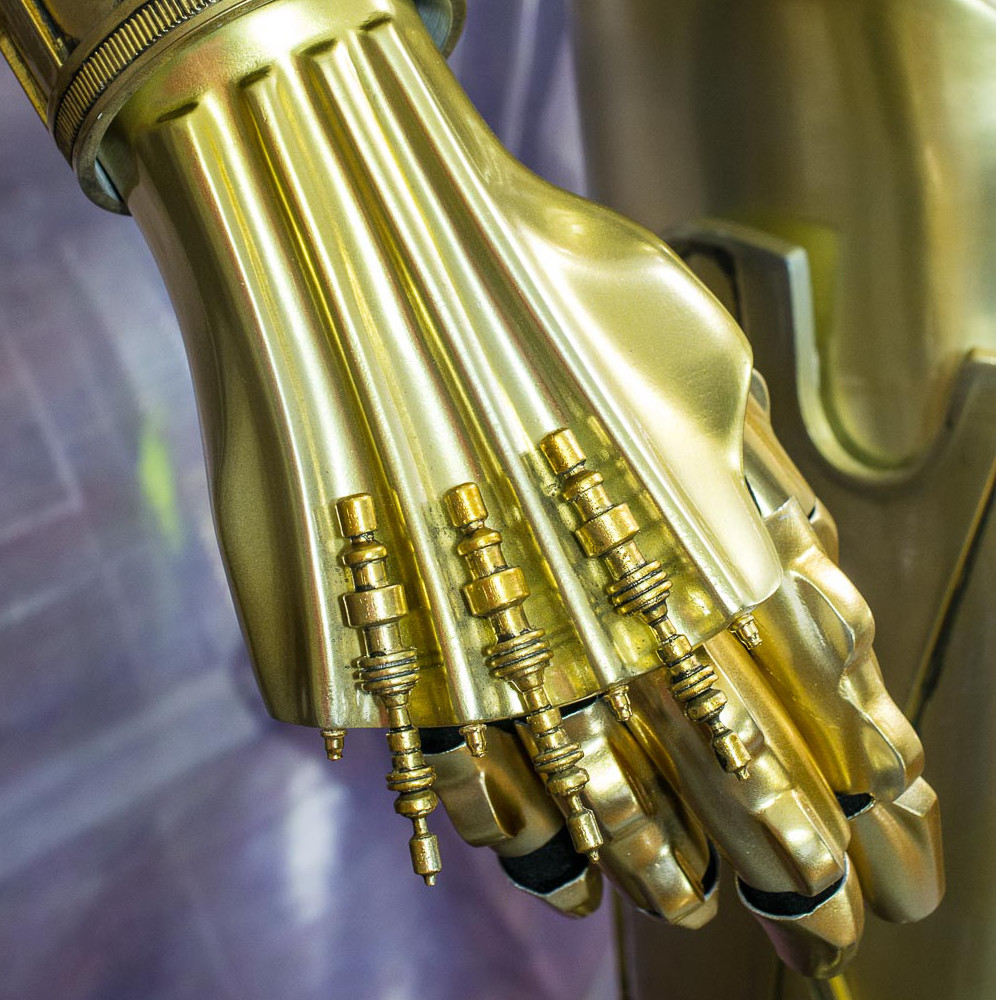
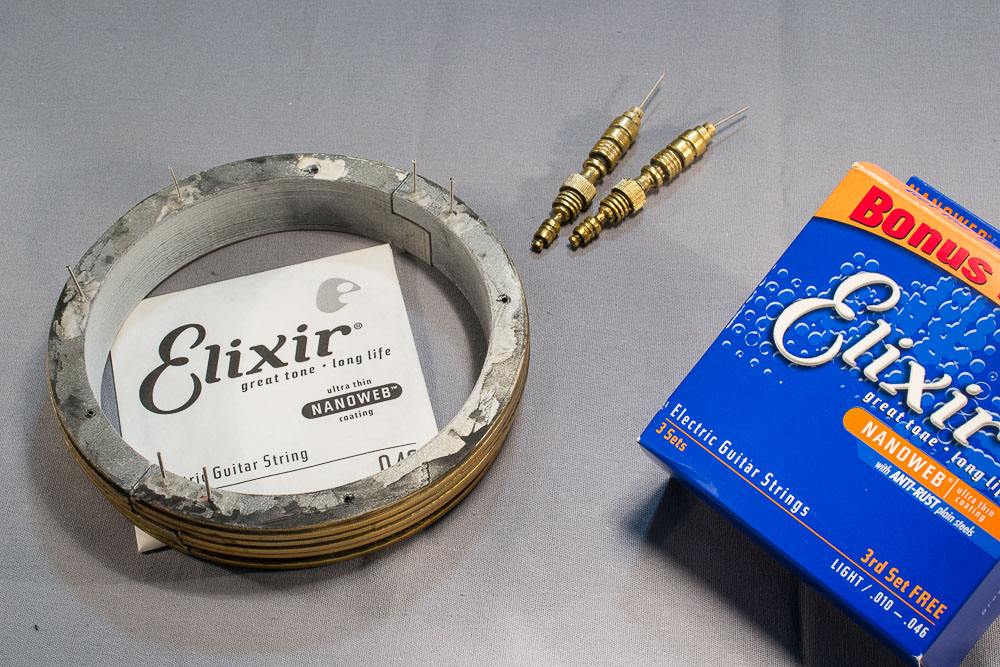
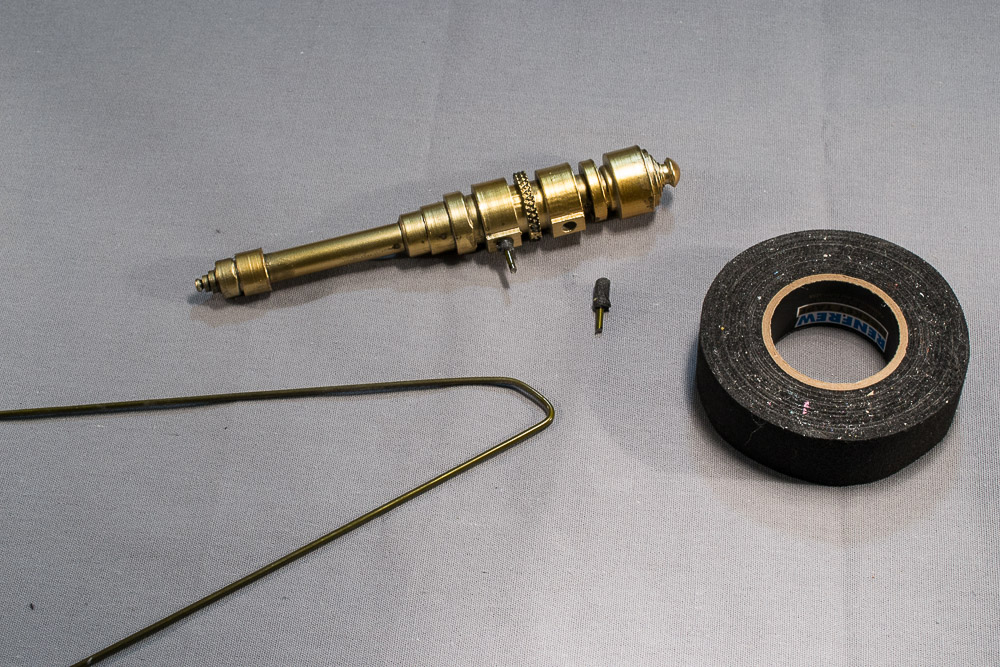
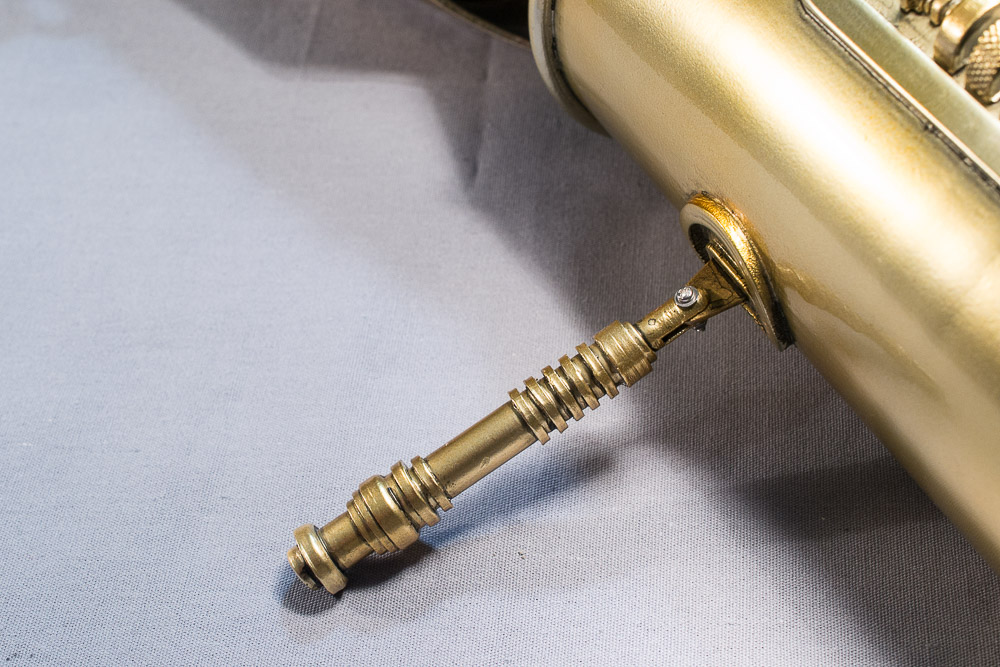
For the 2 throat pistons, I wanted something that would give a little, so I used a .46 (low E) guitar string. It also lets me bend a little to get the position right. I used guitar strings on the top neck collar as well. It was easier to line up with the holes on the chest/back pieces.
For the knee pistons, I cut some small straight pieces off of a coat hanger, and wrapped with friction tape. The knee pistons just sit in place and remove easily.
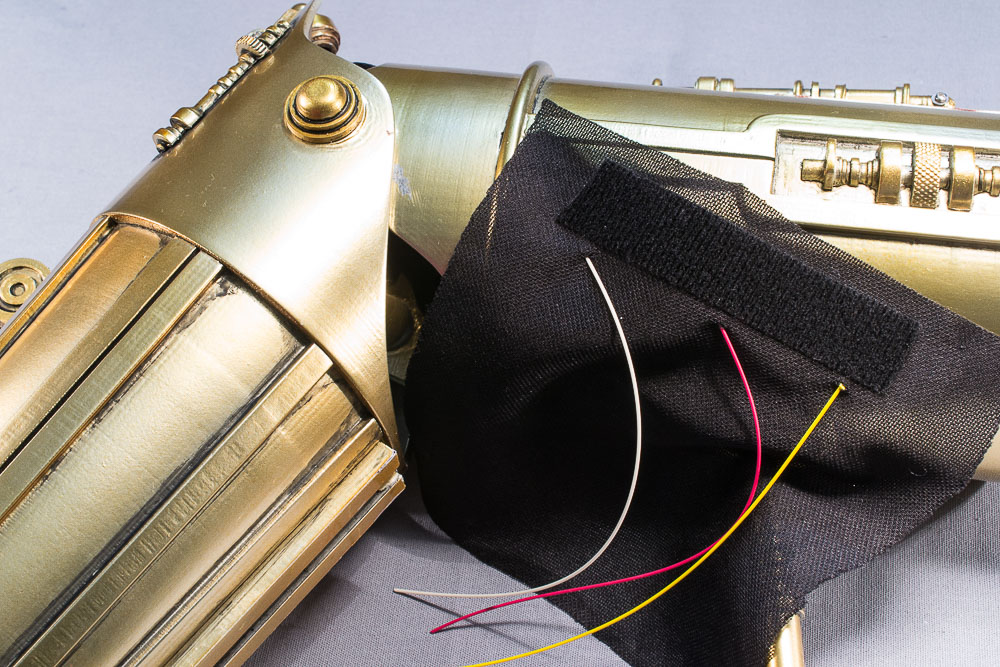
To cover any gaps, such as behind the knees, and the inside/outside elbows, speaker cloth can be used. I attached some adhesive hook & loop (velcro) on the speaker cloth and on the insides of the elbows/knees. Dummy wires can be inserted for decoration.
I used M2 screws, washers, and nuts of various lengths to secure the chest piece to the back, and the arm piston slider parts. I doubt this was how it was secured in the films, but it worked for me.

12) Hands
Thingiverse does have a pair of hands that can be 3D printed. By this time in the project, I was feeling a little lazy and didn’t want to mask all of those small areas for painting black and gold. I obtained a wearable hand from Thingiverse, and printed all of the objects. I then purchased 2 artist model hands on Amazon, and also a pair of halloween costume arm-length gloves. I wrapped some craft foam around the wrists of the hands to help secure a tight fit into the forearms. The artists hands aren’t perfect as far as articulation…they are limited. The finger pieces are a little tight & cramped. But, it looks OK, and 3PO can hold a comlink now.
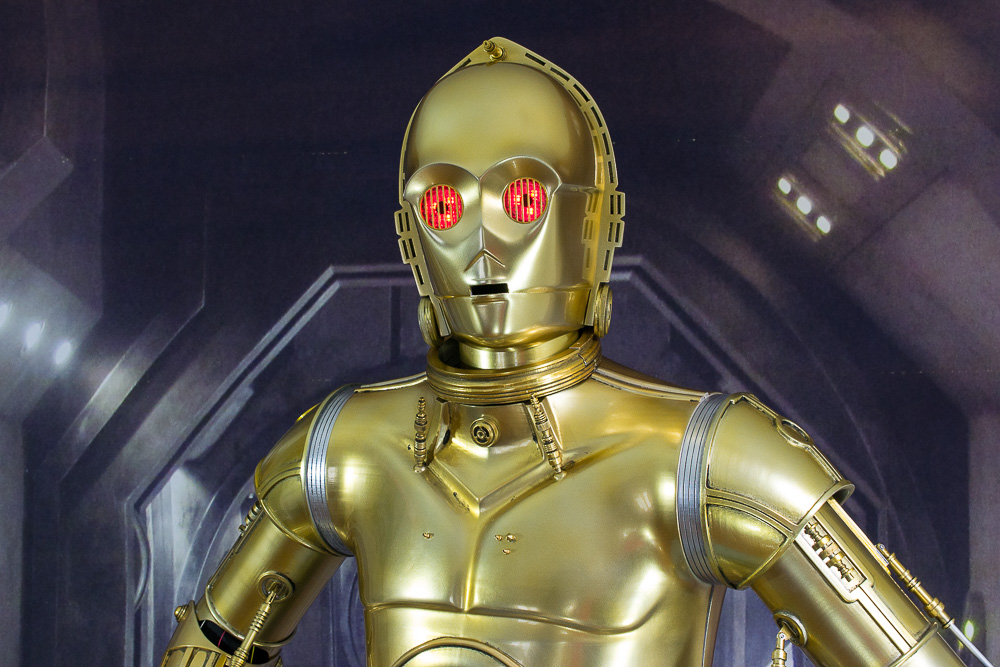
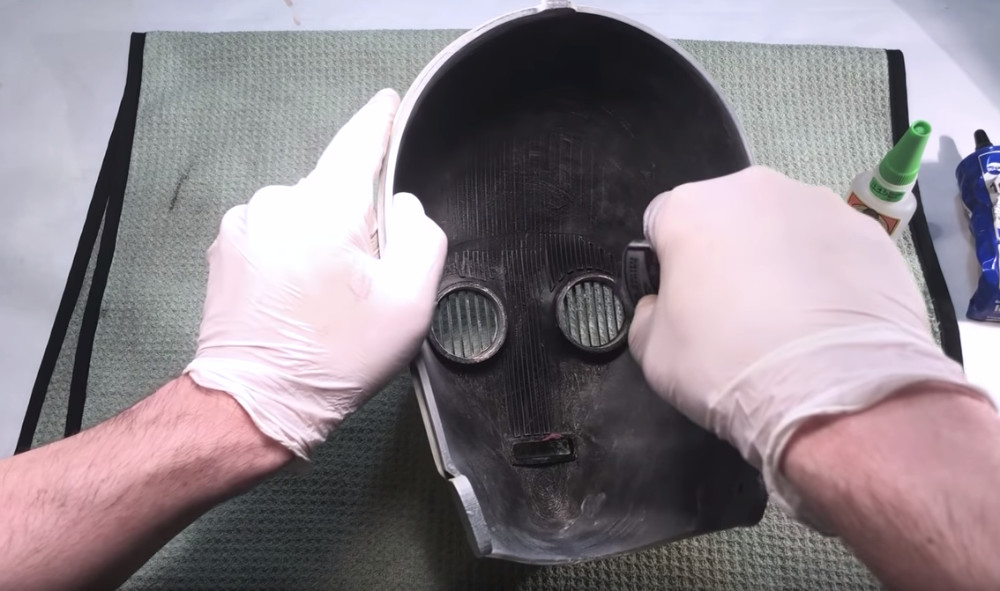
13) Head Assembly, Eye Electronics, & Sound
I detailed C-3PO’s head assembly, eye lenses/electronics, and sound in a previous post. I modified Jesse M’s eye grids to accommodate some off-the-shelf underwater LED lights. Lens templates, modified eye grids, a list of materials, and instructions, can be found here.
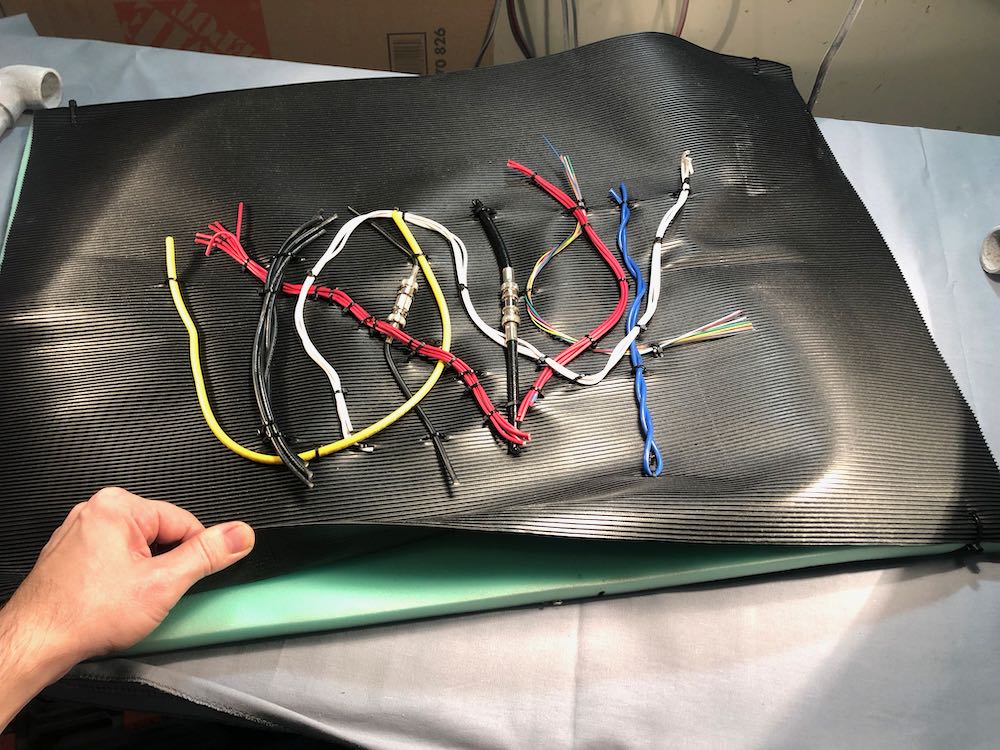
14) Belly Wires
I found a bunch of random wires at work and secured them to a piece of utility floor mat with zip ties, which was in turn secured to some 1″ thick craft foam. The foam keeps the utilty mat rigid, while it sits between the shorts and chest pieces.
After printing and painting a protocol droid, a display stand can be very useful. Click here to view procedures for building a PVC display stand for C-3PO.
C-3PO MEETS A SPECIAL GUEST

Happy Trooper’s droids were able to meet a very special guest
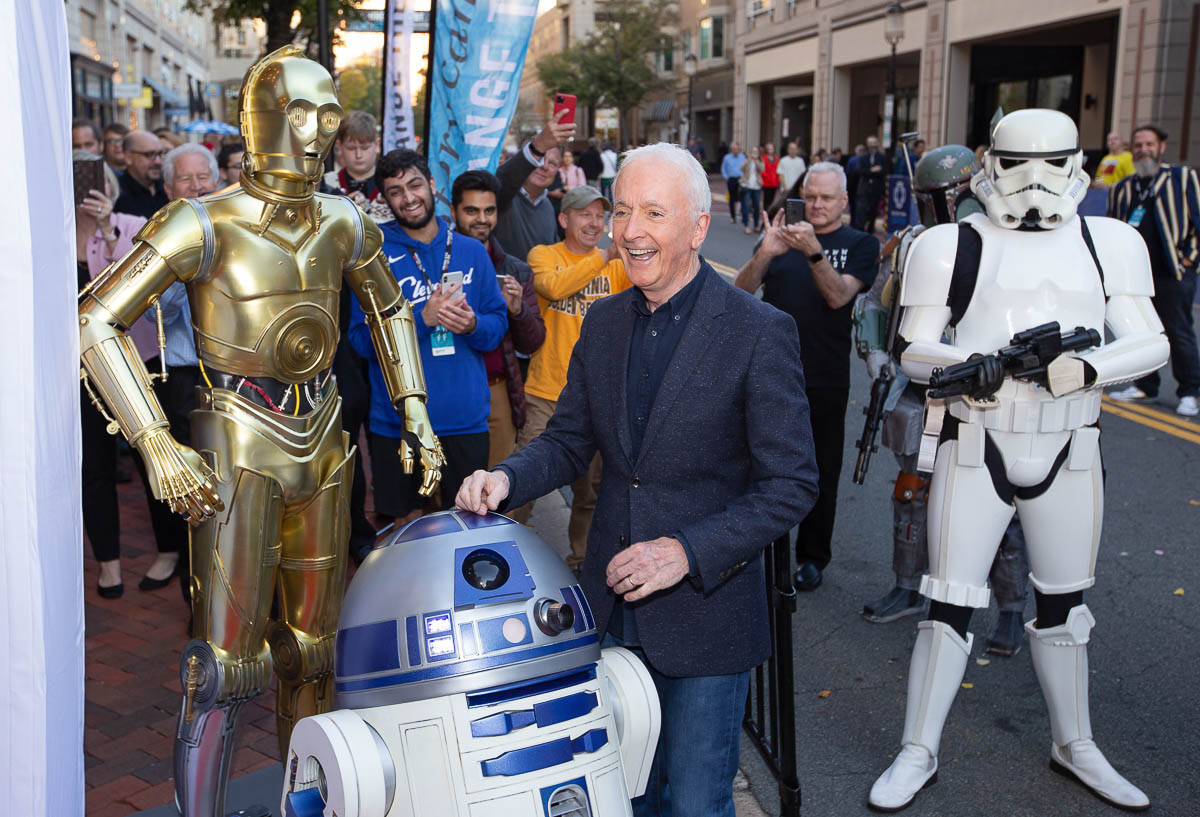
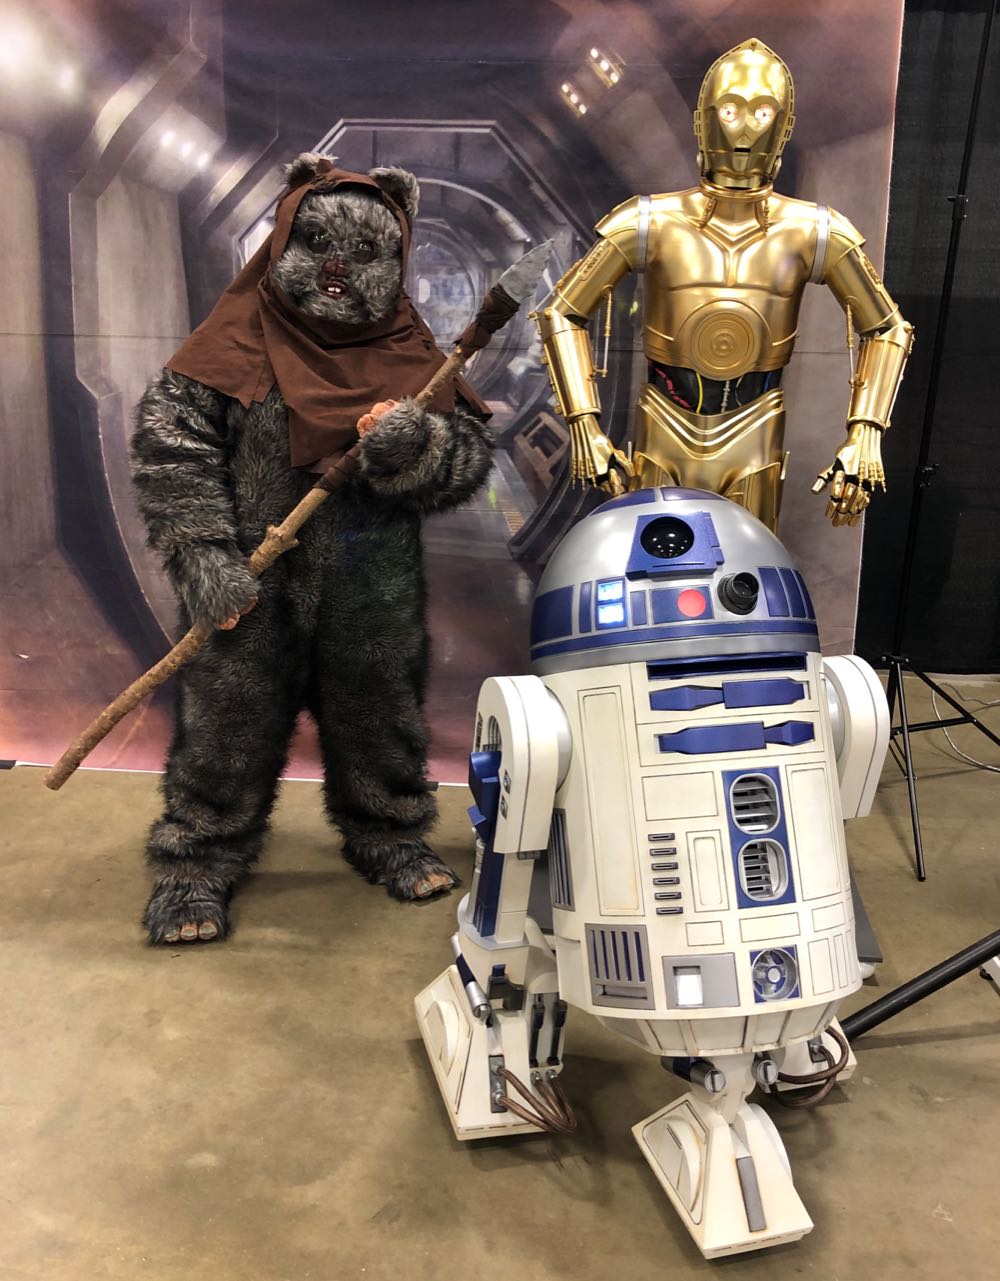
Reunited with some old friends

C-3PO & R2 met a very special guest at the Washington West Film Festival in Reston, VA – 2019

Anthony Daniels at the Washington West Film Festival in Reston, VA – 2019
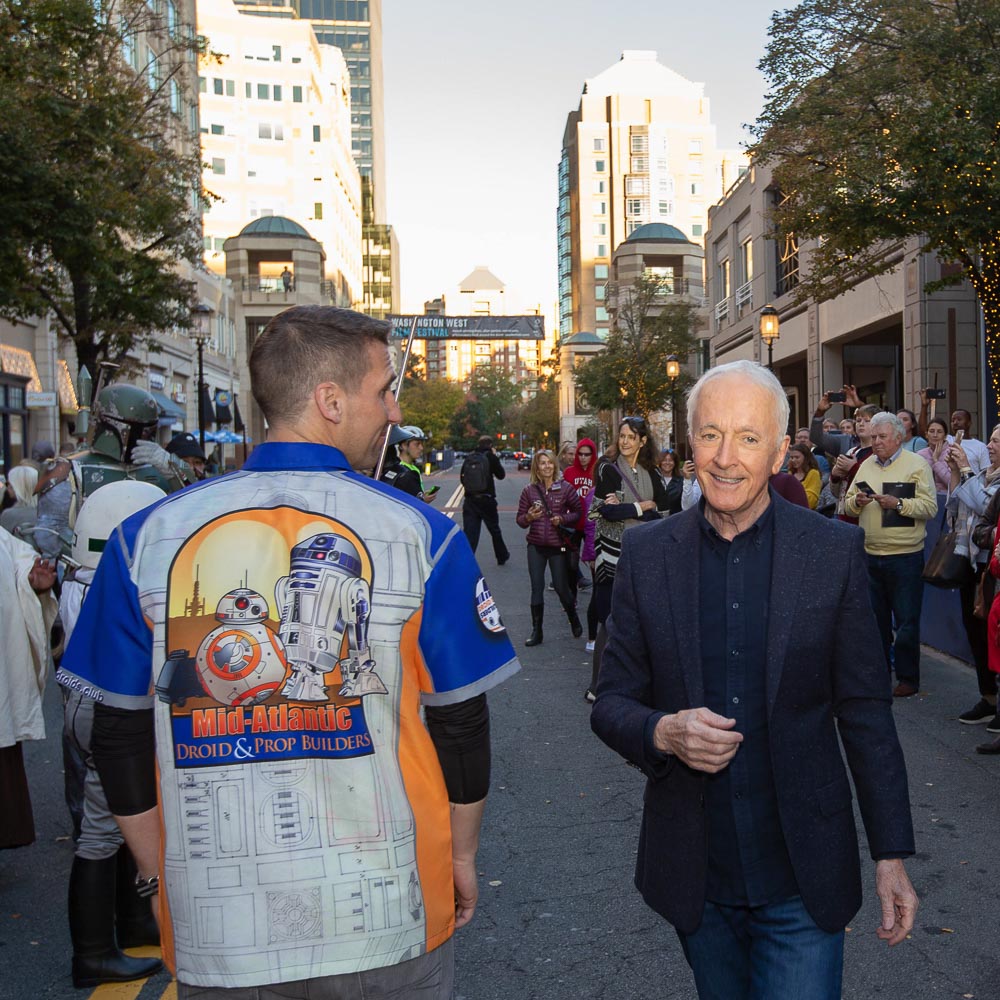
HappyTrooper & Anthony Daniels