


Previous Story
PVC Display Stand for 3D Printed C-3PO
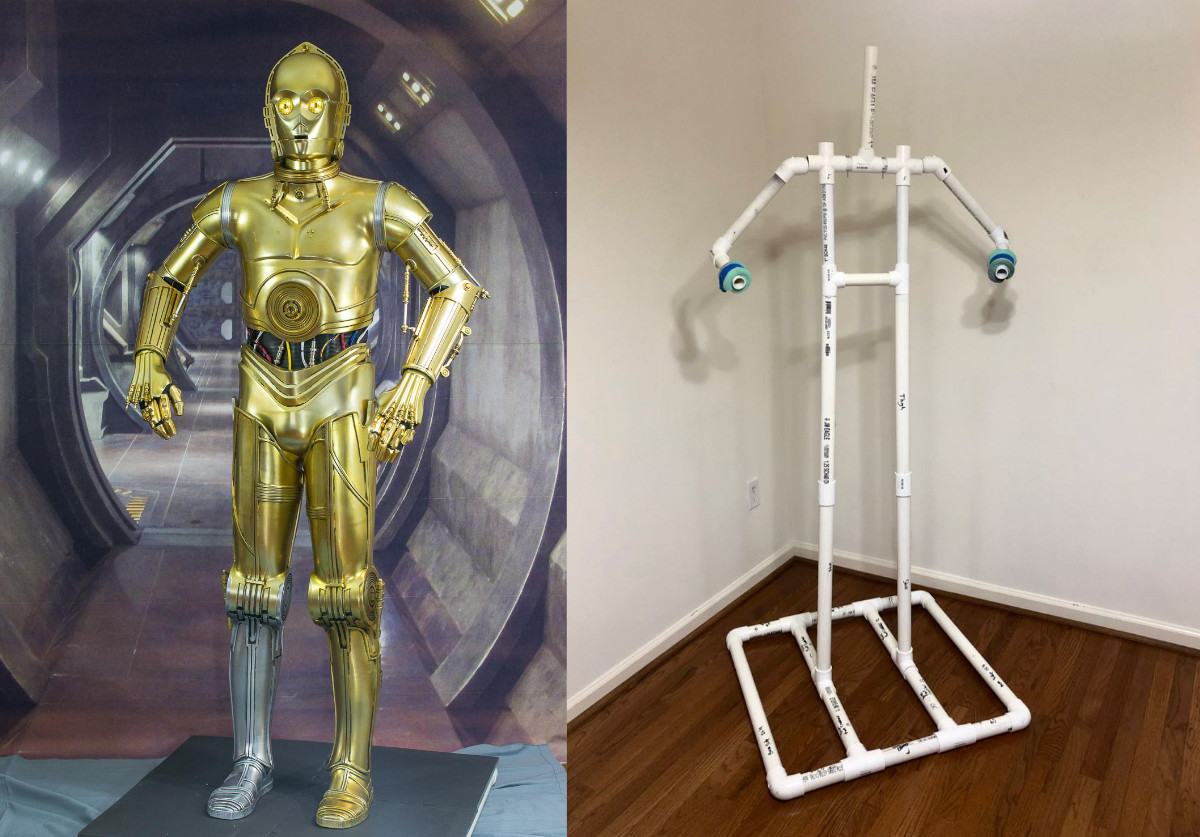
After printing, sanding, filling, sanding some more, priming, sanding even more, and painting C-3PO, I found that he needed a display stand. Fortunately, C-3PO costumer and YouTuber: Gordon Tarpley, has shared his idea for a C-3PO display mannequin. All credit goes to Gordon Tarpley for this design. I am simply providing my measurements and a bill of materials that will fit Jesse M’s 3D printed C-3PO, available on thingiverse. If you are reading this Gordon, thank you for sharing this! Please check Gordon’s C-3PO mannequin video on YouTube.
NOTE: This stand has been measured for Jesse_M’s 3D printed C-3PO available on thingiverse. The STL files from Jesse_M were printed as-is.
Bill of Materials:
2 x 10′ of 1-1/4″ PVC Pipes
1 x 10′ of 1″ PVC Pipe
1 x 2′ of 1/2″ PVC Pipe (Home Depot sells short lengths)
4 x 1-1/4″ PVC 90deg Elbows
6 x 1-1/4″ PVC Tees
3 x 1″ PVC Tees
2 x 1″ PVC Crosses
2 x 1″ PVC 90deg Elbows
2 x 1″ PVC 45deg Elbows
2 x 1″ to 1/2″ PVC Reducers
PVC Pipe Cutter (optional but recommended, saves a lot of time)
Base
1-1/4″ PVC was used to construct C-3PO’s base. This is a very sturdy foundation to mount your beloved C-3PO. Here is a diagram for constructing the base. Not shown in the diagram are the vertical struts that go up through 3PO’s feet, shins, thighs, and shorts.
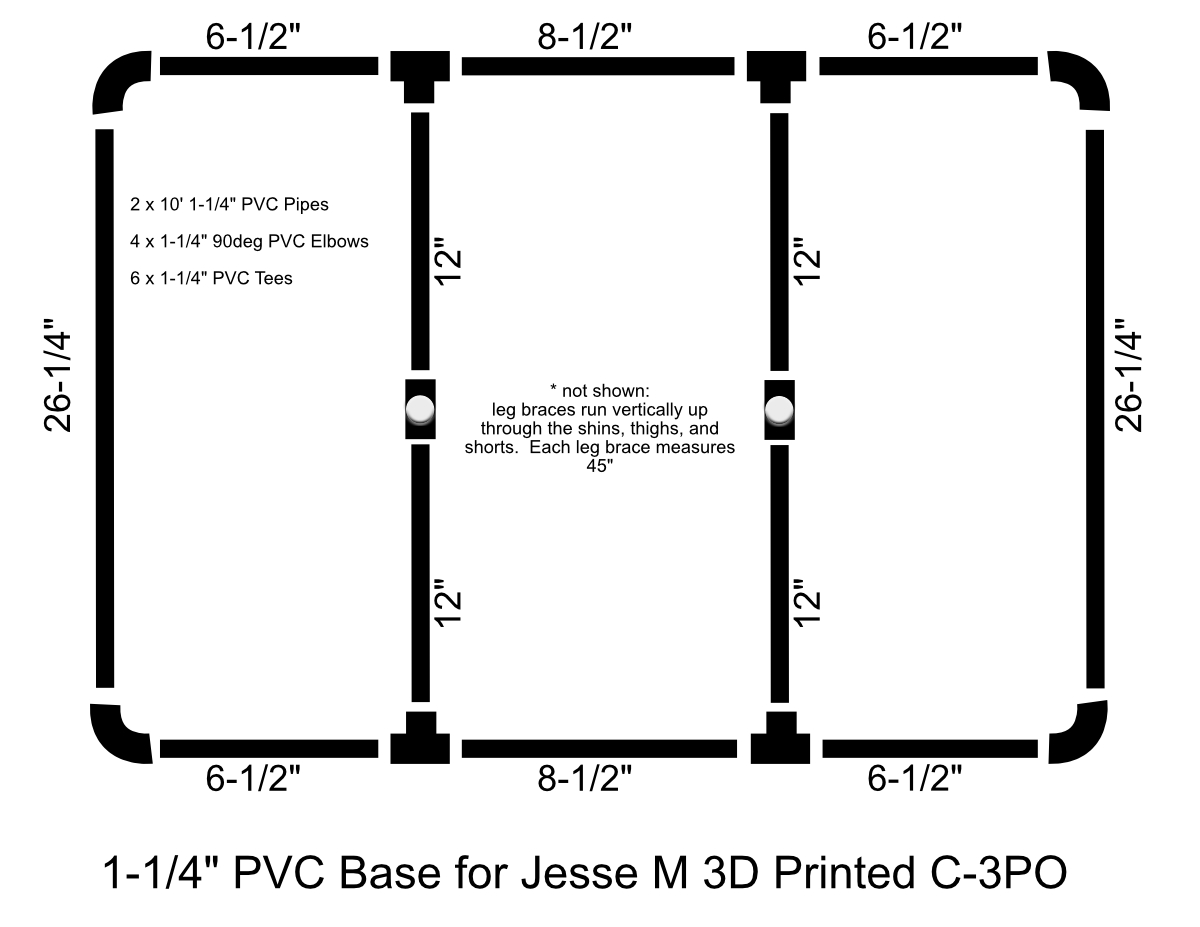
OPTIONAL: I plan on transporting my C-3PO to various events around the area. One of the reasons that I like this PVC stand is that 1) it is lightweight and 2) it is collapsable, making transport very easy. I can fit all of these pieces into a large duffle bag. TIP: I cut the long leg struts in half and secured them with a 1-1/4″ PVC coupling.
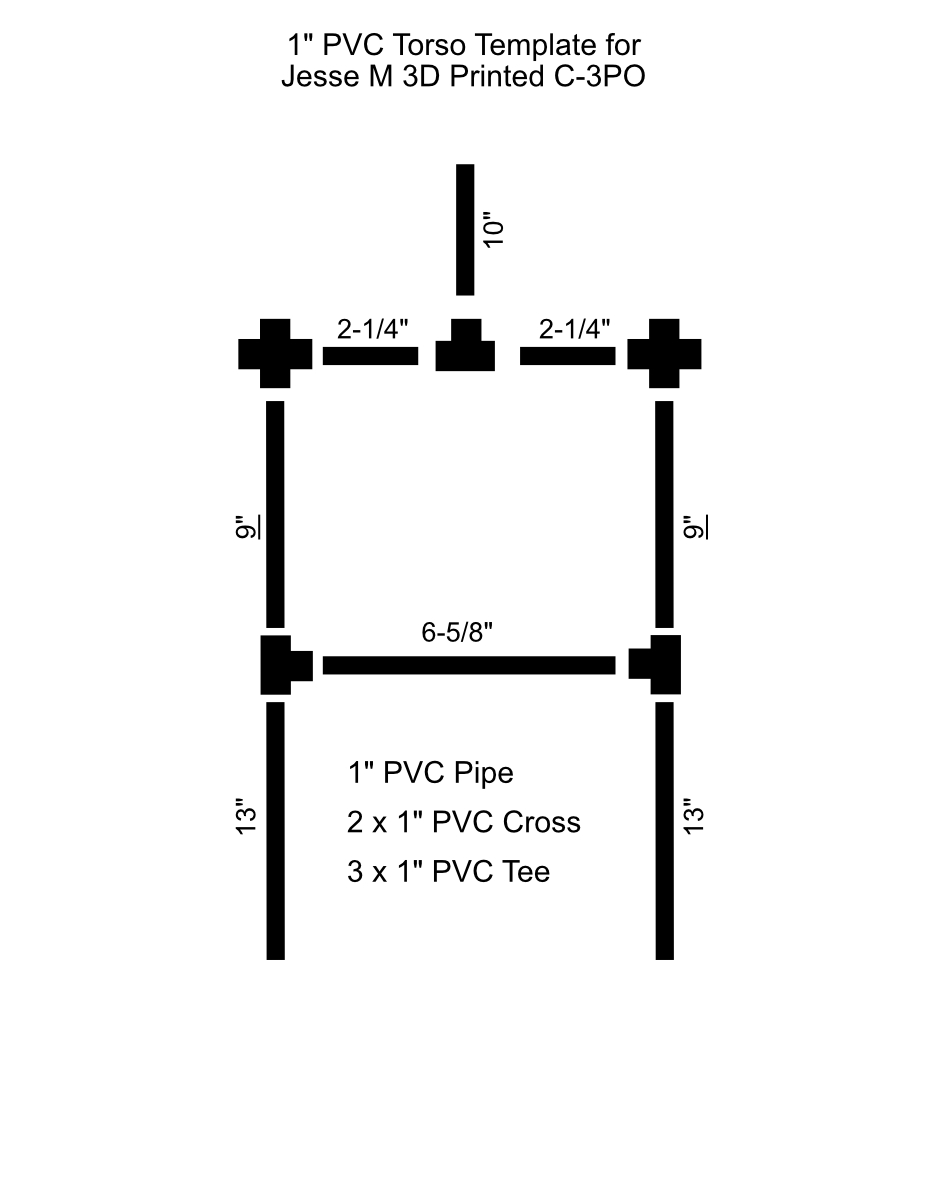
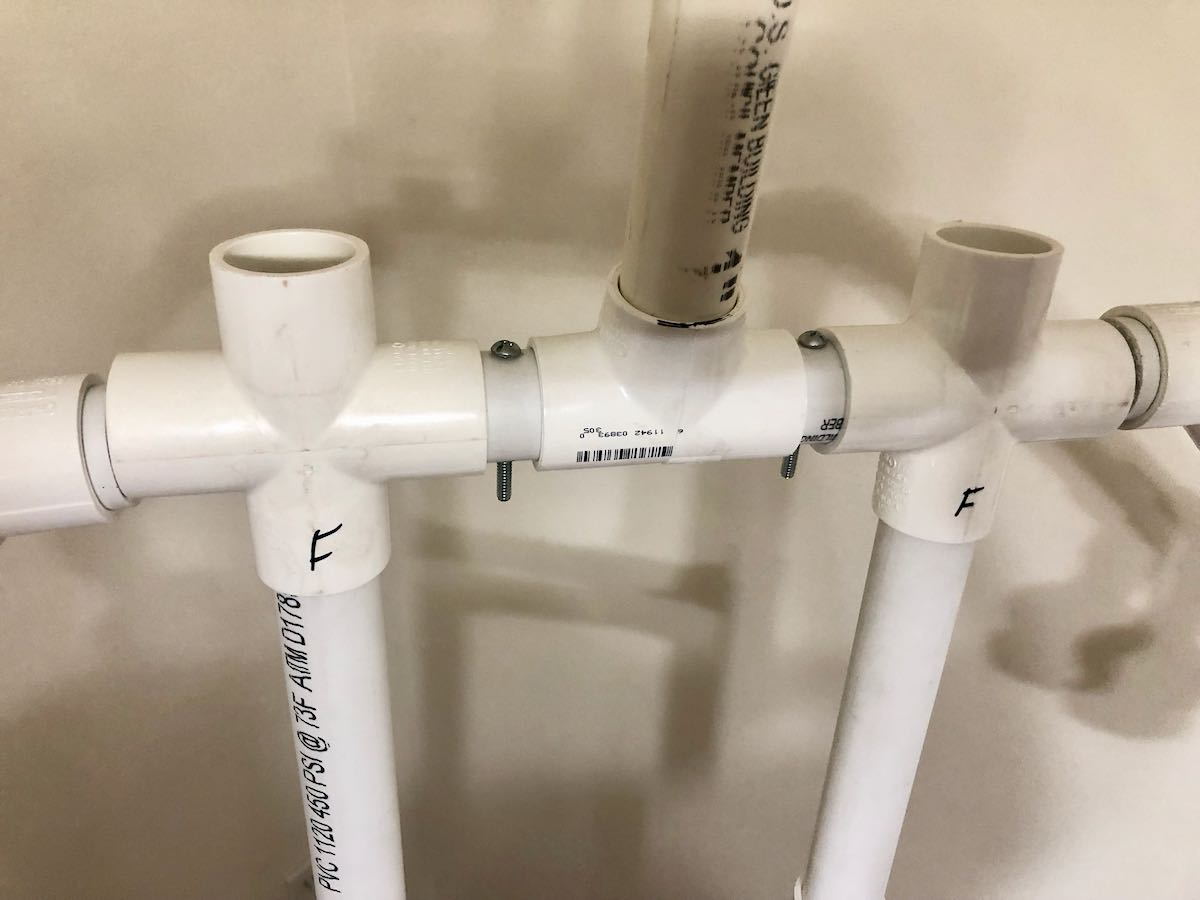
Torso
1″ PVC was used to support 3PO’s torso. The 1″ PVC slides right into the 1-1/4″ leg struts. Here is a diagram for constructing the torso supports:
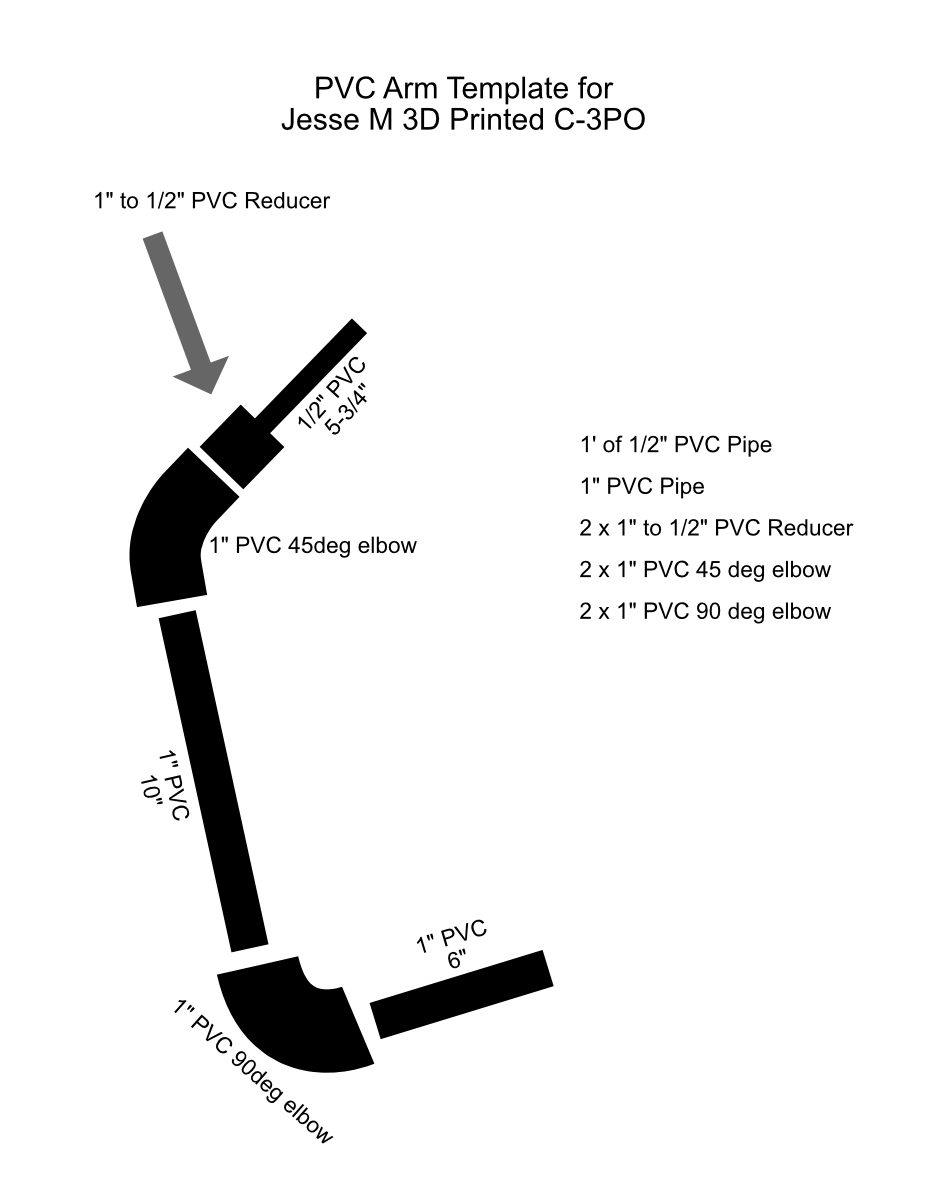
Arms
Gordon Tarpley provided all of us with an easy way to mount the arms to the torso. Using 1/2″ PVC pipe, the arm fixtures slide right into the 1″ PVC shoulders on the torso. Below is a diagram for the arm supports. Please note, the forearm PVC pieces on my mannequin are short because I insert wooden articulated hands on 3PO’s forearms. If you are using the 3D printed hands, you may want your forearm PVC pieces to be longer. Please adjust as necessary.
OPTIONAL: to secure the arms to the torso, a lynch pin (screw) can be used once the arms are inserted into the torso. I drilled out holes through the torso & arm pieces, and secured the arm with a 2″ #8 screw. This will prevent the arms from sliding out.
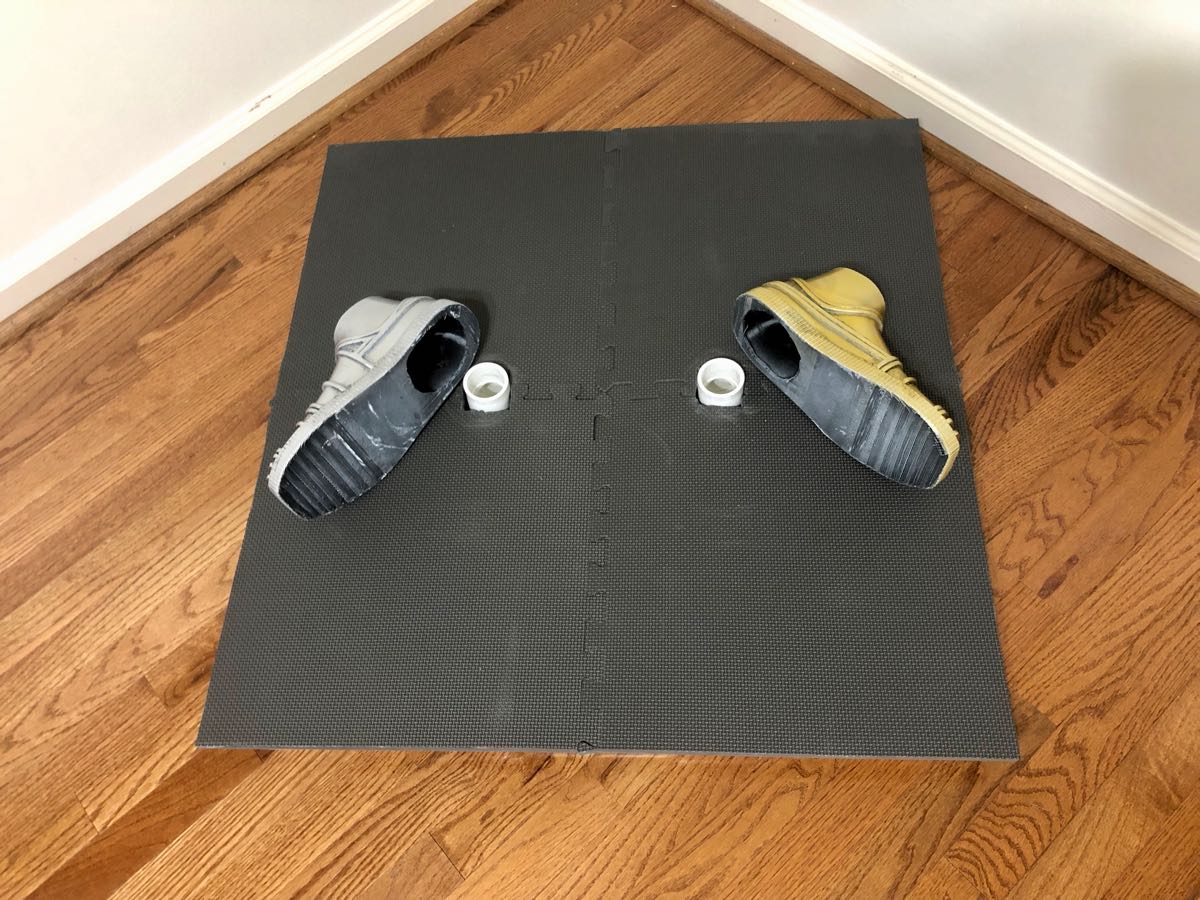
Finishing Touches
Any covering can be used to hide the PVC base. I’ve seen wood, with lighting underneath, it looks terrific. Because I want portability with this stand, I simply used some lightweight EVA foam, cut to size to fit over the stand. I cut out 2 holes for the leg struts to pass through
Gordon mentions in his video that wheels can be attached to the base, making the display stand a little more mobile.
In the future, I may carve up some more EVA foam to put along the sides of the base, with some sort of LED strip.
One more salute going out to Gordon Tarpley for sharing this PVC mannequin.
PVC STAND IN ACTION

Happy Trooper’s droids were able to meet a very special guest

C-3PO & R2 met a very special guest at the Washington West Film Festival in Reston, VA – 2019

Reunited with some old friends
How are the hands connected to the arms?
I am currently printing C3PO with Jeese_M files and the hand from RoelVeldhuyzen
Hello, thank you for your comment. Please check the following post: https://happytrooper.com/?p=7182 and scroll down to #12. I used some wooden artists hands. As mentioned in the post, the hands are not perfect. The finger rings are a little tight, and articulation is limited on the fingers, so it is a bit cramped. I wrapped some foam around the “wrists” of the wooden hands. The hands are inserted into the forearms and the hands remain in place. There may be better methods available. For me, this works for a statically displayed C-3PO. Best of luck on your build. Stay safe out there! 🙂