
Previous Story
DIY Imperial/Rebel Aluminum Belt Boxes
If you look closely at various characters in the Star Wars films, you will see that many of them share a common costume accessory: belt boxes. They are very easy to spot on Imperial officers, bridge crew, scanning crew, and gunners. Greedo wears them on his belt, and Chewbacca has a few in his bandolier.
The 501st Legion CRL states belt box “dimensions are approximately 2-1/2″ (63.5 mm) by 3-1/2″ (88.9 mm) by 1″ (25.4 mm) thick.” Perhaps it was easier to find aluminum electronics project boxes back when the films were in production. I’ve seen a few metal project boxes on eBay, but they are a tad long. I did find some plastic project boxes on eBay that have very similar dimensions. These could be painted I suppose. However, brushed aluminum does have a more authentic look. Most level 2/3 certifications in the 501st require the rivets and rear overlapping back cover, which are included in this build.
I am in the midst of planning a Greedo costume. He wears 5 belt boxes. There are a few sellers on Etsy that sell belt boxes. If you only needed 2, you could maybe justify the $40 cost for a pair. But, needing 5, the cost is around $100 plus shipping for Greedo’s belt boxes. I wanted to see if I could: 1) save a little money 2) use standard hand tools and 3) get creative. Also, if something were to happen to one/all of the boxes, I can re-make them.
Using the dimensions from the 501st CRL above, I checked around for potential raw materials, and tools, then drew some templates for belt boxes. I had a few of the tools needed to complete the project, others I had to purchase. I still came in under the $100 mark, even with tools that were purchased. To save money on tools, check out Harbor Freight. Links to the tools that I used are listed below. Here are some photos of the finished product.
Building Materials
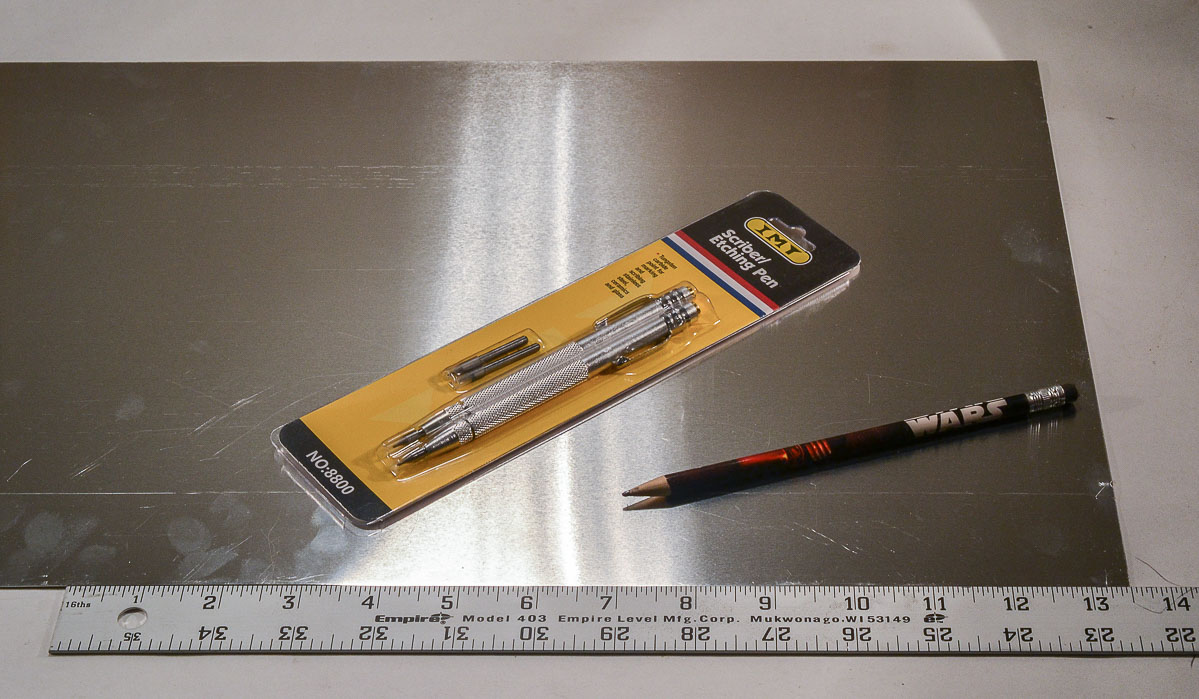
Aluminum Sheet 12″x24″x.019″ ~$10
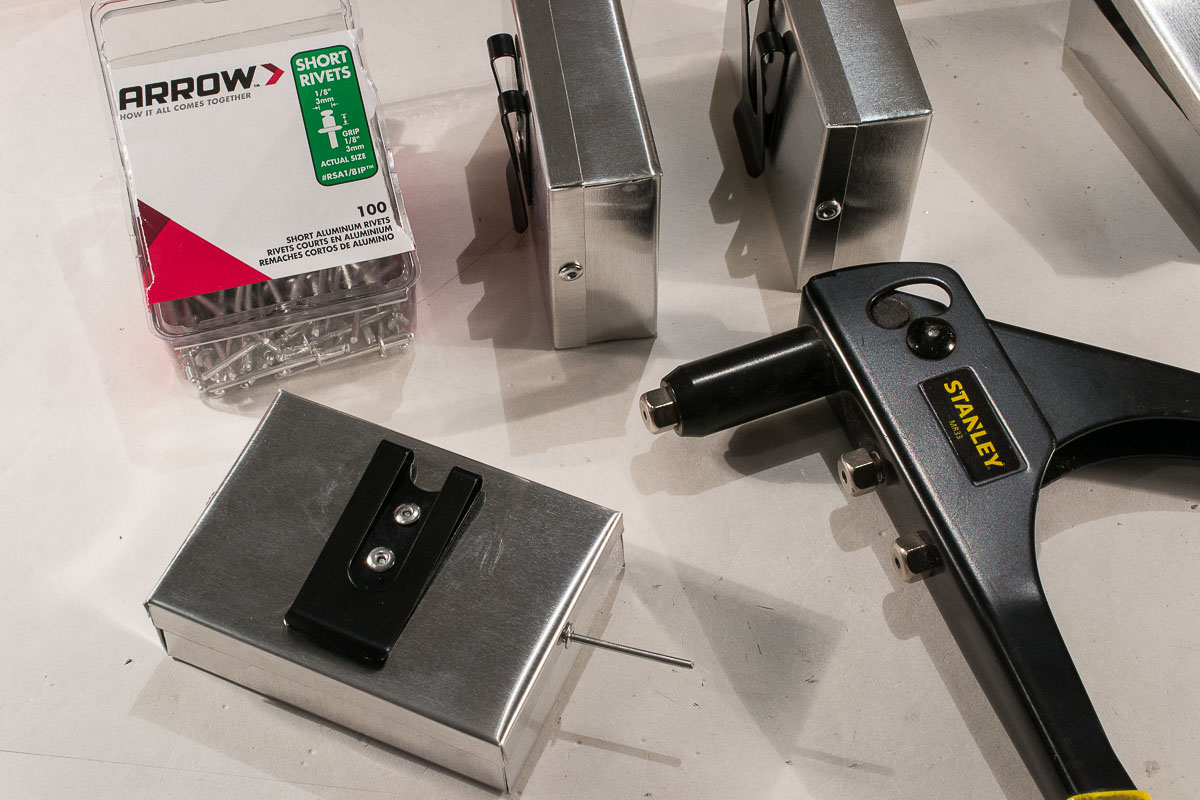
1/8″ (3mm) Pop Rivets ~$5
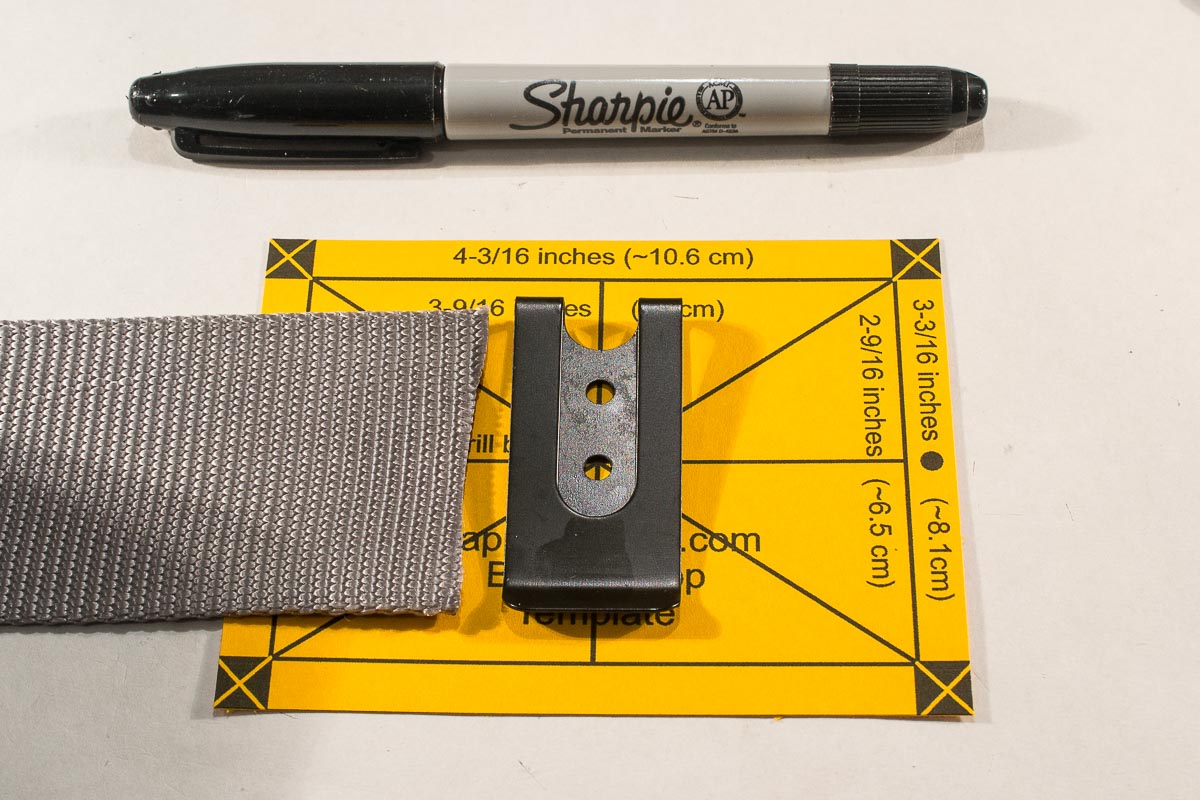
Spring Belt Clips ~$10 for 5 (can also use nylon strapping to keep cost down)
Tools
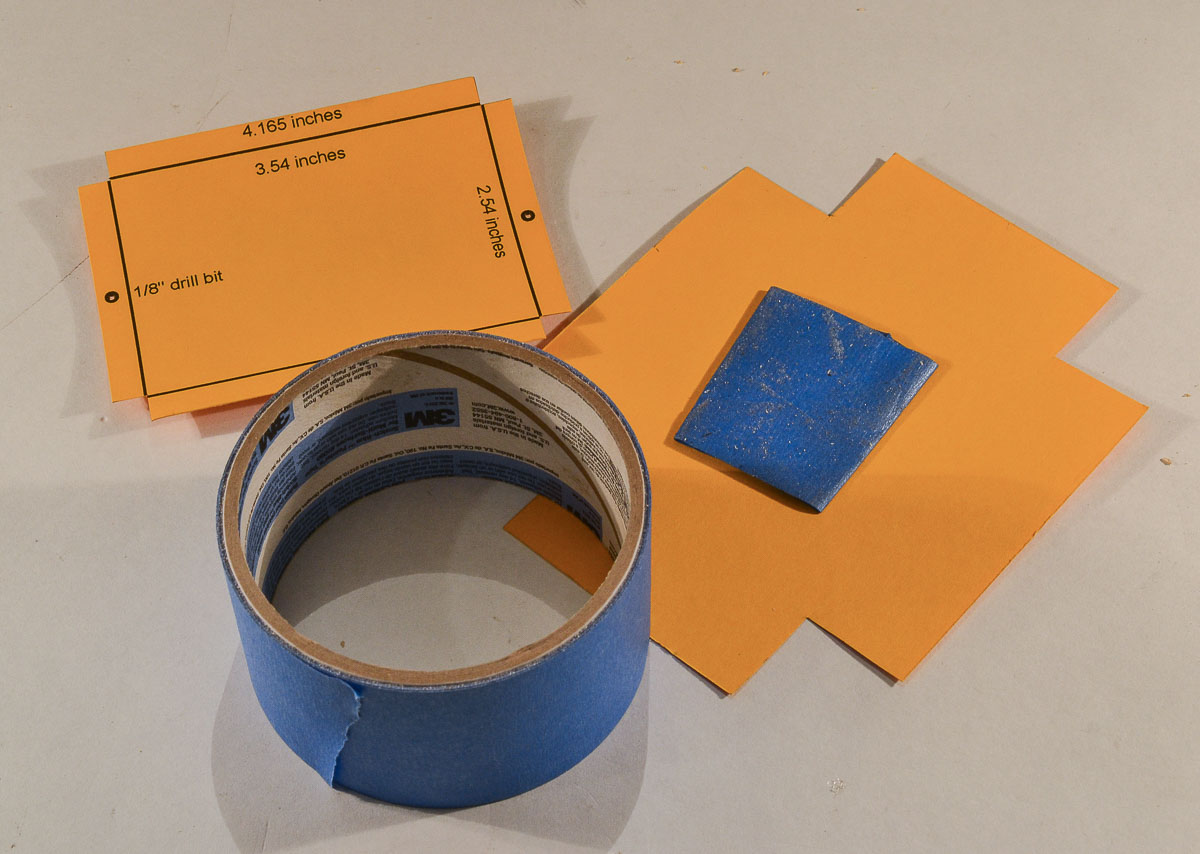
Belt Box Templates – FREE! (in Letter & A4 print sizes)
Card Stock Paper (1 sheet)
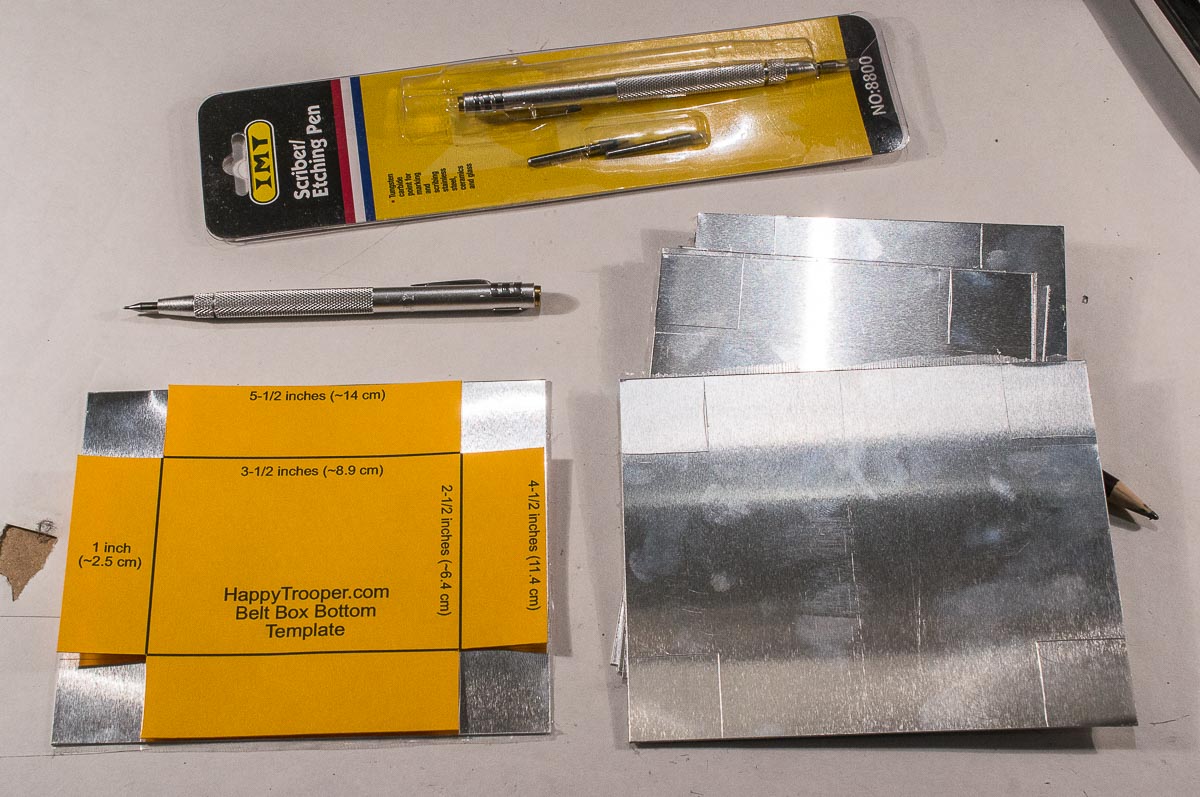
Scriber (or pencil) ~$7
Utility Knife ~$5
Long Aluminum/Metal Ruler ~$3
Riveter ~$5
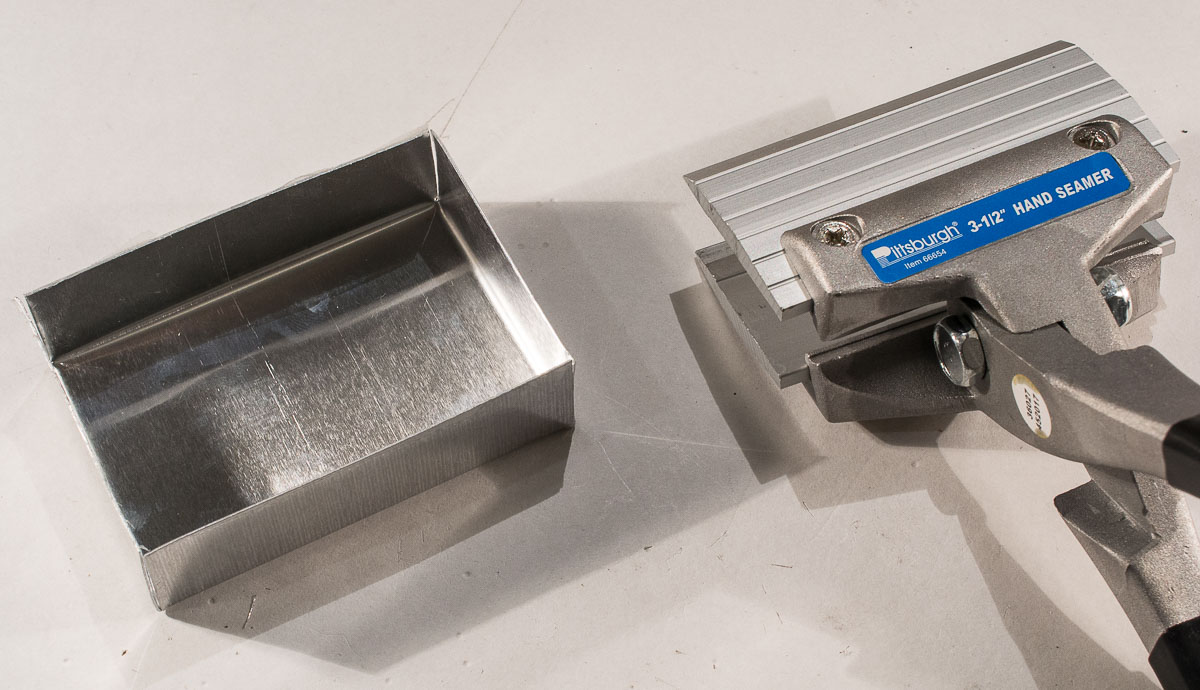
3-1/2″ Hand Seamer ~$10
Straight Cut Tin Snips ~$5
Center Punch ~$4
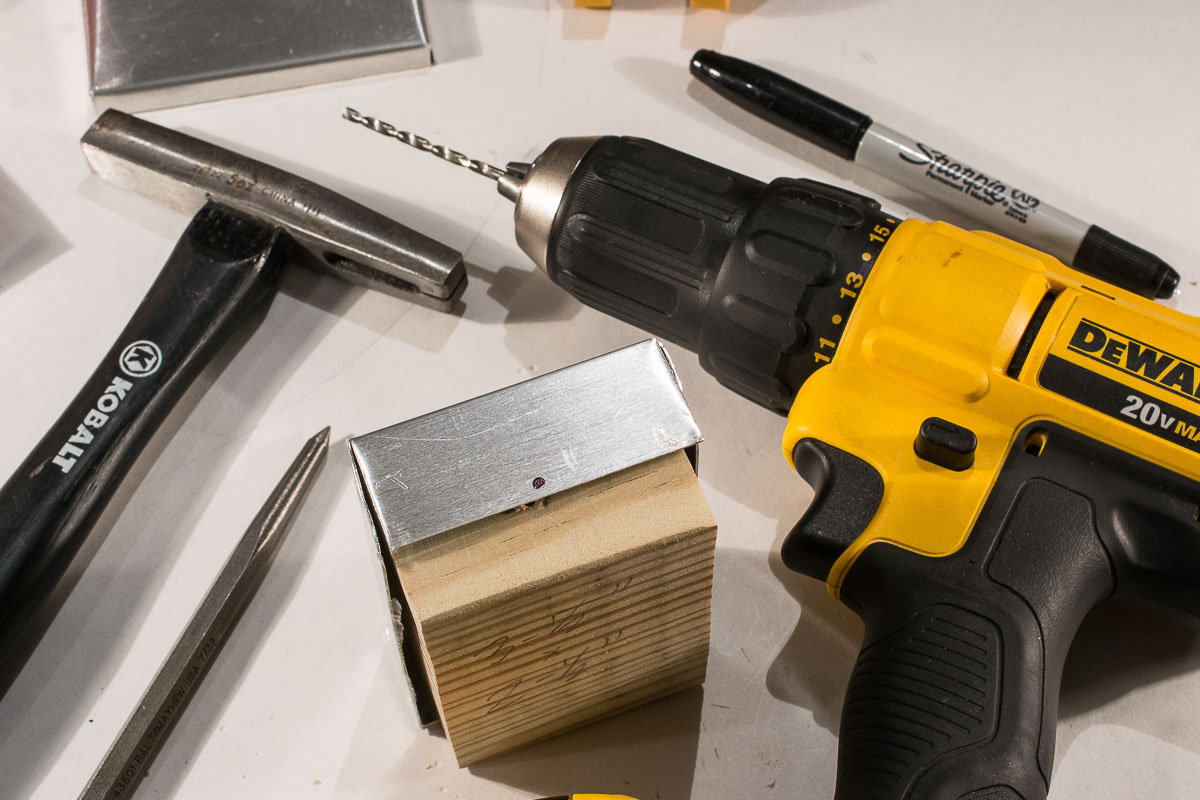
Hammer
Drill Driver
Ratcheting Bar Clamps x 2 ~$8
1/8″ (3mm) Drill Bit
Sharpie
Recommended
Utility Gloves
Eye Protection
Block of wood to use for punch and drill support
Table with a straight edge
Aluminum Sheet Trimming
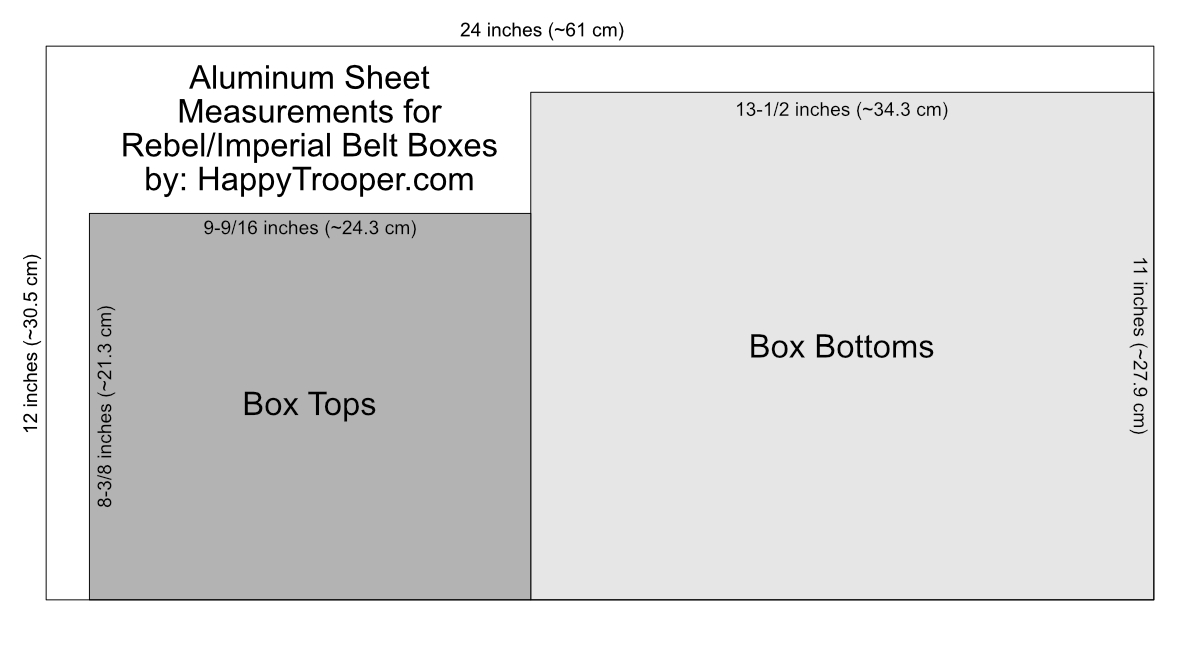
The aluminum sheet that I purchased was 12″ by 24″. I was able to cut all of the necessary pieces from a single sheet. This project will produce 6 belt boxes. If you are making Greedo’s 5 box set, you’ll have an extra box at the end of this project.
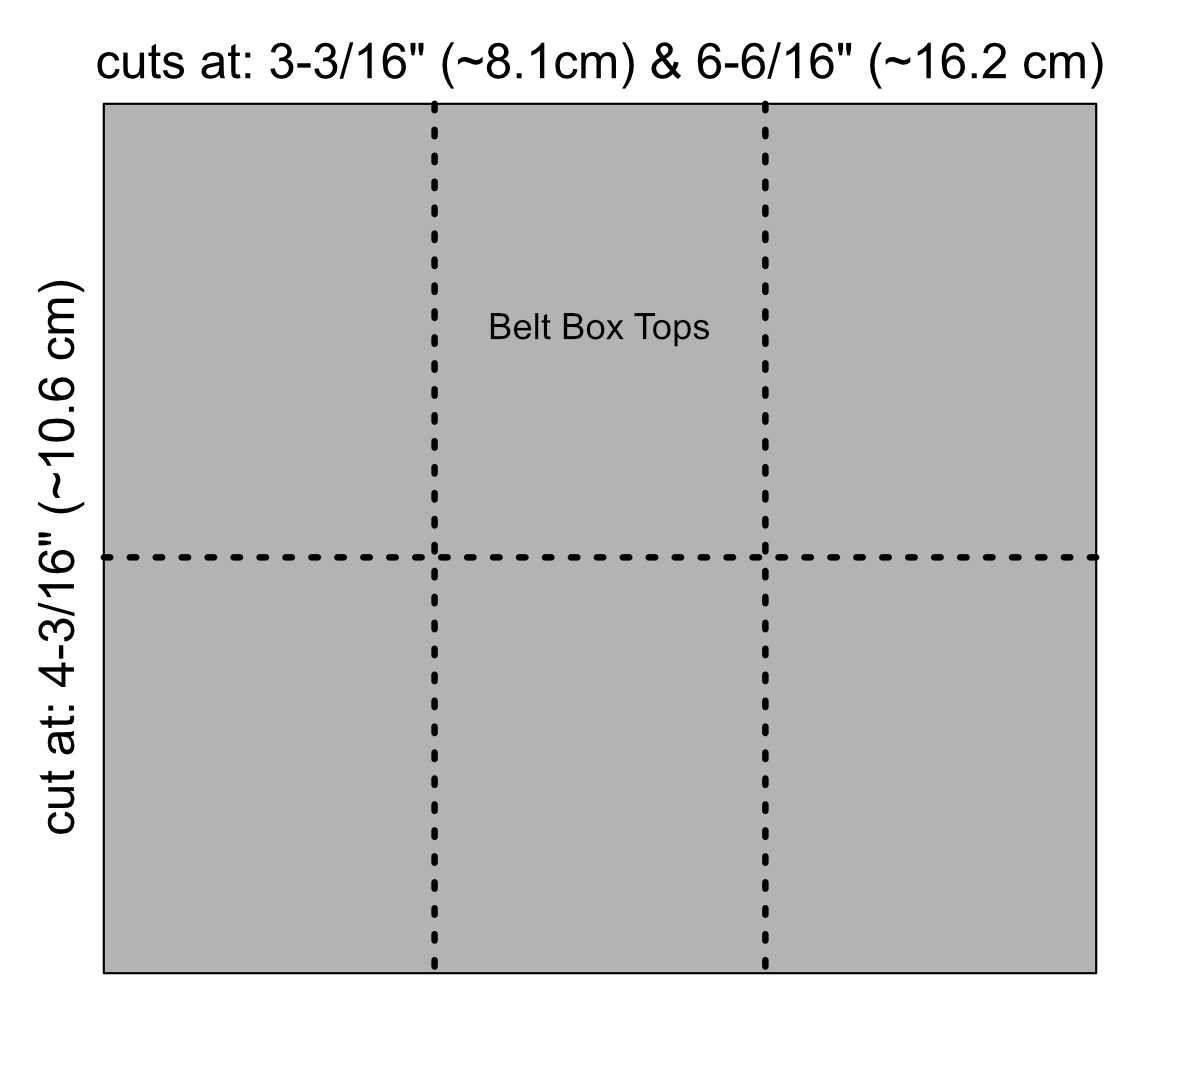
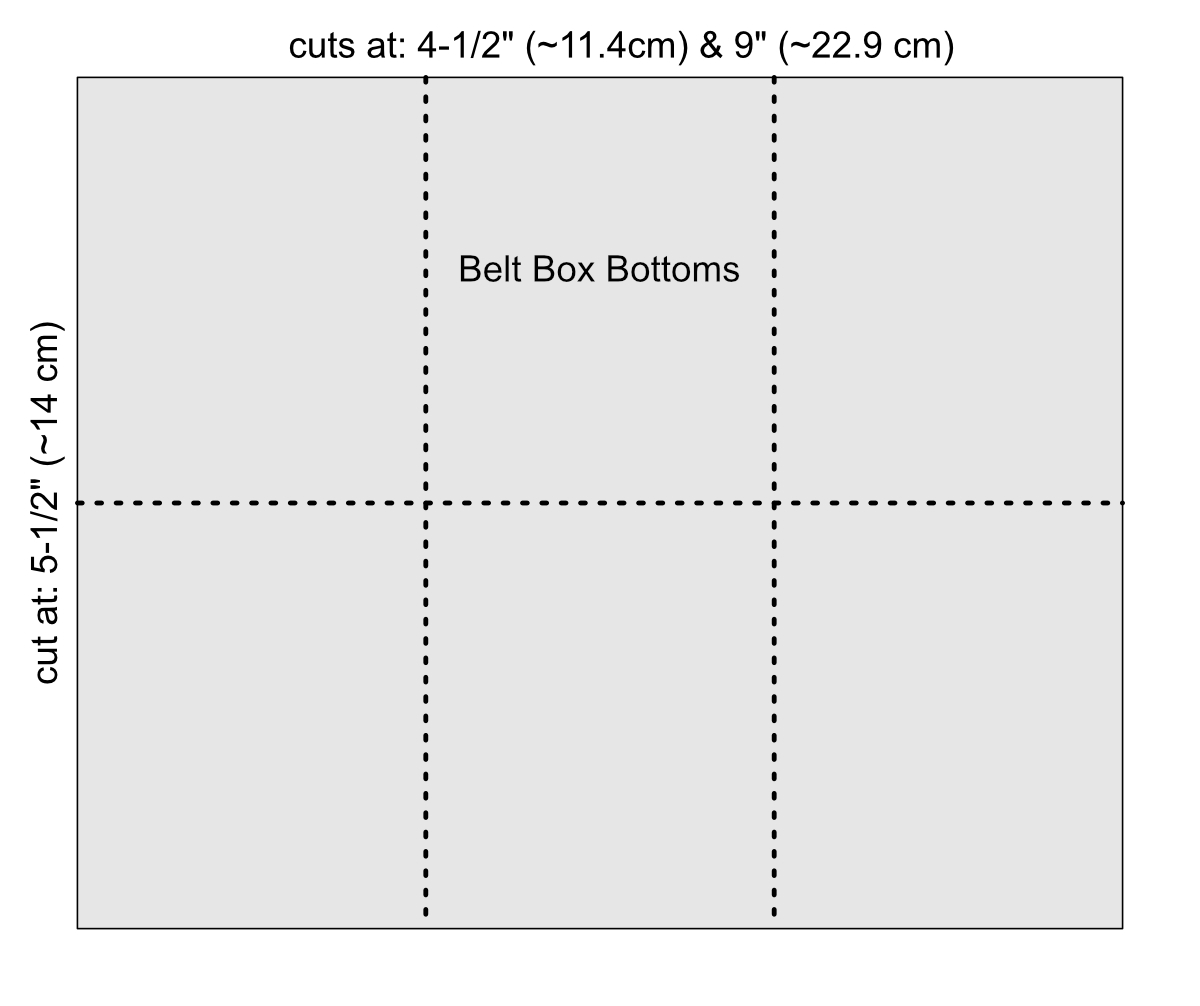
The image below shows the measurements needed to cut out the box tops (the smaller portions of the belt boxes), and the box bottoms (larger portion). Please note, this image is not a template, it is used to show the measurements needed for trimming.
Before getting started, your sheet may have a protective piece of plastic wrap on one side. Leave it on until the end of the project. I made all of my marks and cuts on the side without the plastic. This is the side that will be inside the box. The protected plastic piece will be the visible/outside of the box.
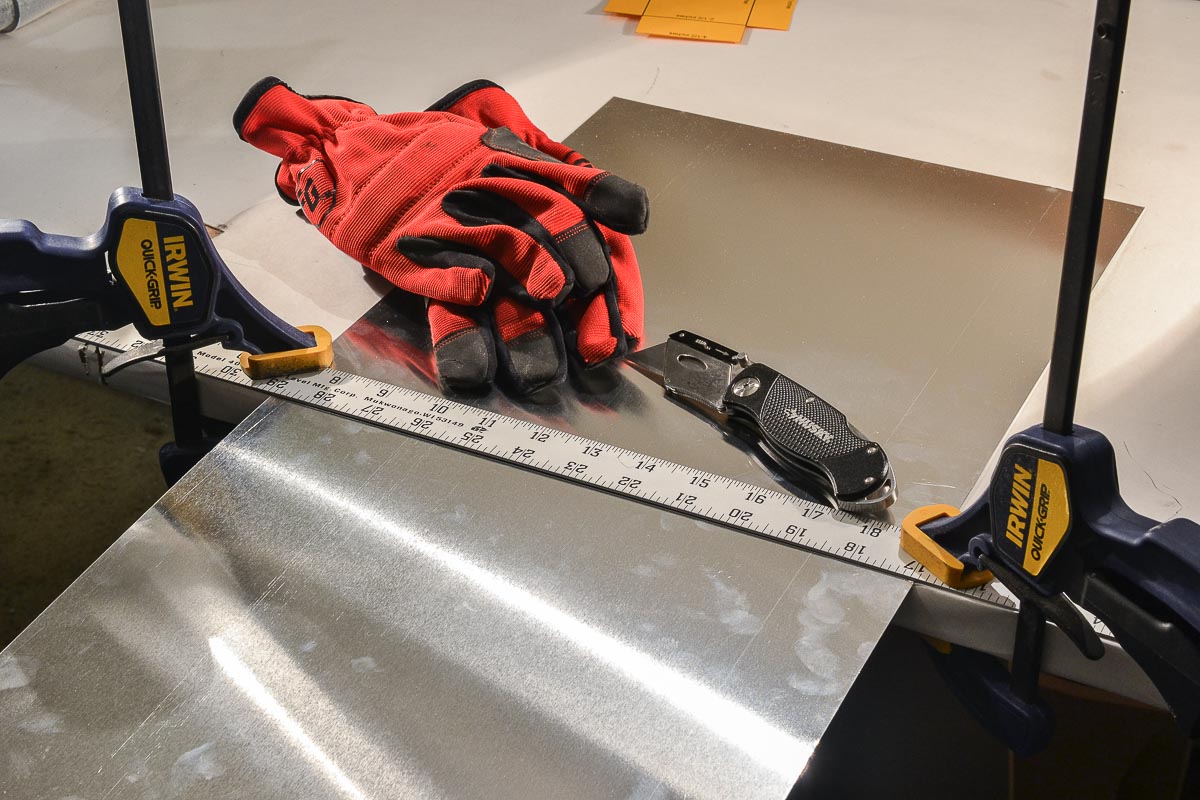
I used a scriber tool to make my initial marks and cut lines. The line from the scriber was easier to see over a pencil, and it won’t wipe off. It also gives the utility knife a groove to follow. This following image shows my initial measurement for the box bottoms. I marked the bottom and the top of the sheet at 13-1/2 inches:
Next, I used the scriber, and a metal straight edge to mark the cut line:

To make a straight cut, I lined my cut line up against the edge of a table, placed a metal straight edge on top, and clamped it down. I made about 10 passes with a utility knife to get a deep groove in there. Use a sharp blade, and let it do its job. No need to apply too much pressure. Just stay in a straight line. If you stray, no big deal…this is the inside of the box that won’t be seen. Use some utility gloves to protect yourself from the blade and sharp metal edges. Get the table edge and metal straight edge aligned as best you can.

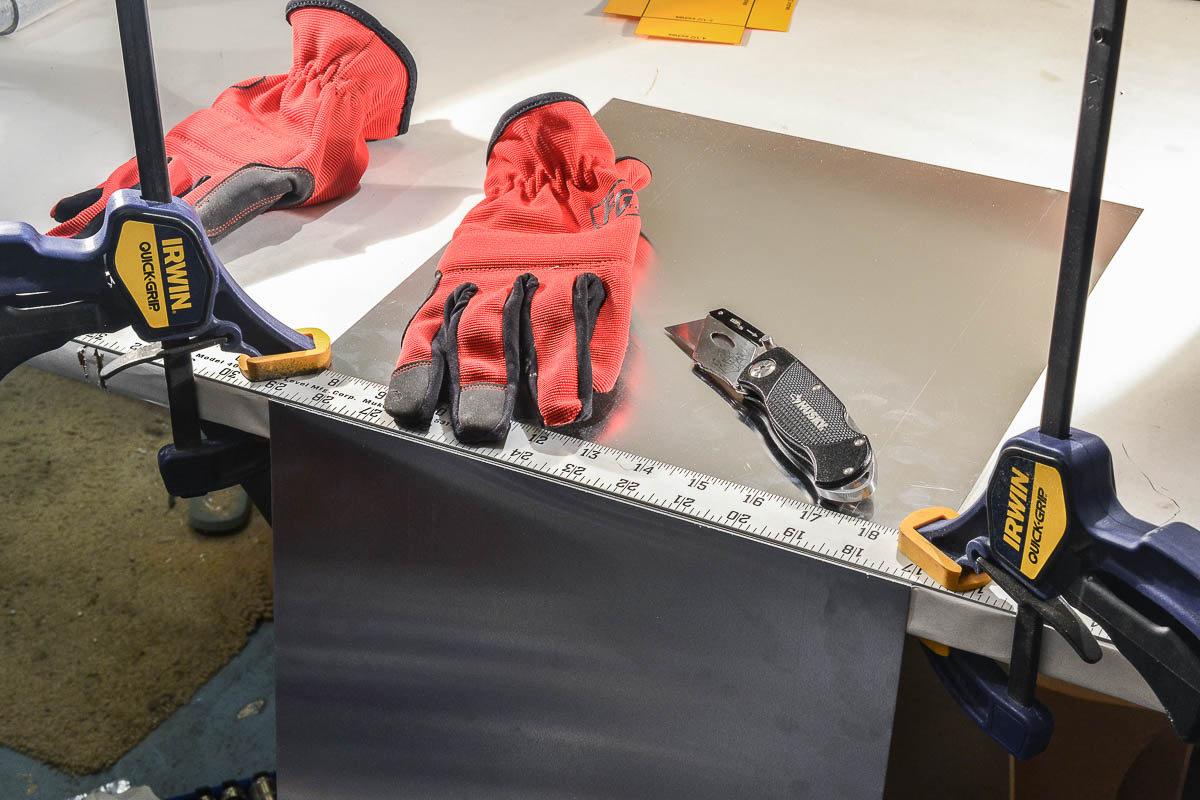
After 10 passes, keep the clamps in place, hold the middle of the straight edge down, and gently bend the sheet downwards. You may need to bend it up/down 3-4 times. It will eventually snap, leaving you with a clean & straight line. You can then cut the protective plastic holding the 2 pieces together.
Now that you have the box top and bottom pieces trimmed, you can begin marking up the next set of cuts. The images below show the dimensions (click to enlarge). Again, these images are not templates, they are used to show the measurements needed for trimming.
After making the necessary cut lines with your scriber/pencil, repeat the exercises above by aligning the cutline against the table edge, and securing the straight edge on top.
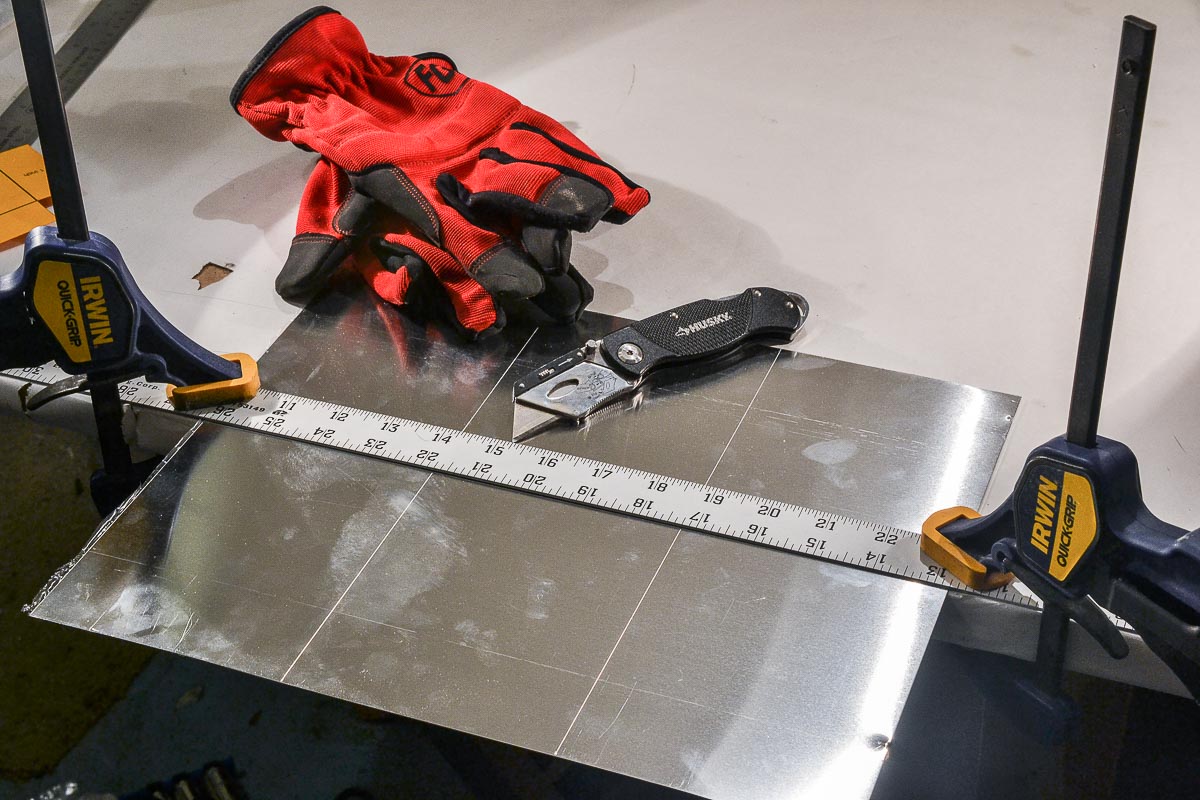
After ~10 passes, gently bend downwards at the cutline while holding the straight edge in place. Repeat this process for all remaining cuts. Rotate your utility blade if needed.
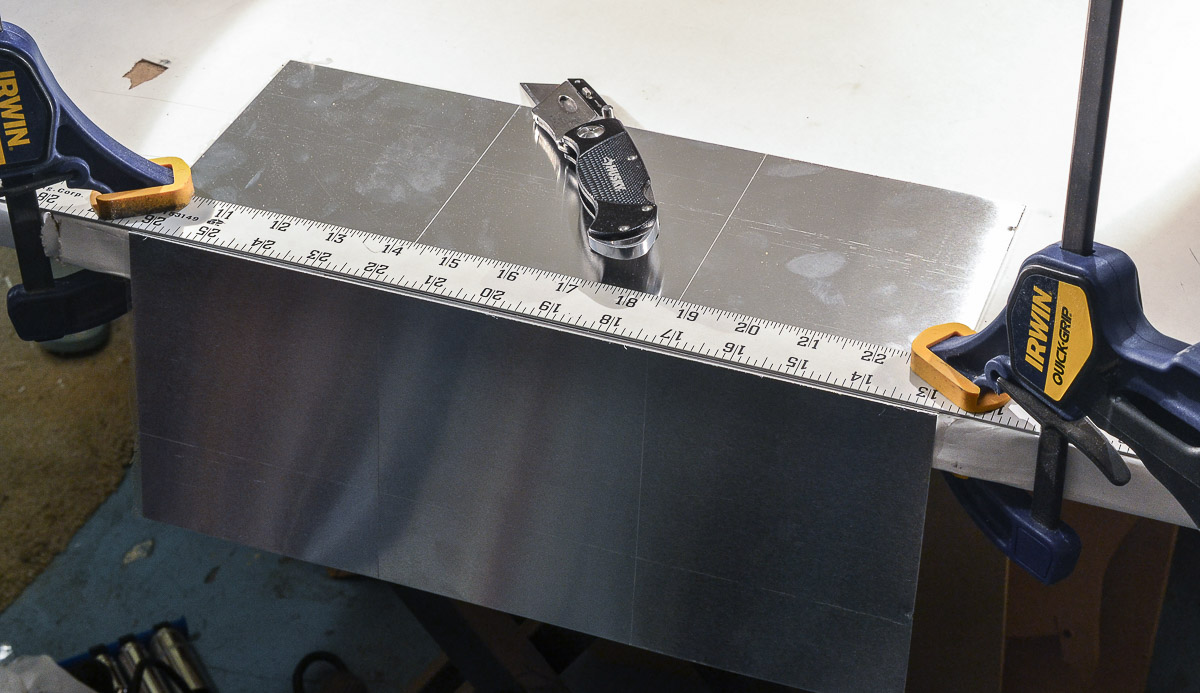
At the end of this exercise, you should have 6 flat box tops and 6 flat box bottoms. Now is a good to print out those box templates on card stock paper. Card stock is preferred over regular paper because it is much stiffer and will help when drawing cut lines against the template. The template zip file contains letter size paper and A4 size paper printouts. I did my best to include metric measurements as well. After printing, please cut the corners off of each template, designated by an “X”.

Box Bottom Assembly
Place some painters tape on the template to keep it secure.
Place the box bottom template on top of one of your 6 pieces of aluminum sheet. Use a scriber/pencil to draw cut lines at the corners. Repeat for all 6 sheets.
Using straight tin snips, begin cutting along the lines. Your sheet will bend, do not panic. You can easily straighten it back out with the hand seamer.
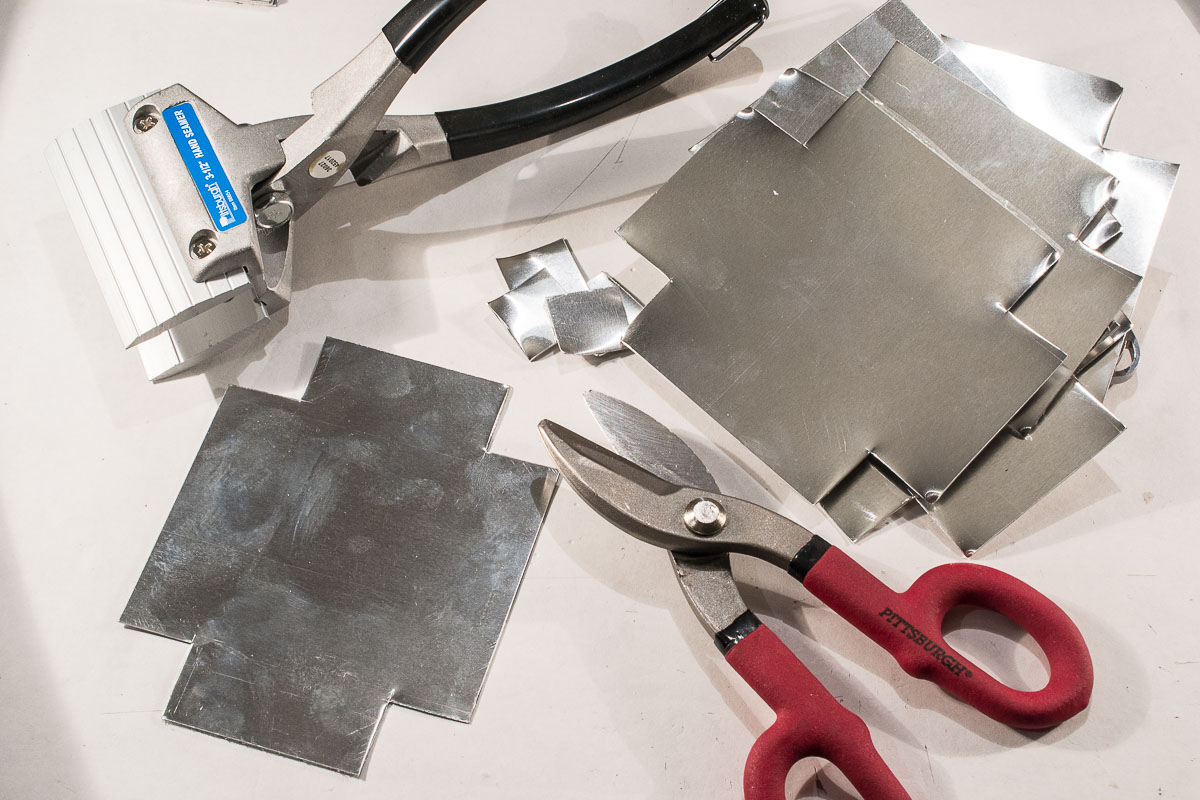
Grasp the short side of the box bottom with the hand seamer. Place the aluminum sheet flat on the table with the plastic film that’s protecting the aluminum face down against the table. Bend the short side up to just shy of 90 degrees. You may need to leave a few degrees to bend the long end in the following step. Do utilize the table to get a clean bend. If you attempt to bend while simply holding the aluminum sheet with your hands in mid-air, you will not get a nice bend.
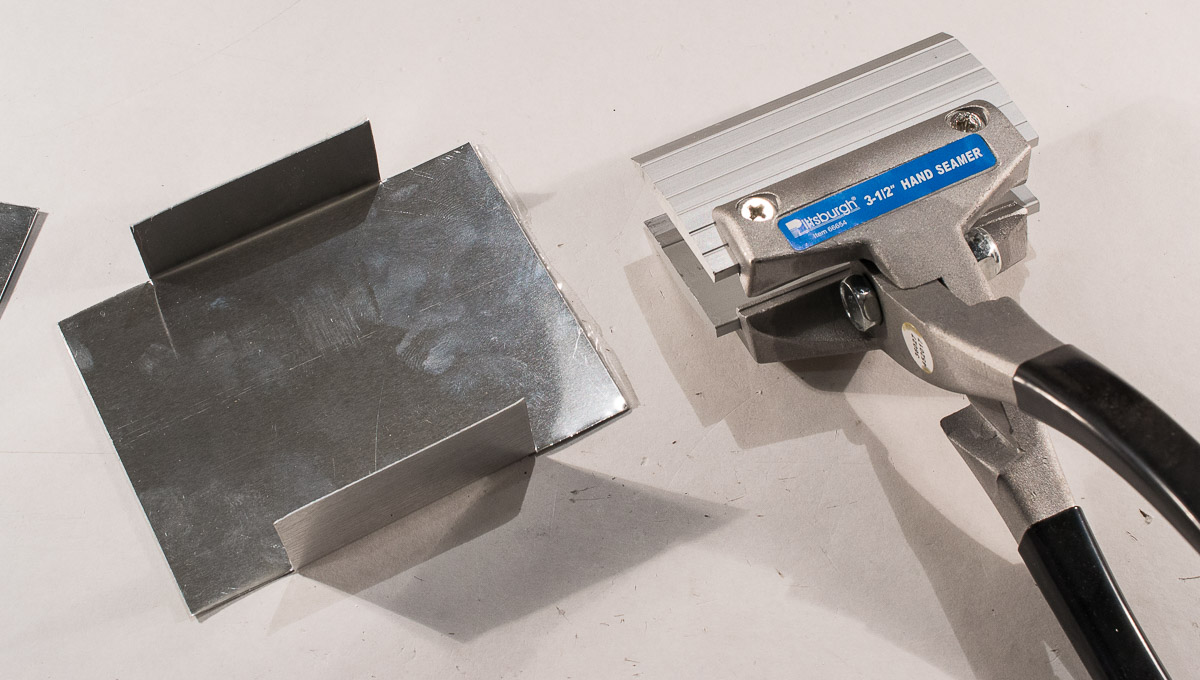
You guessed the next step, bend the long ends up. You can make any adjustment bends by hand now that the seamer did the heavy lifting. Once you have completed the bends on all of the box bottoms, set them aside.
Box Top Assembly
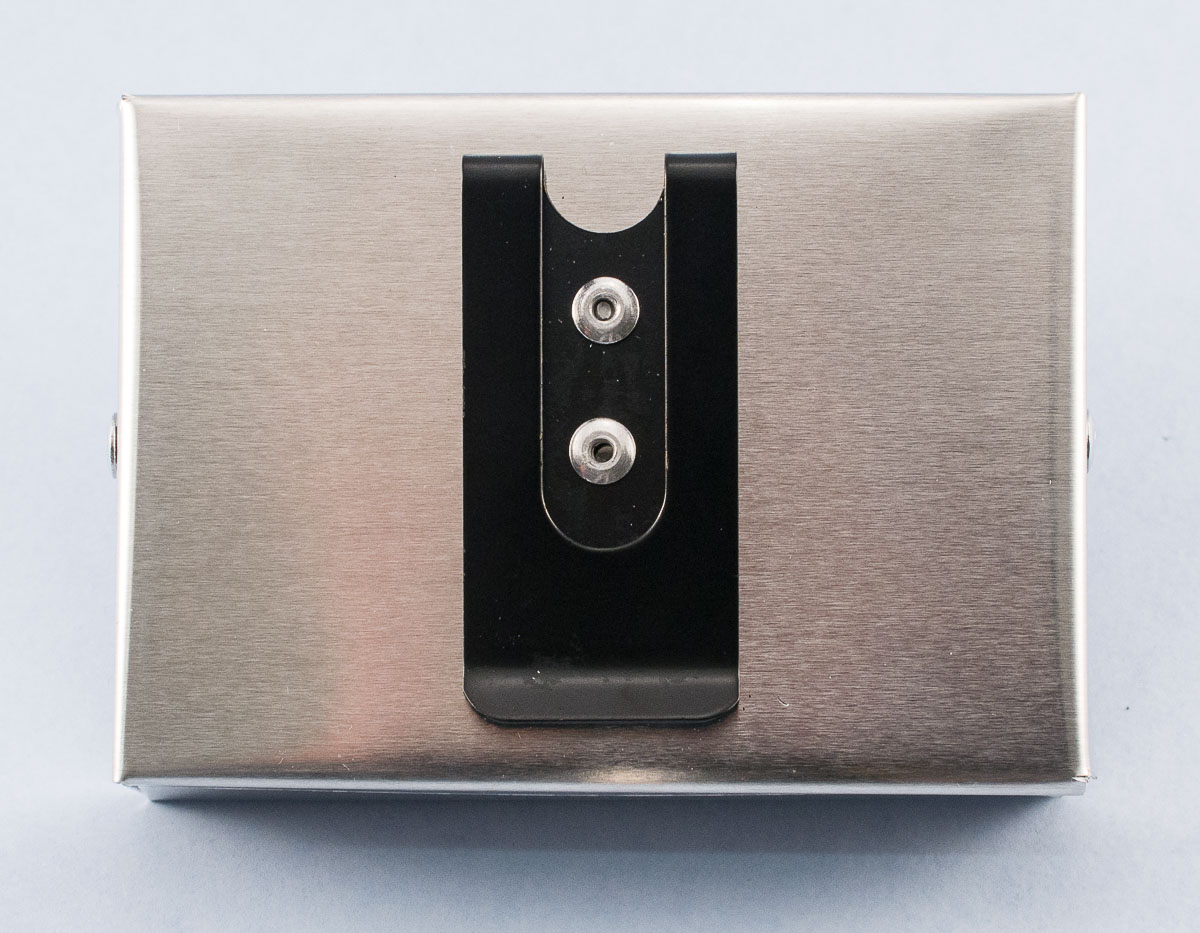
Because there are many options for the belt clip, I did not include any drill target marks. Also, some of you may be mounting these vertically. Because I’m going to use these on Greedo’s belt, the boxes will be placed horizontally. Place the box top template on the table and mark your drill target marks with a pencil or Sharpie.
Place the box top template on top of a box top aluminum sheet. Use a scriber/pencil to mark the cut lines on the corners. Use a center punch to tap a drill target mark for both the belt clip and rivet holes on the sides. Using a center punch is highly recommended. It will make your drill bit stay in place. Without a center punch mark, your drill bit may slip…A LOT.
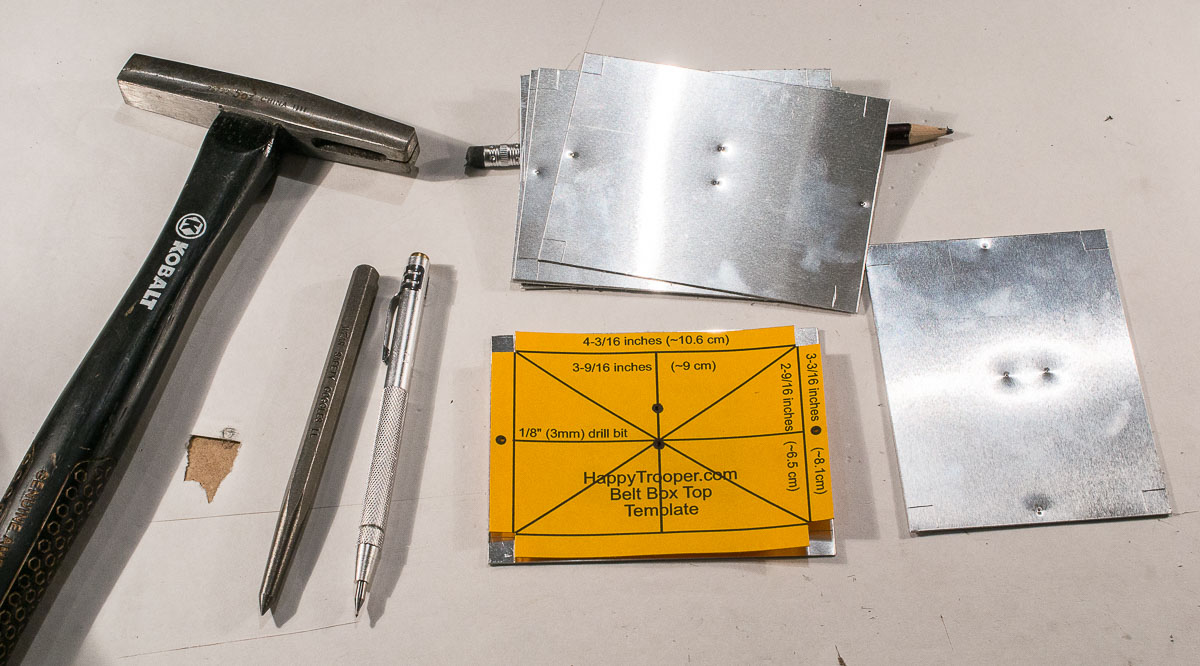
Trim the corners with tin snips, straighten with the hand seamer if needed. Use a 1/8″ (3mm) drill bit to drill out the belt clip and rivet holes on each sheet.

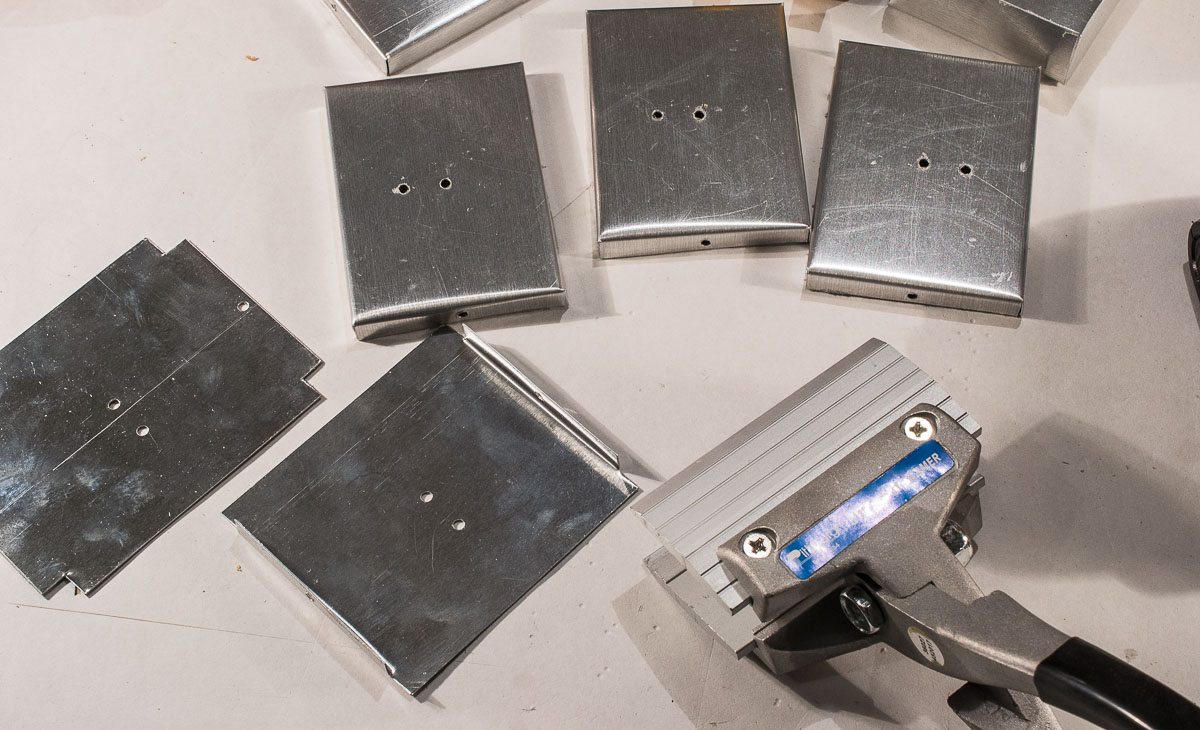
Starting with the short ends, use the hand seamer to bend the ends. Again, remember to 1) place protective plastic film side of the sheet against the table and 2) use the table as a flat surface to make the bend. Once the short ends are bent into place, bend the long ends.
Final Assembly
Because all of the measurements and cuts are done by hand, there is bound to be some minor mis-alignment. Number the insides of the tops and bottoms so that each has a partner. Place the numbered top with its corresponding bottom, and mark the side rivet hole with a Sharpie. Do this for all 6 boxes.
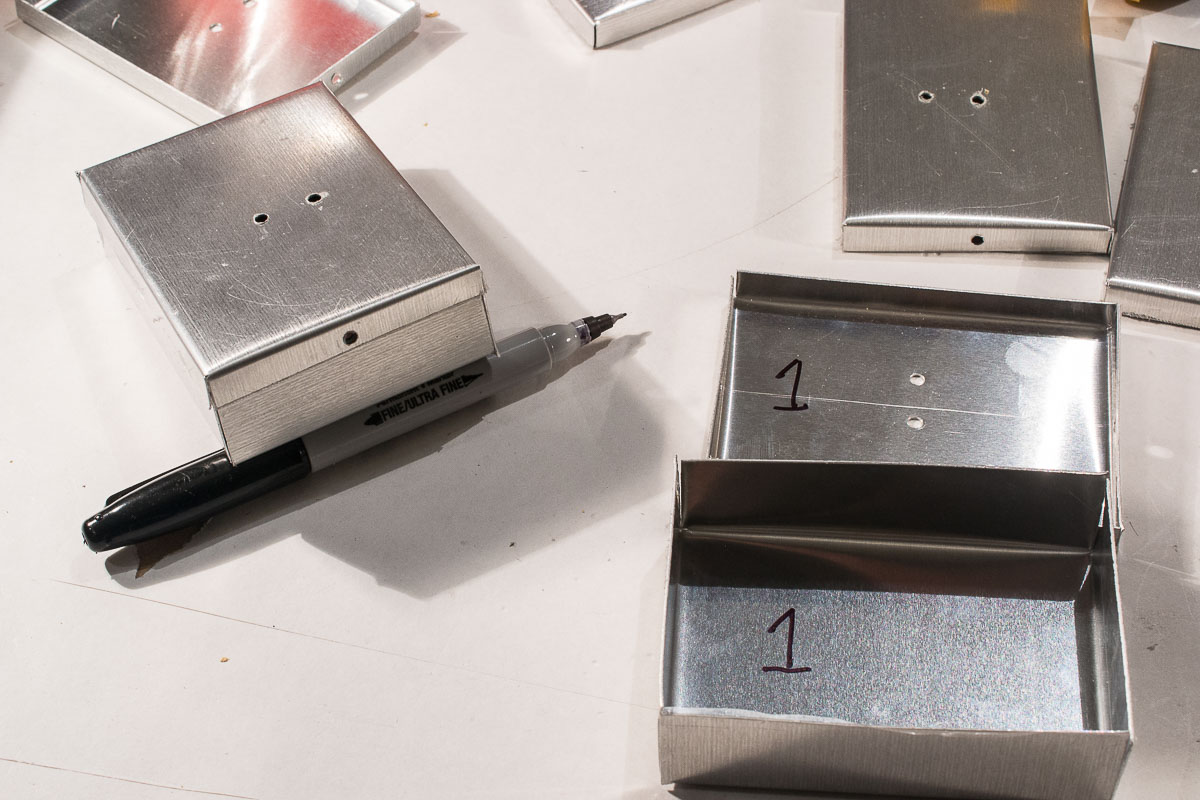
I used some scrap wood that had a length of 3-1/2 inches to support the bottom box. The wood helped keep the shape of the box when 1) using the center punch to mark the drill target and 2) drilling the hole for the 1/8″ (3mm) pop rivet.
Remove the protective plastic film from the box tops and bottoms. Start securing the belt clips with pop rivets.

Secure the numbered tops with the corresponding bottoms, and fasten the side rivets with a riveter.
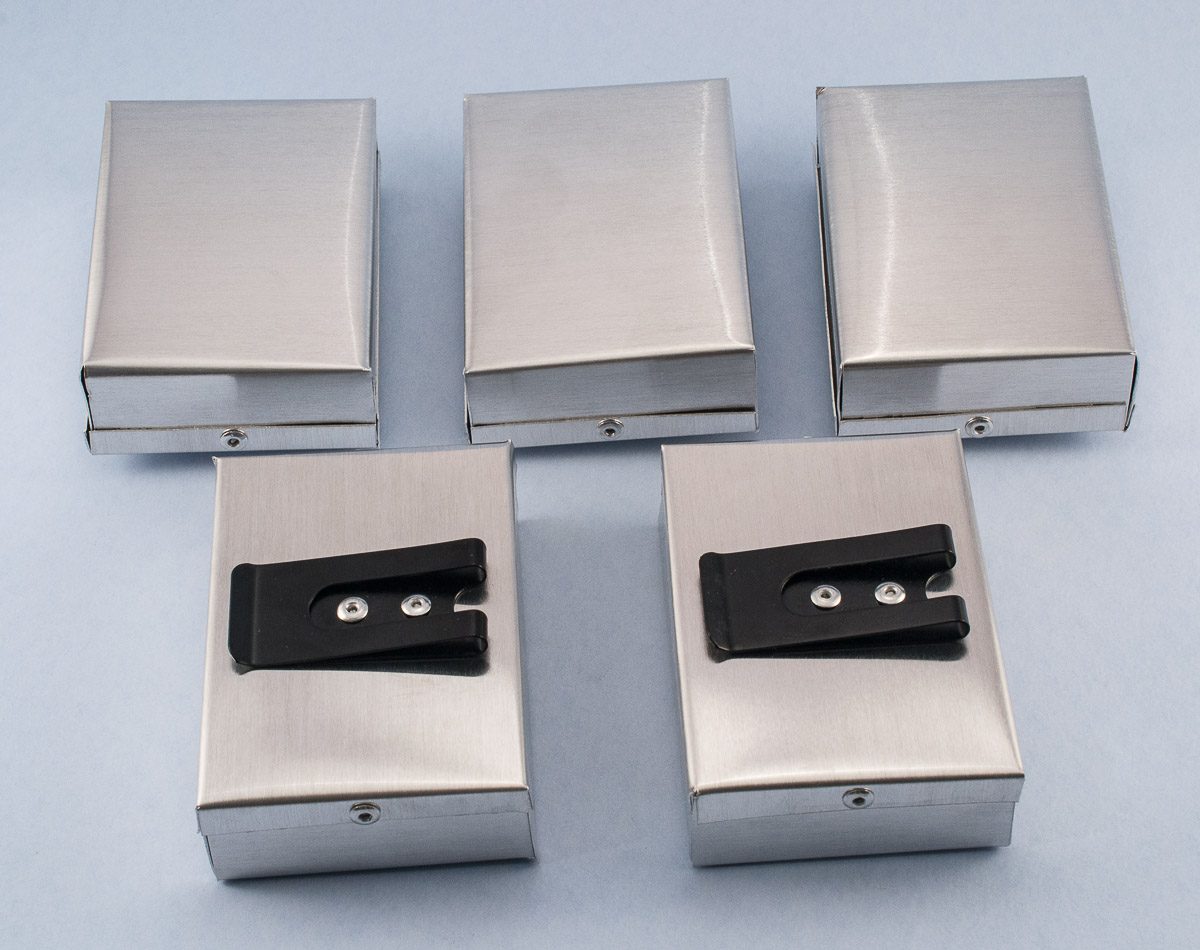
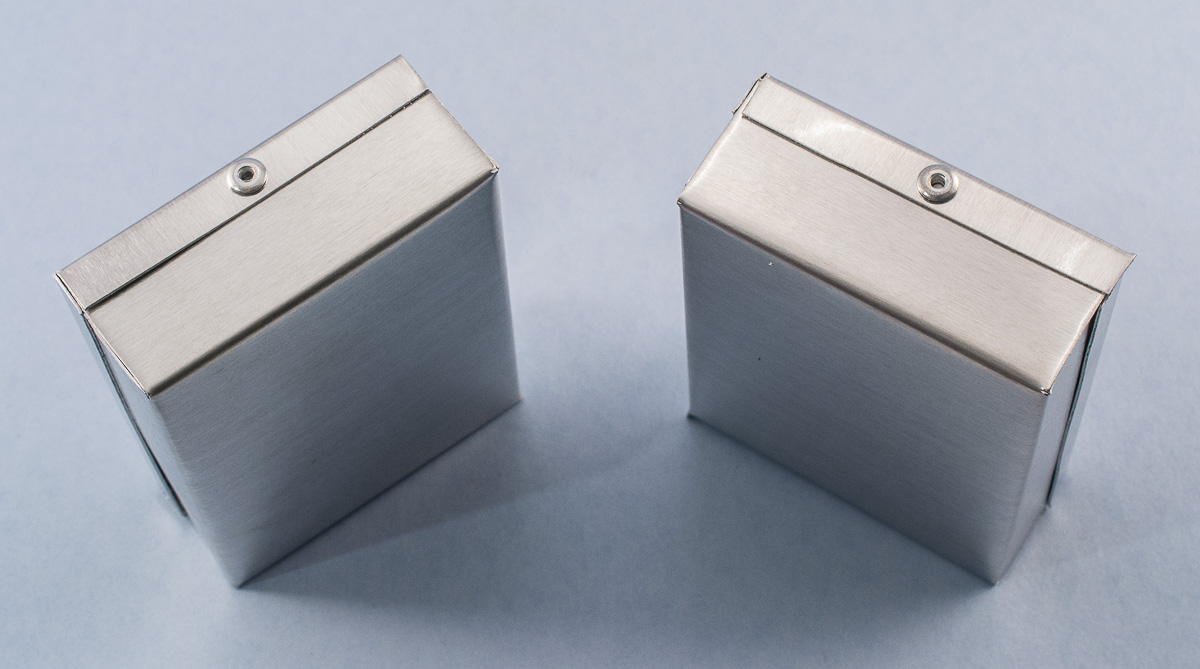
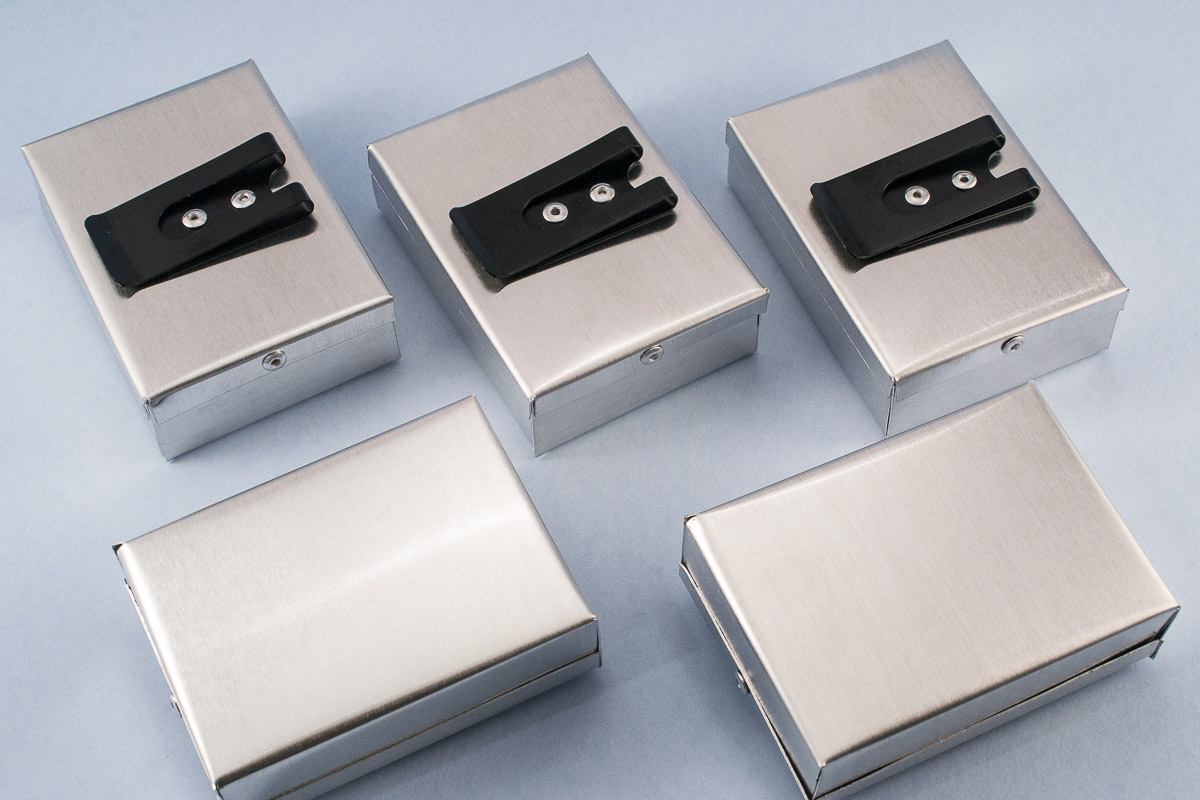
Finished Product
Let’s see those beautiful boxes once again: