

Previous Story
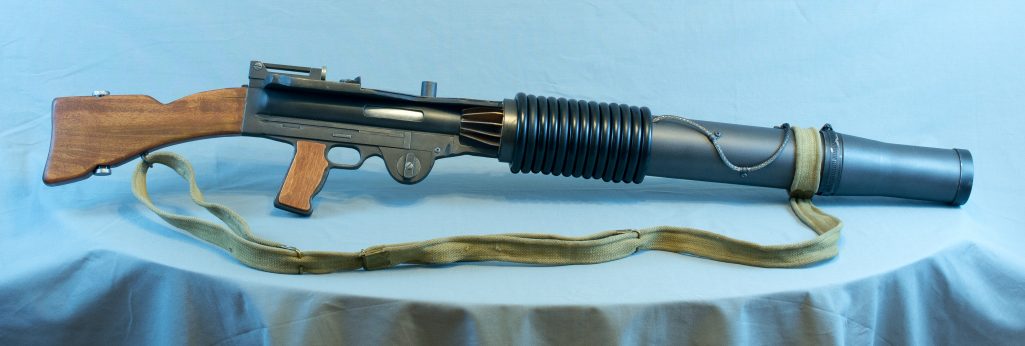
T-21 Light Repeating Blaster Scratch Build
I’m going to tell you up-front…this is NOT my design. I used blueprints provided by another fellow Sandtrooper: TK-2886 a.k.a PandaTrooper. He drew up an exceptional template for the T-21 and provided an easy to follow tutorial on MEPD.net. Big Sandtrooper salute to you PandaTrooper, thank you for the T-21 plans and tutorial!
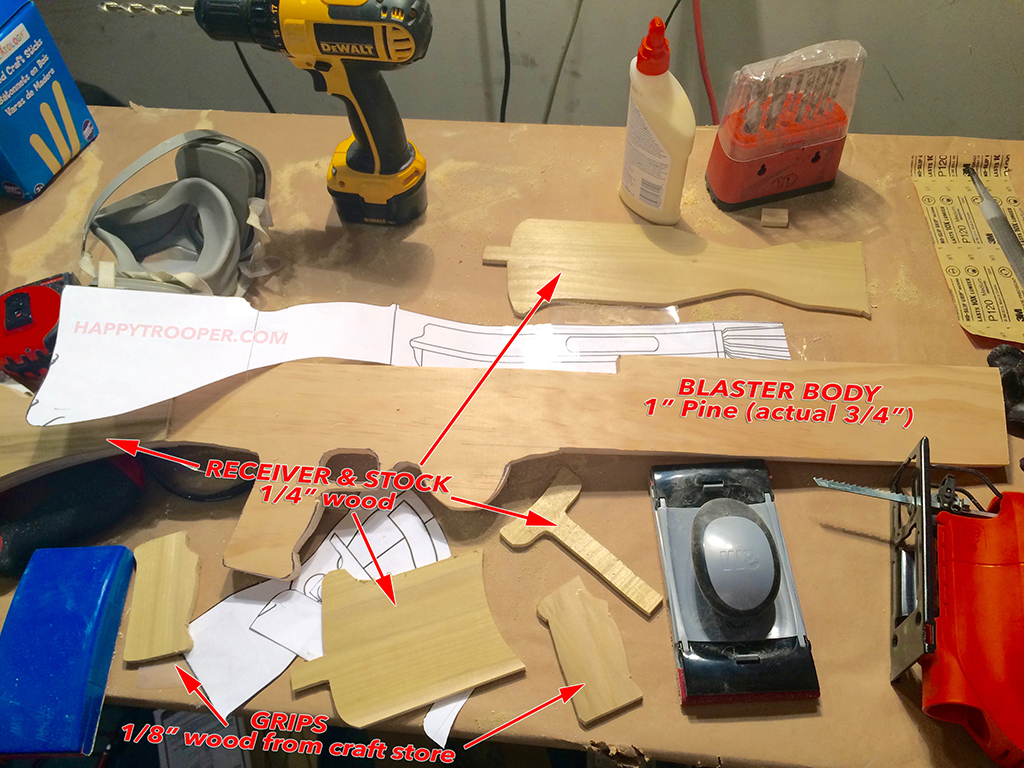
I followed the basic construction using PandaTrooper’s tutorial, however, I did make a few minor modifications to personalize mine. Because PandaTrooper’s tutorial was so good, I will not repeat the steps, instead, I will focus on the minor changes I made to personalize my T-21.
The first place I deviated from the plans was with the grips. 1/4″ wood was used for the receiver parts and the stock. I tried cutting the grips using the 1/4″ wood, but they felt a bit “chunky” when I test fit them on the handle. I went to Michael’s craft store and picked up some 1/8″ wood.
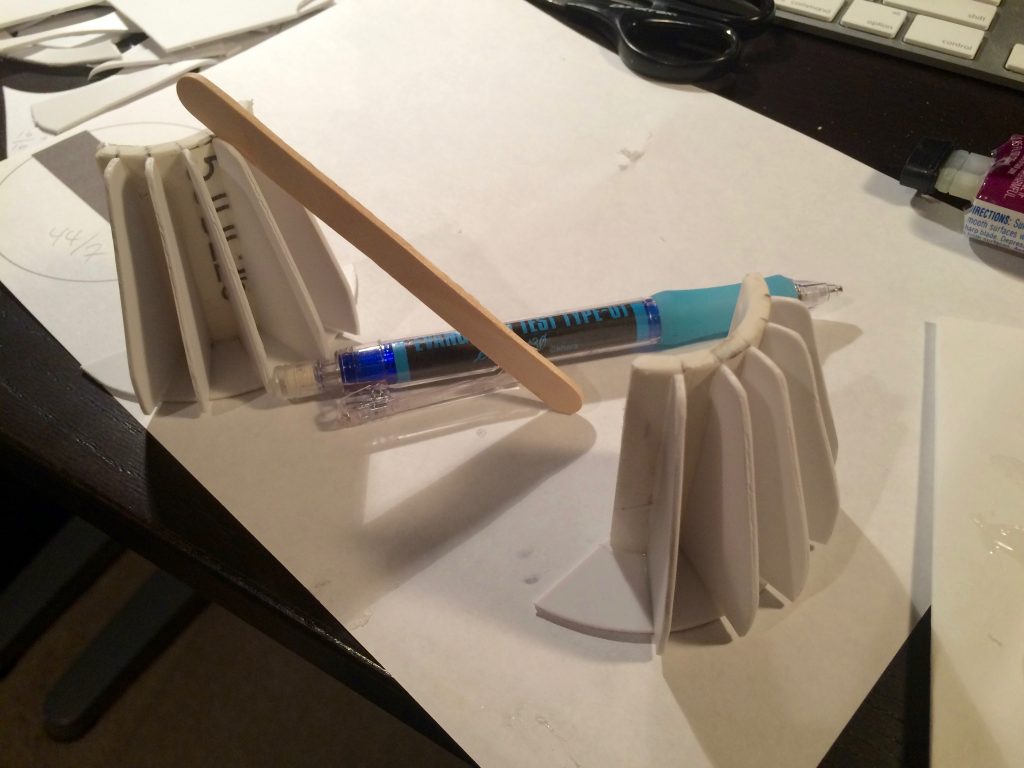
While the 1/4″ stock was being glued to the body, I worked on the cooling fins. Didn’t do anything different here, just providing the link for the cooling fins template, as it is located in a different part of PandaTrooper’s tutorial on MEPD.net
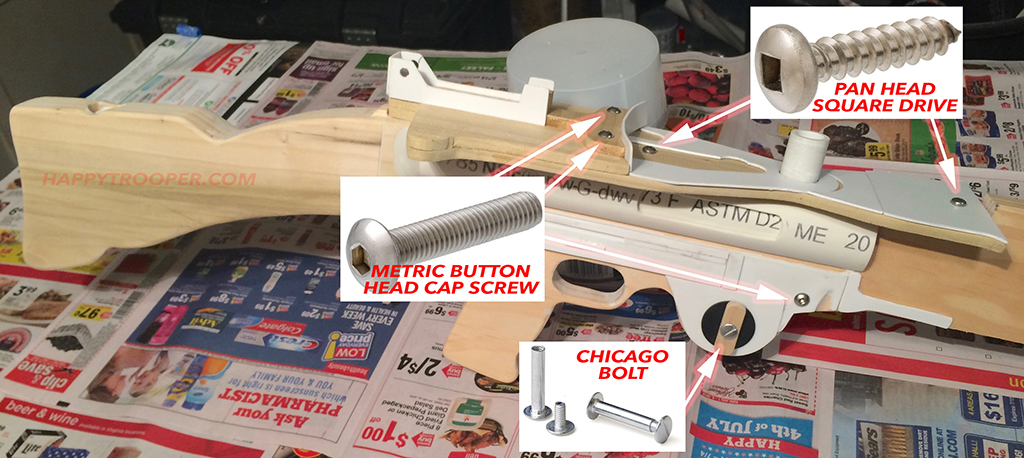
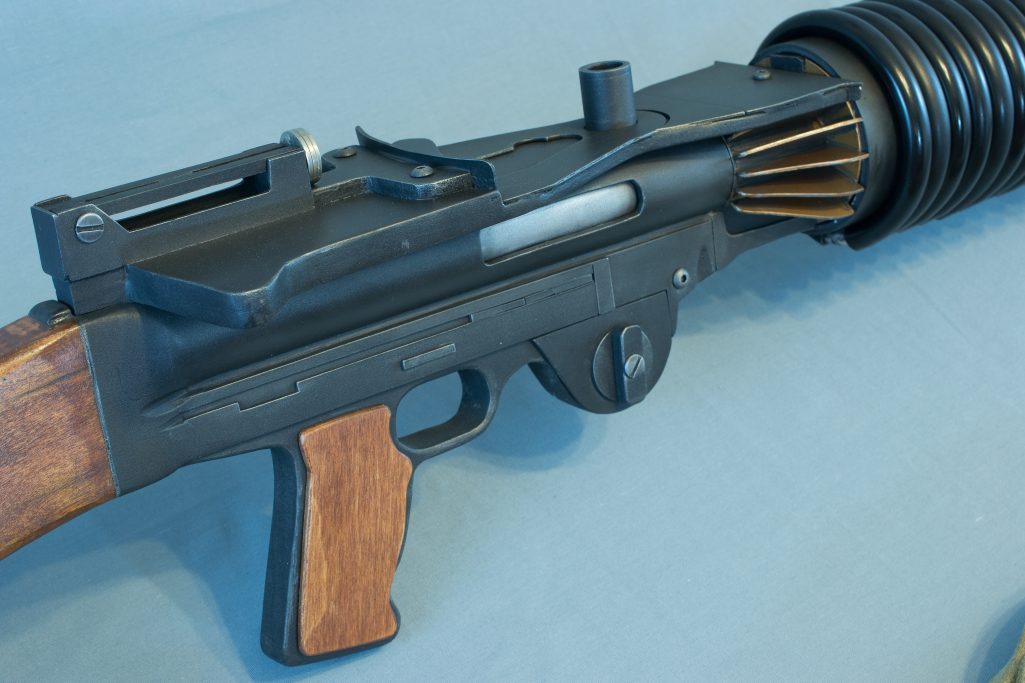
I also changed out a few of the screws. I really liked PandaTrooper’s idea of using a Chicago bolt for the rear flip-up sight, so I put another Chicago bolt at the bottom of the blaster (as seen in the image below). Instead of using pop rivets at the bottom, I elected to use very short Metric Button Head Cap screws. They are only used for decoration, I drilled out holes, put some E6000 adhesive in the hole, and then inserted the screws. Like PandaTrooper, I used 2 Pan Head Square Drive screws at the top of the receiver, for looks, and for securing the receiver.
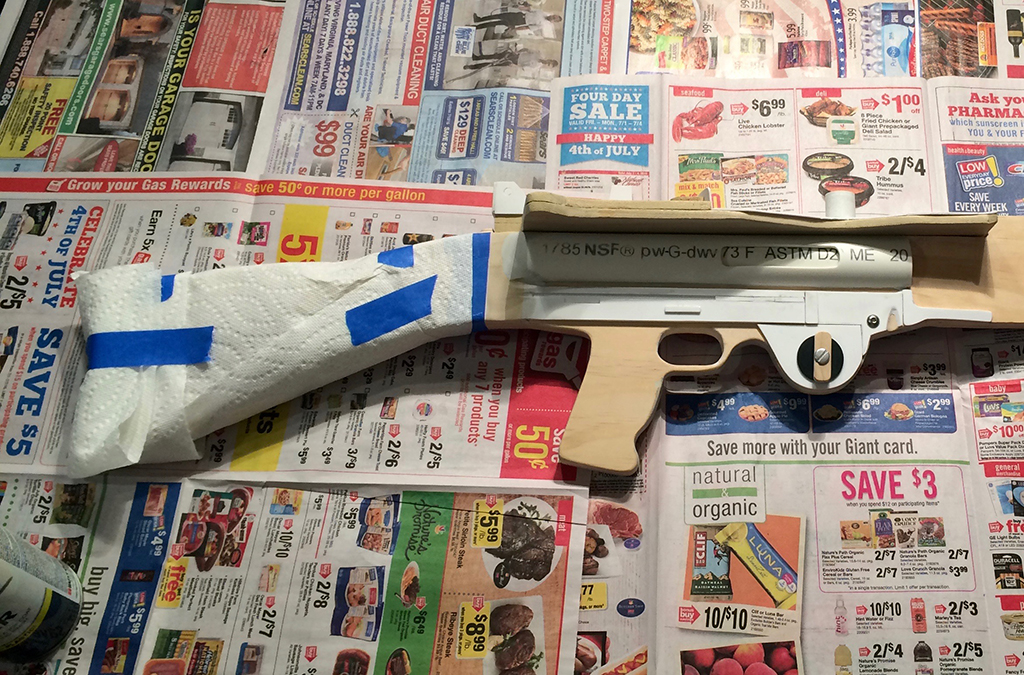
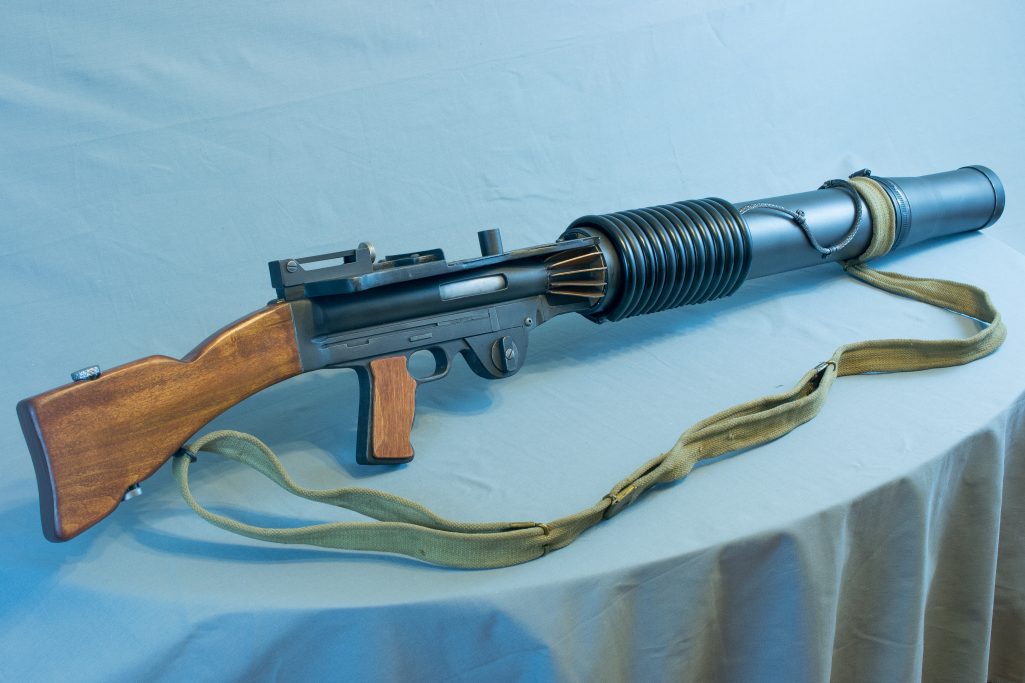
Test fit of the barrel:

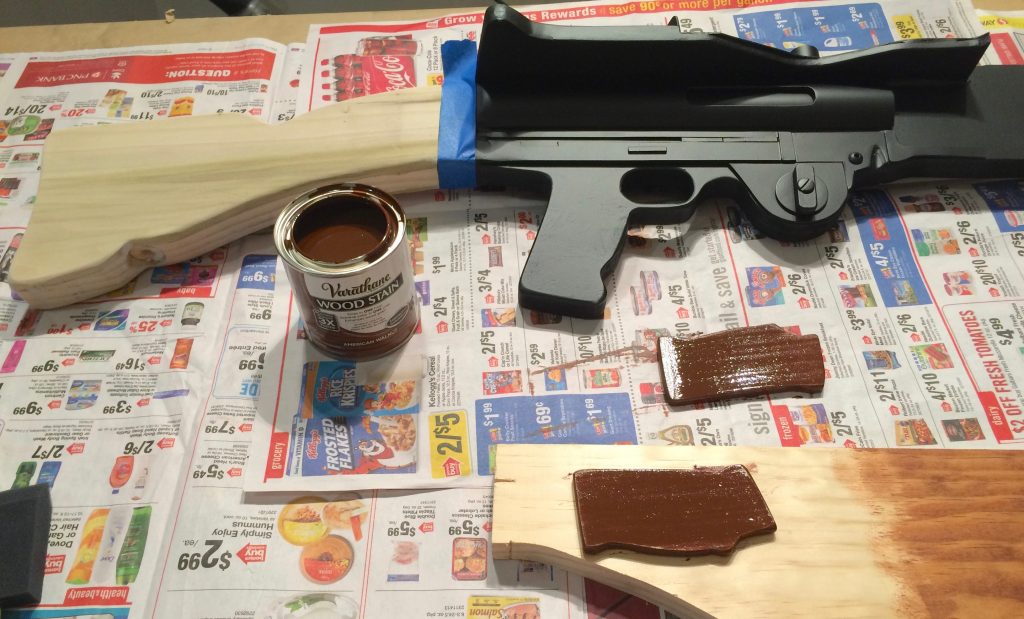
PandaTrooper painted his stock & grips with brown paint, applied some scratches, and some weathering. I wanted a natural wood grain finish, so I masked off the stock before I spray painted the main body flat black.
After the spray dried, I applied some Varathane wood stain in “American Walnut” to the stock and grips. The directions on the stain can were spot on. I applied the stain with a foam brush, waited about 2 1/2 minutes, then wiped it off with a paper towel. It left a deep, rich color, I only needed one coat. After waiting about 2 hours, I applied the first coat of satin polyurethane. I followed up with a 2nd coat a few hours later. I let all of that dry for 24 hours. Came back to the garage, lightly sanded the stock and grips with 800 grit sandpaper, and then applied the last coat of satin polyurethane.
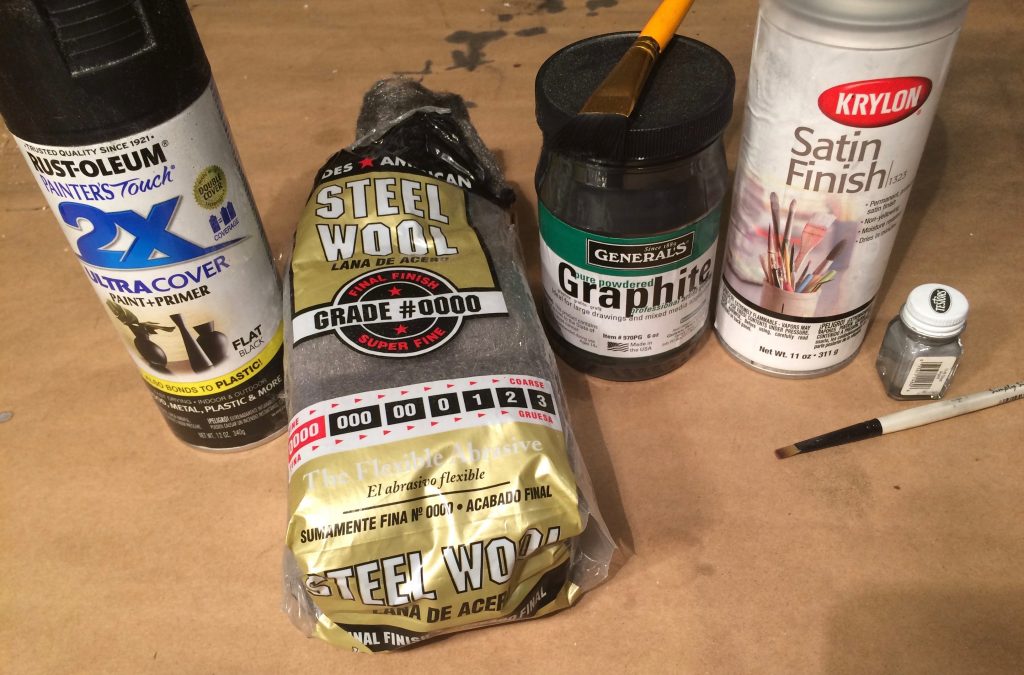
For finishing the blaster, I tried a faux gunmetal technique that I was reading about on therpf.com. For the areas that I wanted to simulate gunmetal, I gently went over the body with very fine 0000 steel wool. This apparently creates small crevices while minimizing damage to the finish. I then generously brushed on powdered graphite, and kept rubbing it in with the brush.
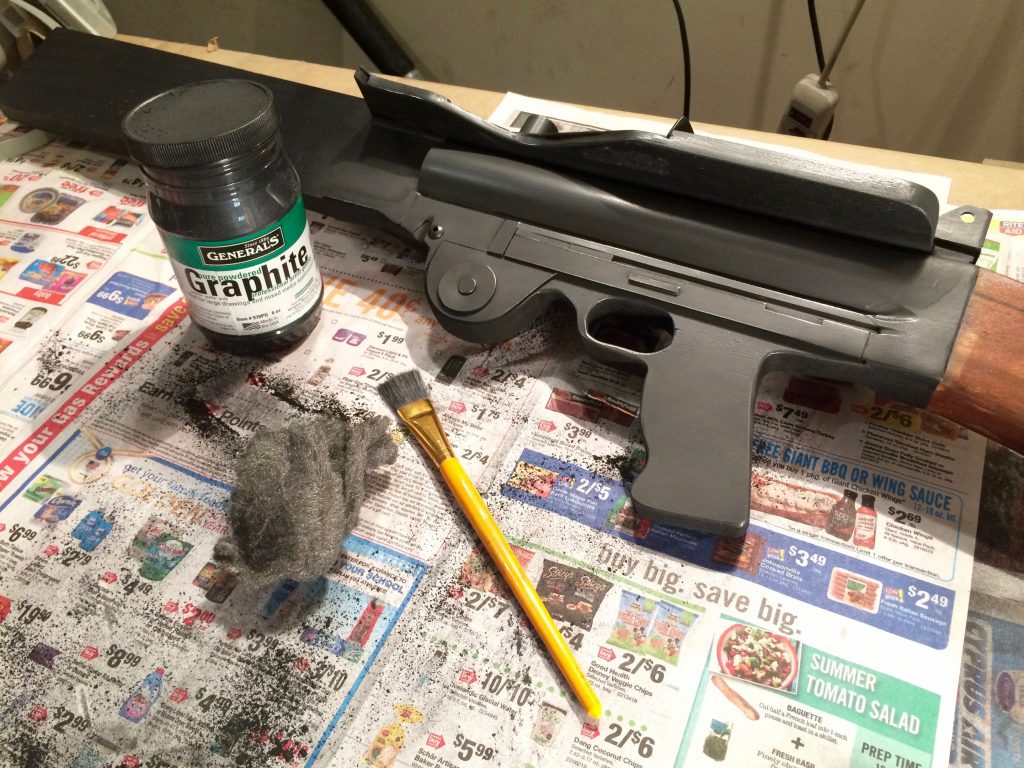
To seal it, I applied some Krylon clear in a satin finish. I am very pleased with the results. In a nutshell, the body and barrel were primed with flat gray spray paint (not shown), followed by 2 coats of flat black. After the black had ample time to cure, I rubbed it down with 0000 steel wool. Powdered graphite was then brushed on and rubbed in. The graphite was sealed with clear satin. To make those edges pop, I dry-brushed Testors silver enamel with a stiff bristled brush.
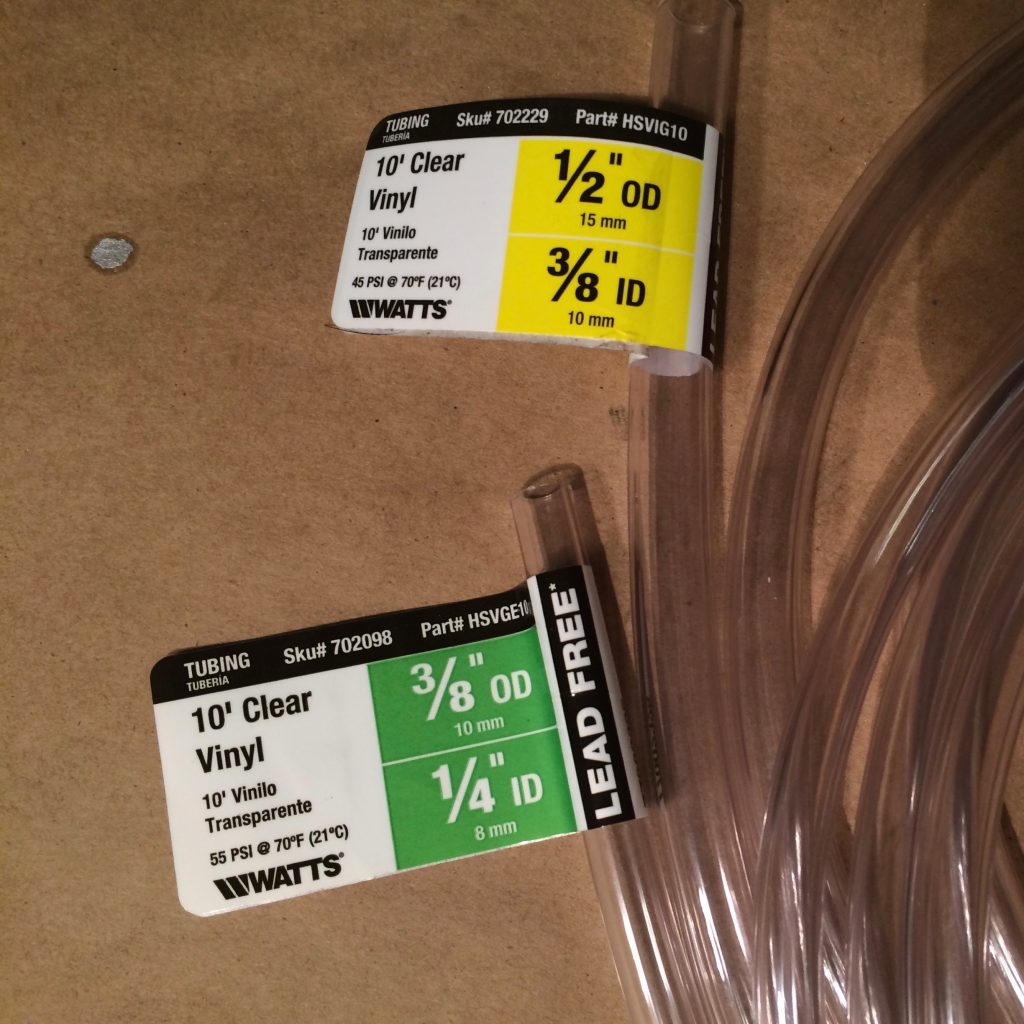
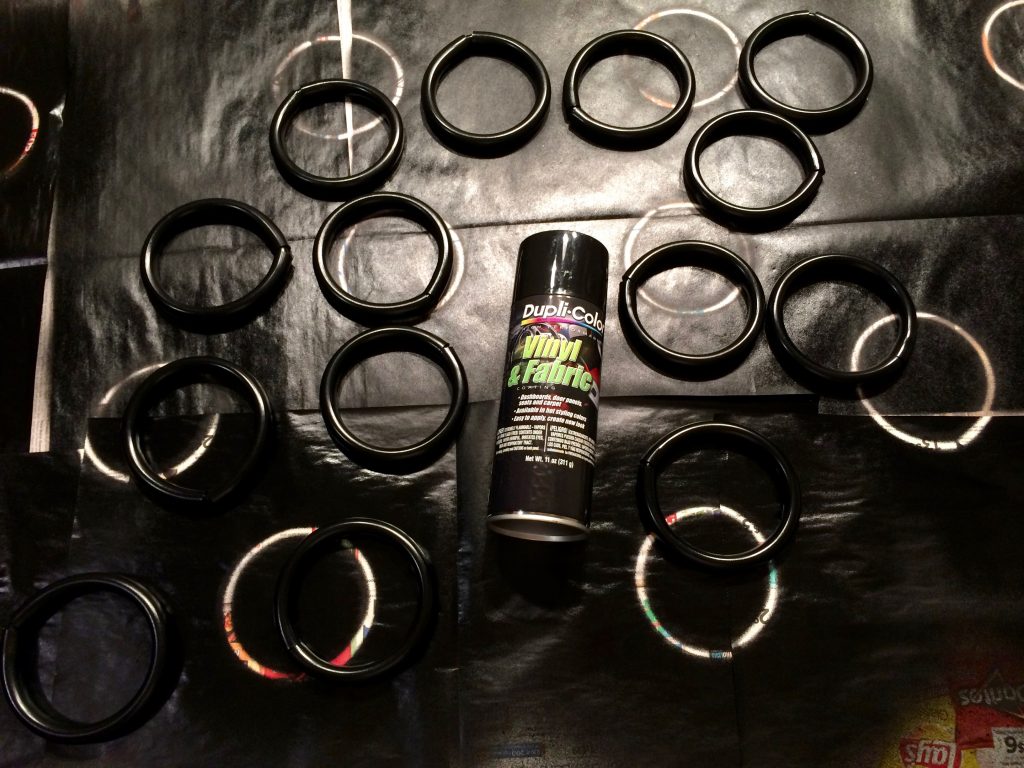
Wrapping things up, for the ribbing, I used 2 different types of vinyl tubing. For the outside, I used 1/2″ outer diameter (with 3/8″ inner diameter). To join the 2 ends of a ring, I cut about 2″ of 3/8″ outer diameter (1/4″ inner diameter) to use as an insert/connector. I needed about 14 feet of the 1/2″ OD tubing. A single role of the 3/8″ OD tubing was more than enough.
Once the rings were cut, I roughed them up a little with 400 grit sandpaper. I then applied Dupli-color vinyl spray paint in black. I tried some Plasti-Dip spray as a test on one of the rings since I had some left over from coating the inside of my Sandtrooper bucket. Even with the surface roughed up on the vinyl tubing, the Plasti-Dip would not bite at all. The Dupli-color was awesome, it cured rather quickly, and seems to have a strong finish. The Dupli-color was available at my local auto-parts store.
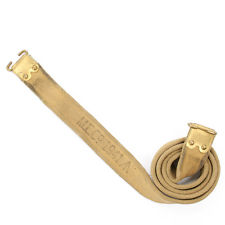
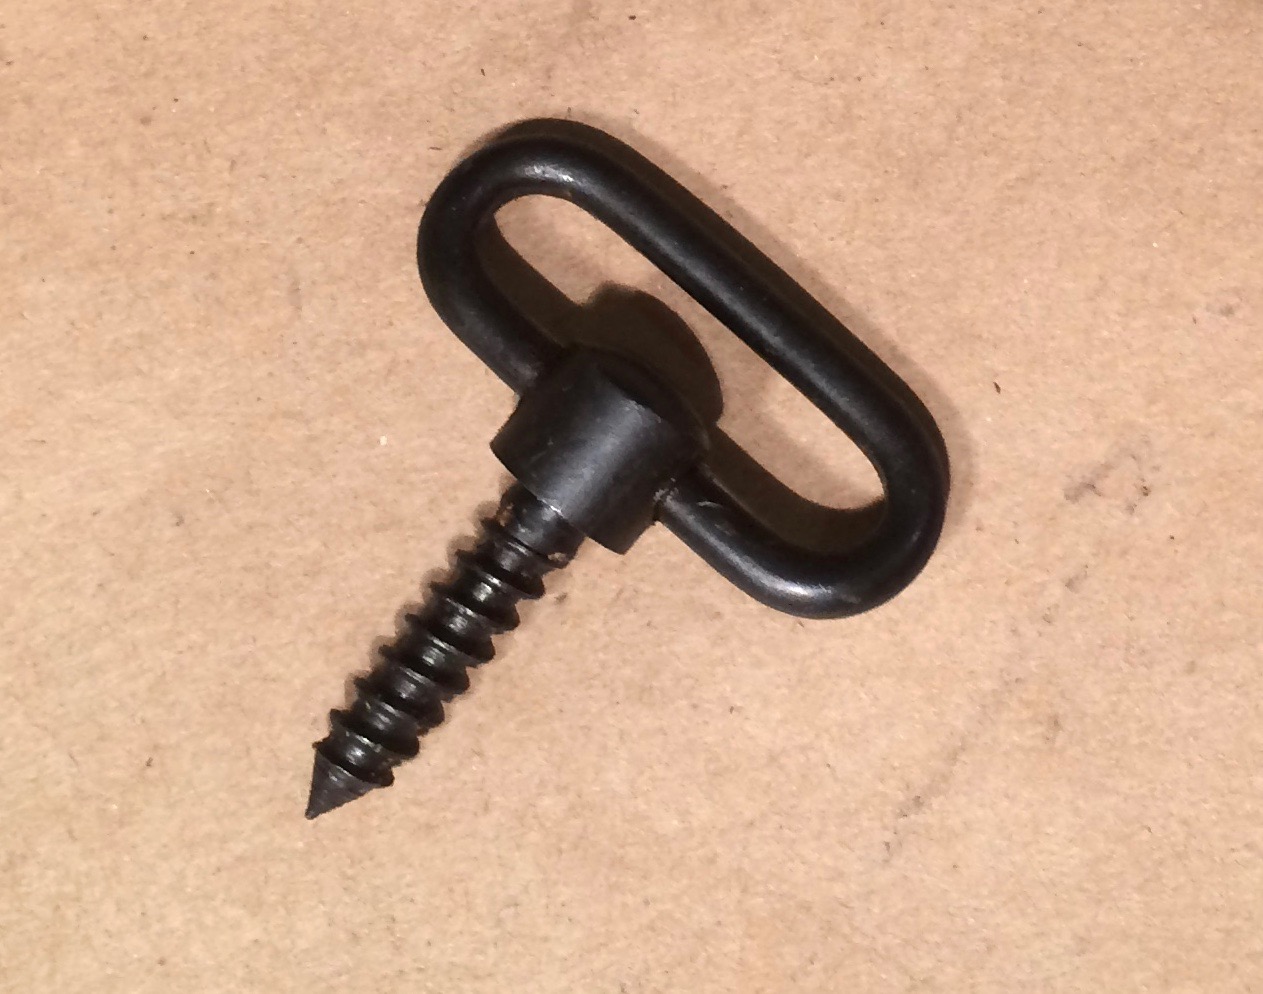
For the sling, I picked up 2 Lee Einfeld canvas slings to join together, and a sling swivel that could take a 1 1/4″ sling (the width of the Einfeld). I found both of these items on eBay.
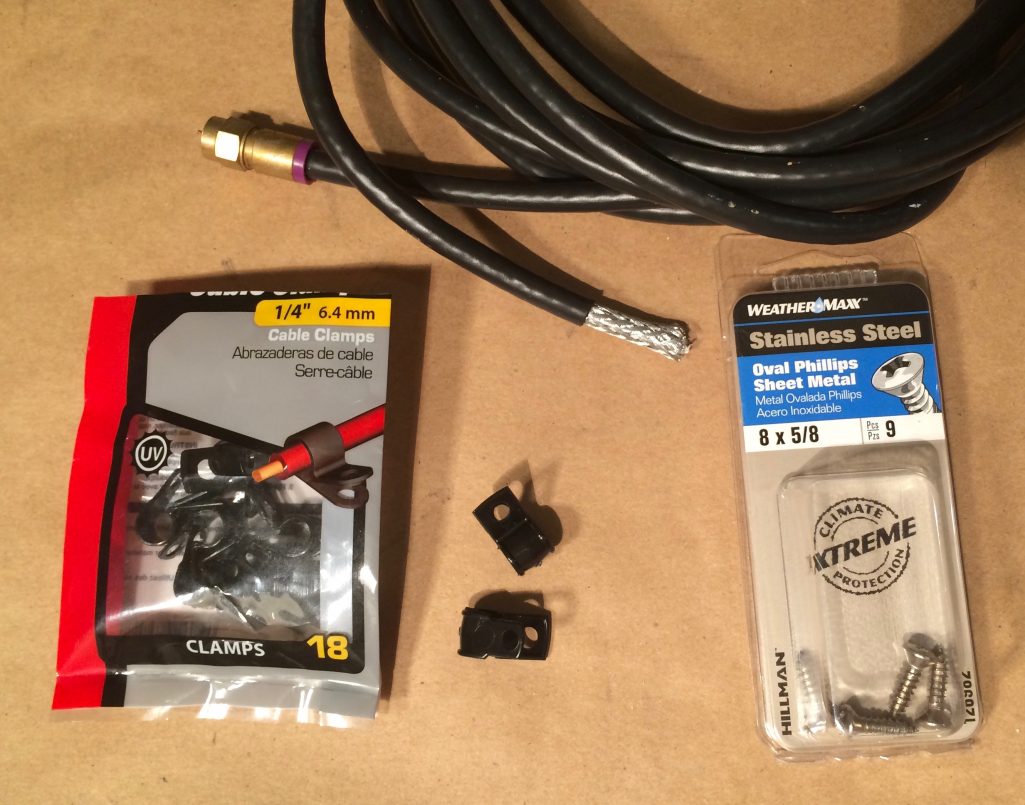
I’ve seen other T-21 builds, and I really like the look of the cabling that is wrapped around the barrel. I used some old coaxial cable that I had sitting around, stripped it, and used the inards to wrap around the barrel. The cable was dusted with black spray paint. I drilled out 2 holes in the barrel, placed the ends of the cable in the holes, and secured the remaining cable with 1/4″ cable clamps and some oval phillips machine screws.
Can’t wait to go trooping with this bad boy!


The only “sight” that I used on the barrel was a hose clamp, dusted with black spray paint (pictured above).
Again, a big Empire salute to PandaTrooper for sharing his T-21 plans and building instructions!
Hello Happy Trooper,
This is a fantastic version of PandaTrooper’s plan. I actually prefer your touches to be honest. I have a question regarding the templates. I am having issues printing the template provided by Pandatrooper. Conversely, I had no issue printing your DLT-19 template. Do you by chance have a T-21 template in a pdf format similar to your DLT-19? IF so, could you provide it? I would greatly appreciate any suggestions you could offer.
Sincerely,
Gentry S.
Hello Gentry,
Thank you for your comment! As you can see, I don’t get many around here, so you can imagine my excitement when I saw yours. PandaTrooper’s template was a jpg file. I was able to print it on my Mac in full size. I have converted it to a PDF. Please see if this works:
PandaTrooper T21 in PDF: http://bit.ly/2lHMt23
Let me know how it goes. I would like to take it offline after you grab it. Thank you for your post and good luck on your builds!
-Damon
Damon,
Thank you for the pdf of the T-21. I was successful in printing it up. I will update you on my progress. First I wish to tackle the DLT-19. I really enjoyed your DL-44 video as well. Do you ever foresee yourself taking a stab at Jango Fett’s Westar blaster? I believe Rubies sells them by the pair. Anyway, thank you again.
Hello,
GREAT WORK ON THE T21. Is there any way that I can get a copy of that PDF so that I can make one of these bad boys for myself?
Thank you,
Andre
Hello Andre,
Thank you for visiting 🙂 The link should still be good, try this: http://bit.ly/2lHMt23
Good luck!
I just wanted to thank you for the build vids you post! As a model builder/woodworker suffering from a mild case of burnout, your channel on Youtube has reignited my hobby interests. I discovered your channel one day when my grandson asked me how a lightsaber works. So, onto Google and Youtube I went for research and that’s where I found your channel. I’ve scratchbuilt several lightsabers, including an illuminated cutaway version, and will soon begin building some of your other props. Anyways, all that just to say thanks for all you do. Keep up the great work!
Hello Mike,
Many thanks for taking the time to write in. Its good to meet another builder! You mentioned that you are a model builder…you probably noticed that there are a few model building techniques in some of the builds (dry brushing for weathering, washes, etc.) I picked those up in my model building days and applied them here. After you finish your lightsaber, and get some photos online, please post a link to your work, I’d love to see it. Thanks again for stopping by, good luck on your builds! 🙂
Hi Damon, (it is Damon, right?)
Yes I am familiar with the modeling techniques you show in your videos. Like you, I’ve been building for a while! My wife and I really enjoy your videos, especially how you get the kids involved. If you’ll go to my FB page here, https://www.facebook.com/pg/The-Badger-Modelworks-1522798371285088/about/?ref=page_internal , you can see the lightsabers I’ve done so far. The middle two sabers on the display rack will probably look VERY familiar to you, LOL. I’d be interested in your critique. See ya around the net!
looks like I am going to attempt this build myself, this is my most used gun in SW battlefront, I will keep you updated on my build happy trooper
I hope to see more sw related builds from you , sincerely Cody Skywalker from youtube thanks
Hello Cody,
Thank you for visiting the site and taking the time to leave a comment. I’m a big fan of the T-21 too, its a big beefy gun 🙂 Please send some pics when you complete your project!
I have just finished the DLT19 from your tutorial.. great step by step video, thank you. I am moving on to the T21 now and I am super excited to get started. Just wanted to thank you for all your hard work that has helped so many of us.
Asher
Hello Asher,
Thank your for your kind words, I’m glad that you enjoyed the video. Congrats on completing the DLT-19! As you know, that is a major undertaking! So many materials and steps. Great job! The T-21 should be a little easier. If you feel up to sending some pics, hit me up on the “Contact Happytrooper” link on my blog home page. I’d love to see your work!
Hi Happy Trooper!
I am watching your Tutorials for a pretty long time by now, and wanted to thank you for all the detailed instructios (seriously, there are not many who are actually explaining what they did as you do!) Well, I haven’t actually tried out any of your builds, because I live in Switzerland and we don’t have many shops wich sell wood and PVC measured in inches. But it wouldn’t really be a problem to find out how thik or wide the building materials you use are in centimeters. But let me get to a point, I would really appreciate it if you could make a tutorial for the A280c, because its my favourite blaster rifle from Star Wars (and I’m sure I’m not the only one in this Galaxy!)
Thanks anyway!
Hey I’m having issues finding the right size Pvc pipe for the front portion of the barrel which brand or place did you buy yours from I can’t find it at home Depot or Lowe’s I was only able to find the bigger main barrel one.
Hello Randie,
As noted in PandaTrooper’s build found here: http://forum.mepd.net/index.php?/topic/6618-how-to-t-21-blaster-scratch-build/ there isn’t an exact size PVC pipe to use for the front barrel. A 3″ PVC pipe was used, and approximately 1″ was removed. I laid the 3″ PVC pipe on a table, took a board, and drew a straight line lengthwise on the PVC pipe. I measured 1″ from that line, then drew another straight line lengthwise. That is the area that needs to be cut. I’m sure that I did something unsafe with a jigsaw or rotary tool to get that piece removed.
Once removed, you could use rivets like PandaTrooper to secure the 2 ends together. Having just come off of my Sandtrooper armor build, I simply reused the 1″ strip that was just cut from the PVC pipe and glued it inside of the pipe with E6000. I used duct tape and clamps to set it in there. Its still holding up to this day. I let it dry for well over 24 hours, then patched the small gap with Bondo filler.
Hope this helps.
Don’t worry about getting every measurement and detail exact. The fact is, only real enthusiasts will know you’re “an eighth of an inch off here”, the average person will know it’s a BFG blaster, so just get on with it. That being said, if you want to go all the way and add every wire and greeblie, go for it. Interpret this template and tutorial as you wish and modify your build to suit your needs. Enjoy the build!
hello, I am having a hard time getting your template for T-21 sandtrooper repeating rifle. Is there any way I can get a link to print them out.
Are you able to download the PDF using this link?
http://bit.ly/2lHMt23
Thank you for your reply!
ok, the link you sent me, I can open. So, the only template is the entire blaster showing the size of individual pieces. I am going to print the actual size at Kinkos.
I have been making some of your builds. I just finished the gaffi stick and tusken blaster rifle. Now, I am going to test my skills on the T-21 blaster build. I have a sandy tk costume, so hopefully, my skills will turn out a good blaster.
Your directions are awesome and easy to follow. Your website is very well done.