

Previous Story
Inexpensive light box and clamp light frame
I’ve been having loads of fun making videos on YouTube. I thought I’d share my simple setup for photos and videos.
For toy photography, I use a very simple lightbox. I purchased some 20″ x 30″ foam poster board from Office Depot. It came in a pack of 3. For 3 of the boards, I cut 10″ inches off of the end, so that I had 3 20″x20″ pieces. On all of the pieces, I measured about 2 inches from each edge and drew a square inside. I then used a straight edge to cut out the inside square. This gave me 3 20″ x 20″ inch frames with an 18″ x 18″ cut out in the middle. On the frames, I taped a piece of tissue paper to create a light diffuser. Lastly, I taped 2 of the discarded 10″ x 20″ pieces together, creating a 20″ x 20″ square. This will be used as the back drop/support. I taped all of the pieces together to create a cube.

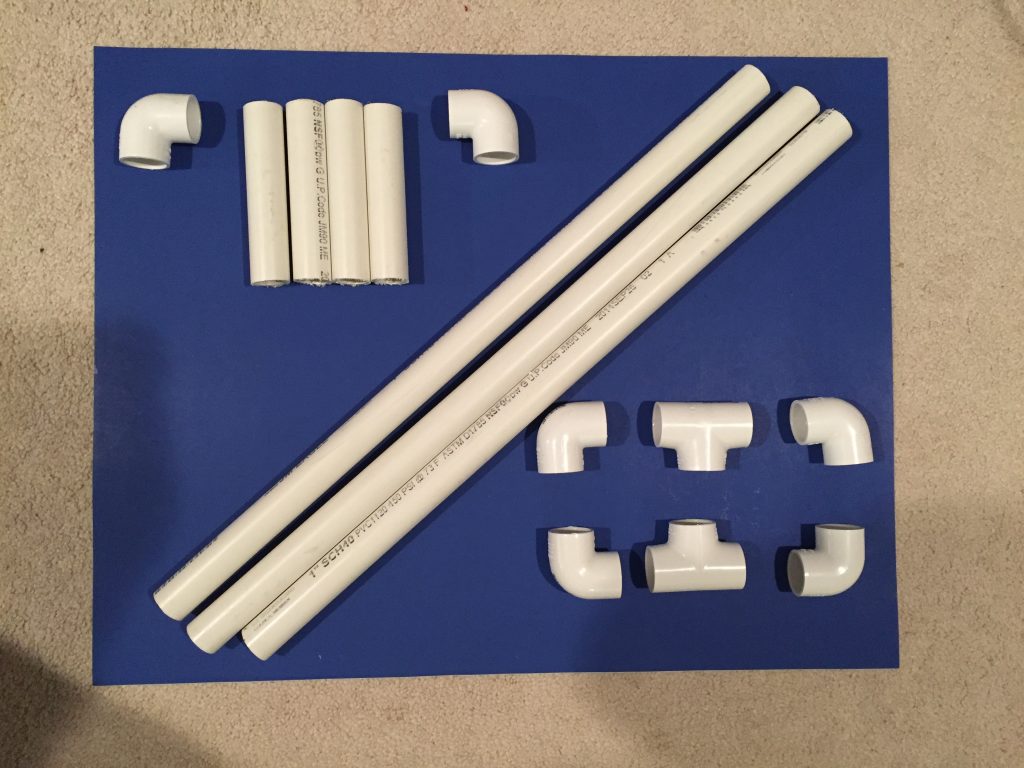
The frame that I use around the lightbox is made from 1″ PVC pipe. I purchased a single piece from Home Depot, along with a few elbow and T connectors. This stand works well to clip the utility lamps on both sides of the light box. The pieces are as follows:
– top crossbar = 28″ of 1″ PVC
– 2 x vertical sidebars = 28″ of PVC
– 4 x base stand = 6″ of PCV
– 2 x 1″ PVC T connector
– 6 x 1″ PVC elbows
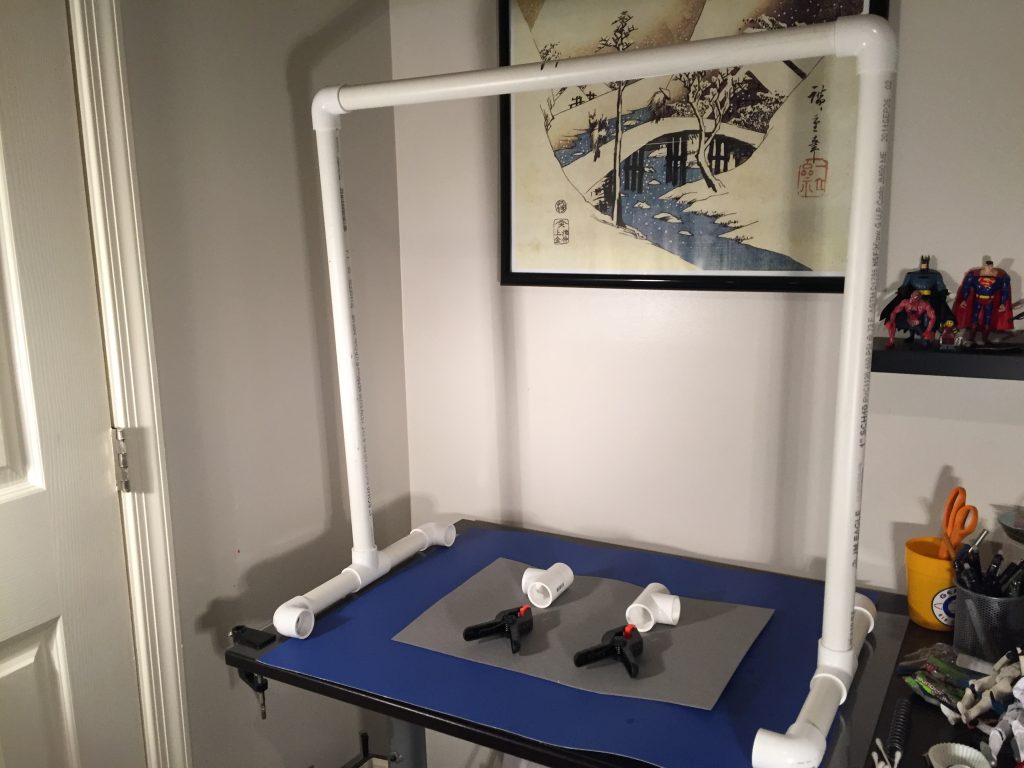
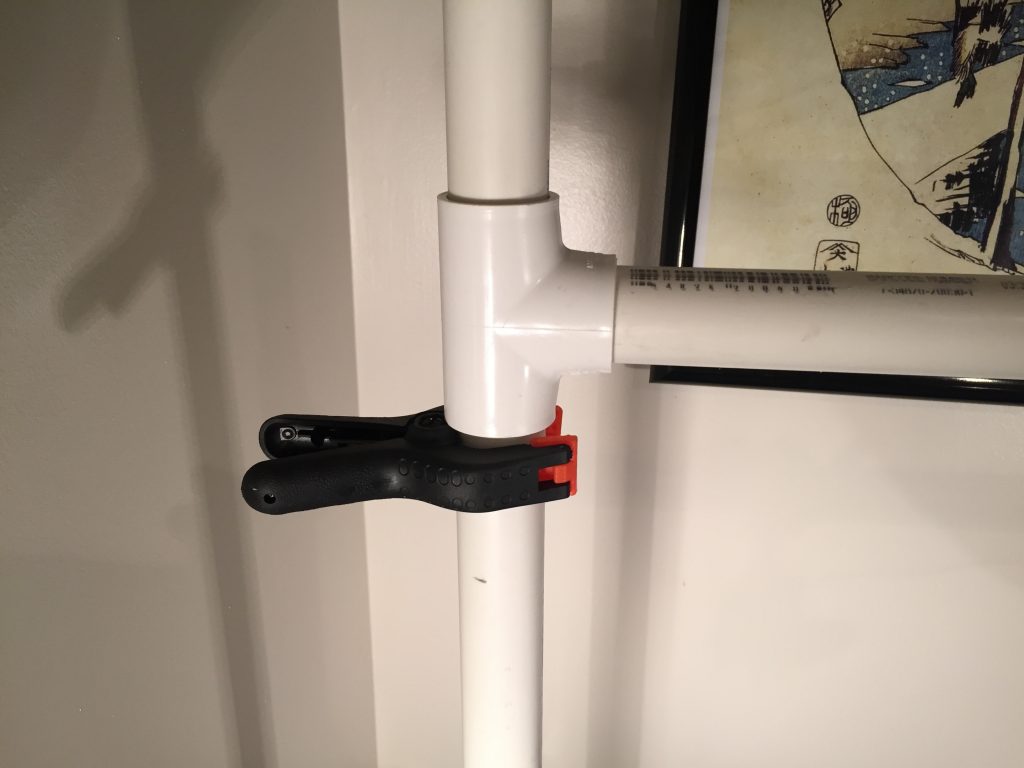
To make the crossbar adjustable, you can substitute T connectors for the top elbows. You would then sand out the inside with a rotary tool so that it can move freely on the PVC pipe. To secure the crossbar at a certain height, you can use spring clamps.
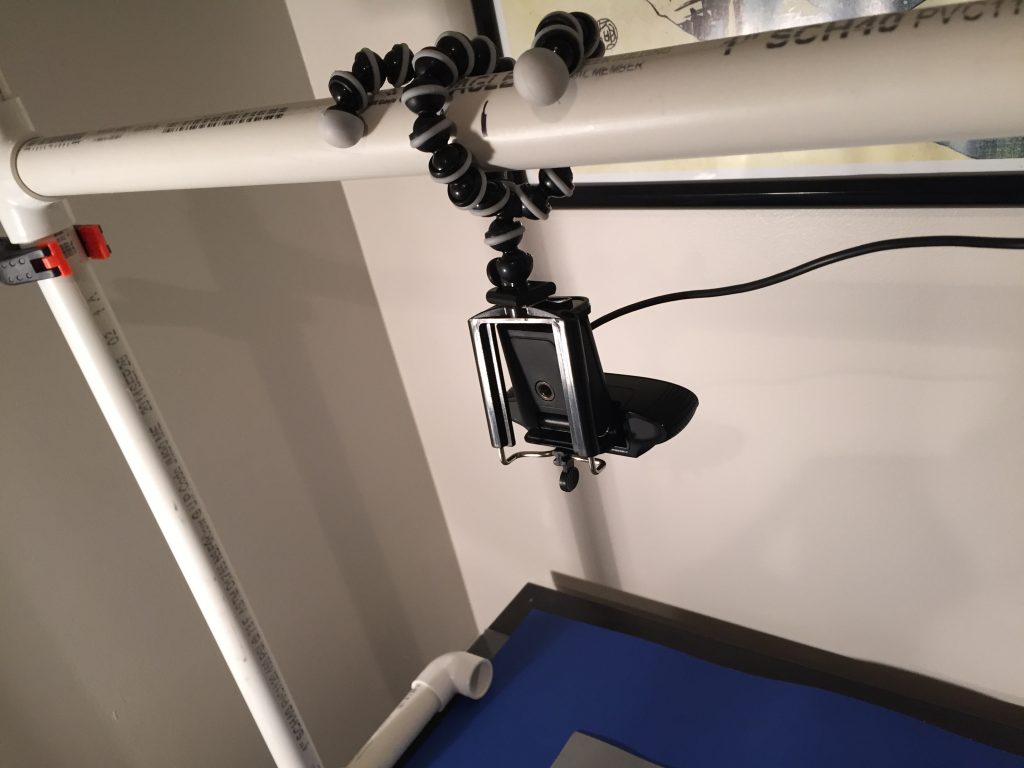
This frame is also helpful for taking overhead videos and photos with your mobile device or a webcam. Using an octopus style tripod mounted on the top crossbar, you can secure a camera that gives a nice top-down view. I sometimes use my iPhone 6, when a webcam is needed, I use a Logitech C920. I use a piece of blue poster board as a backdrop so that I can chroma key if needed.
This is a relatively inexpensive setup that gets nice results. The posterboard is about $12 and all of the PVC is about $10. The clamp lamps are about $7 each.